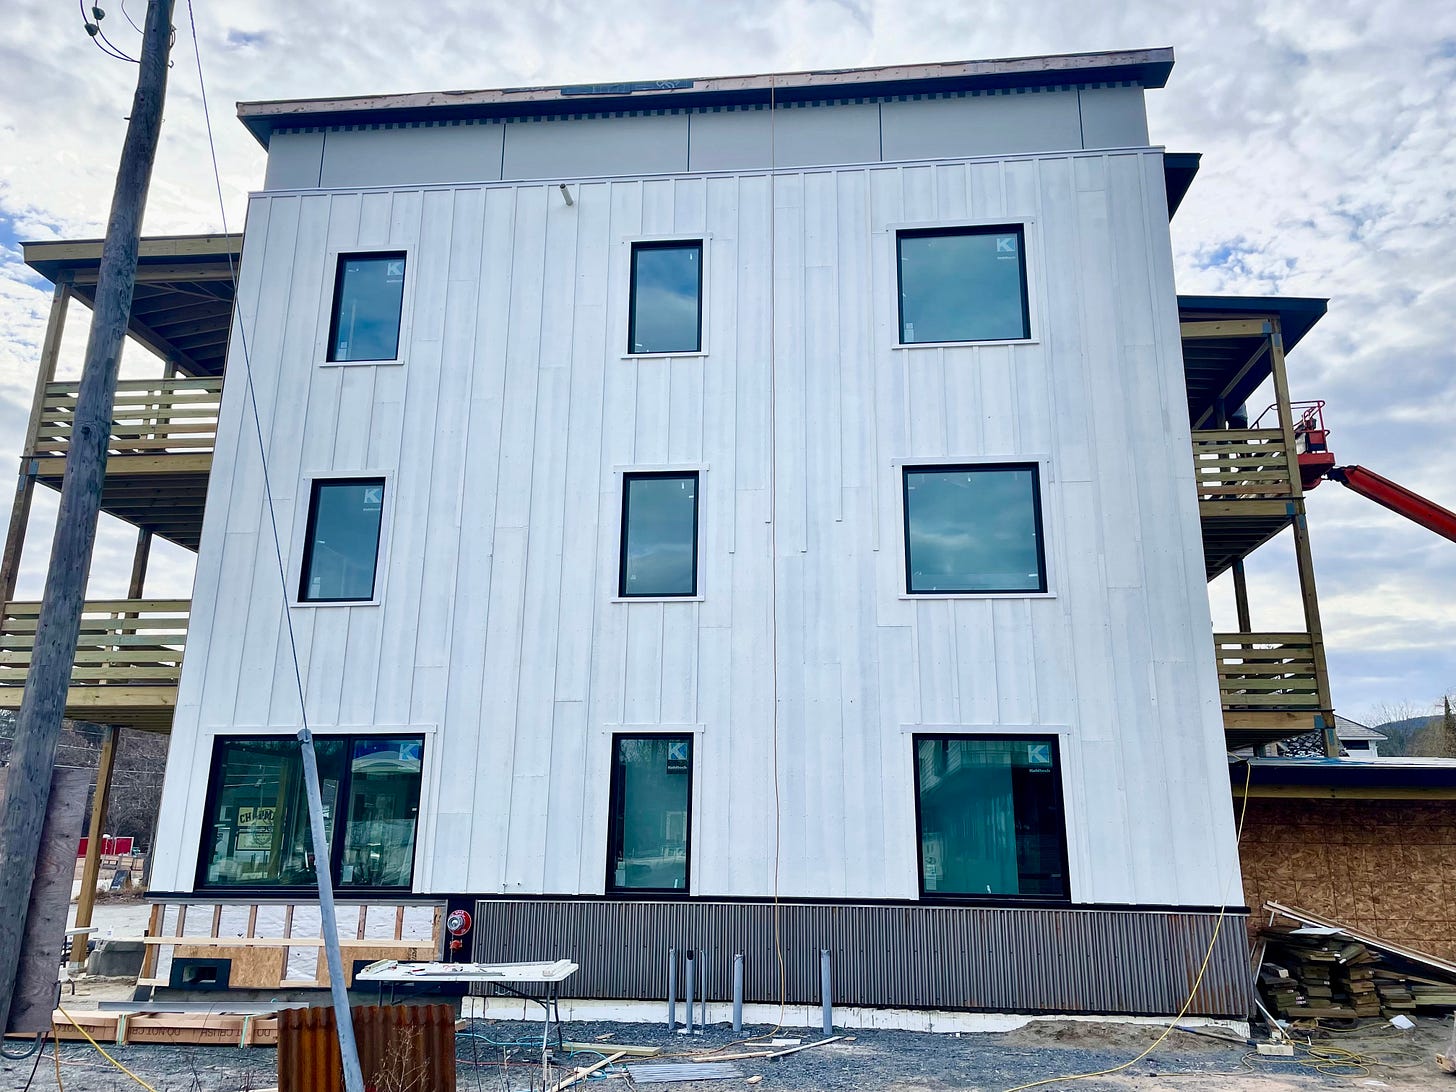
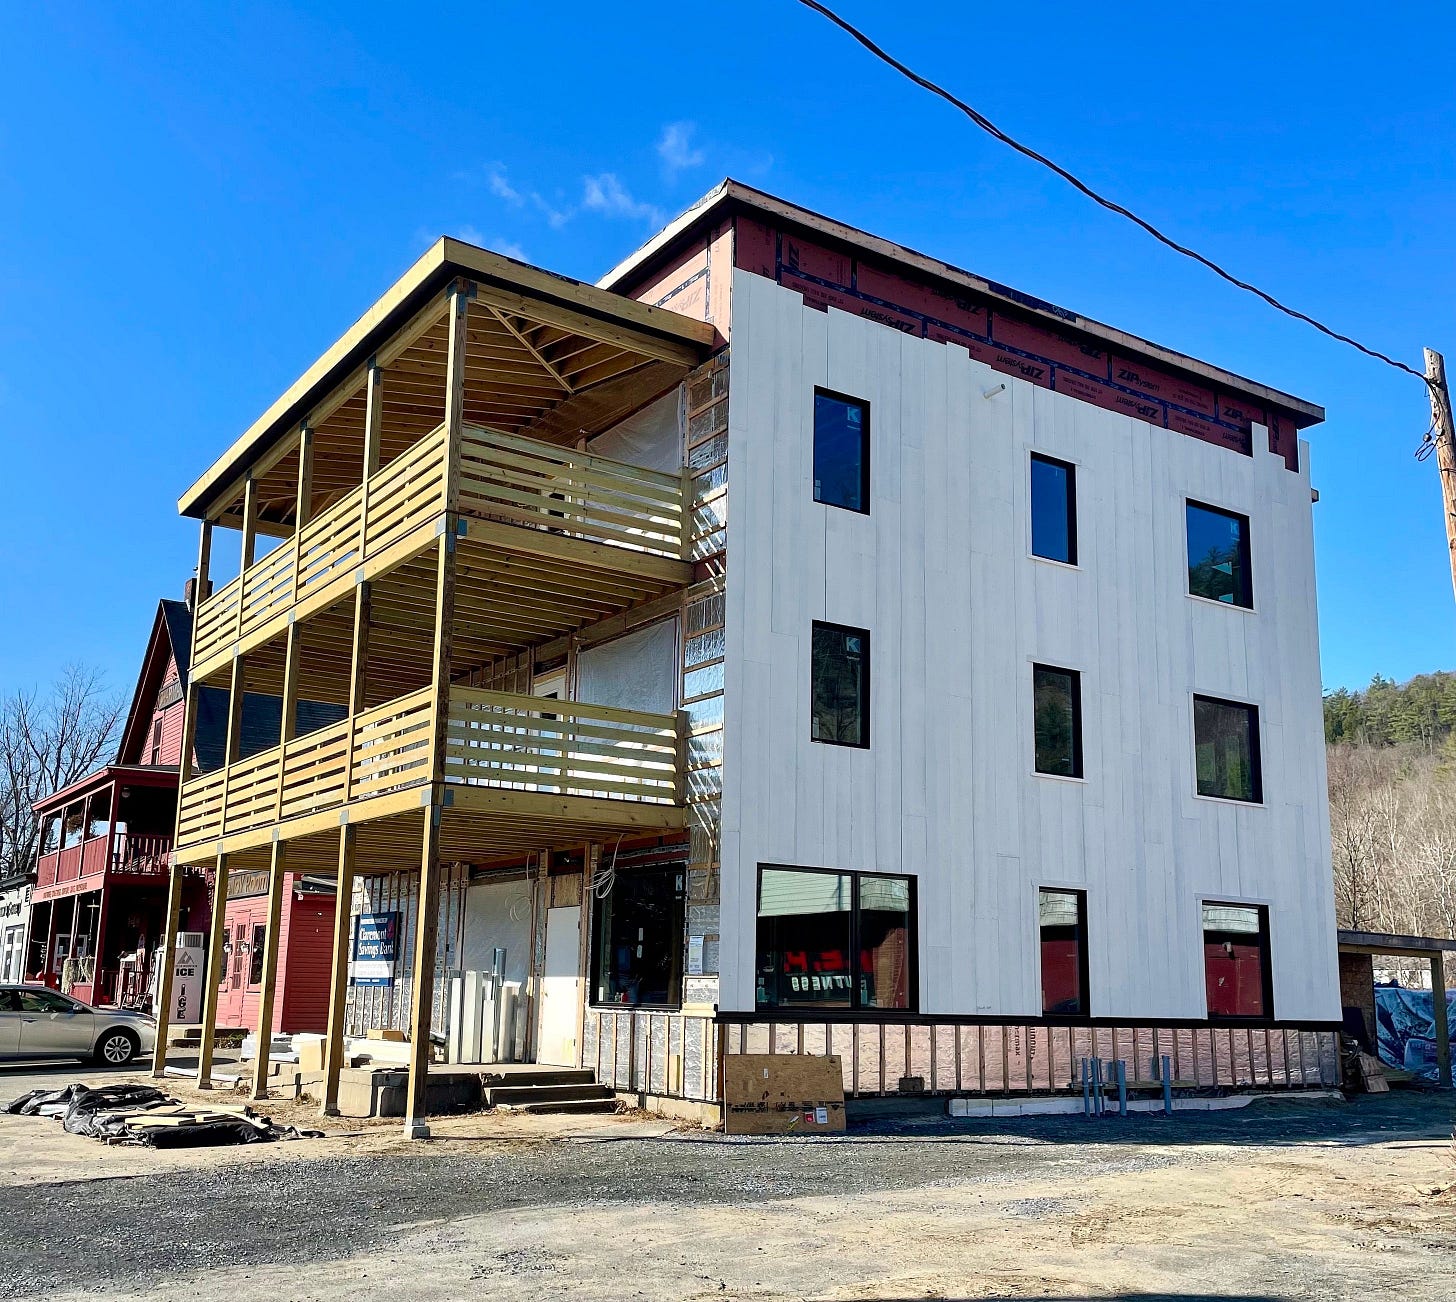
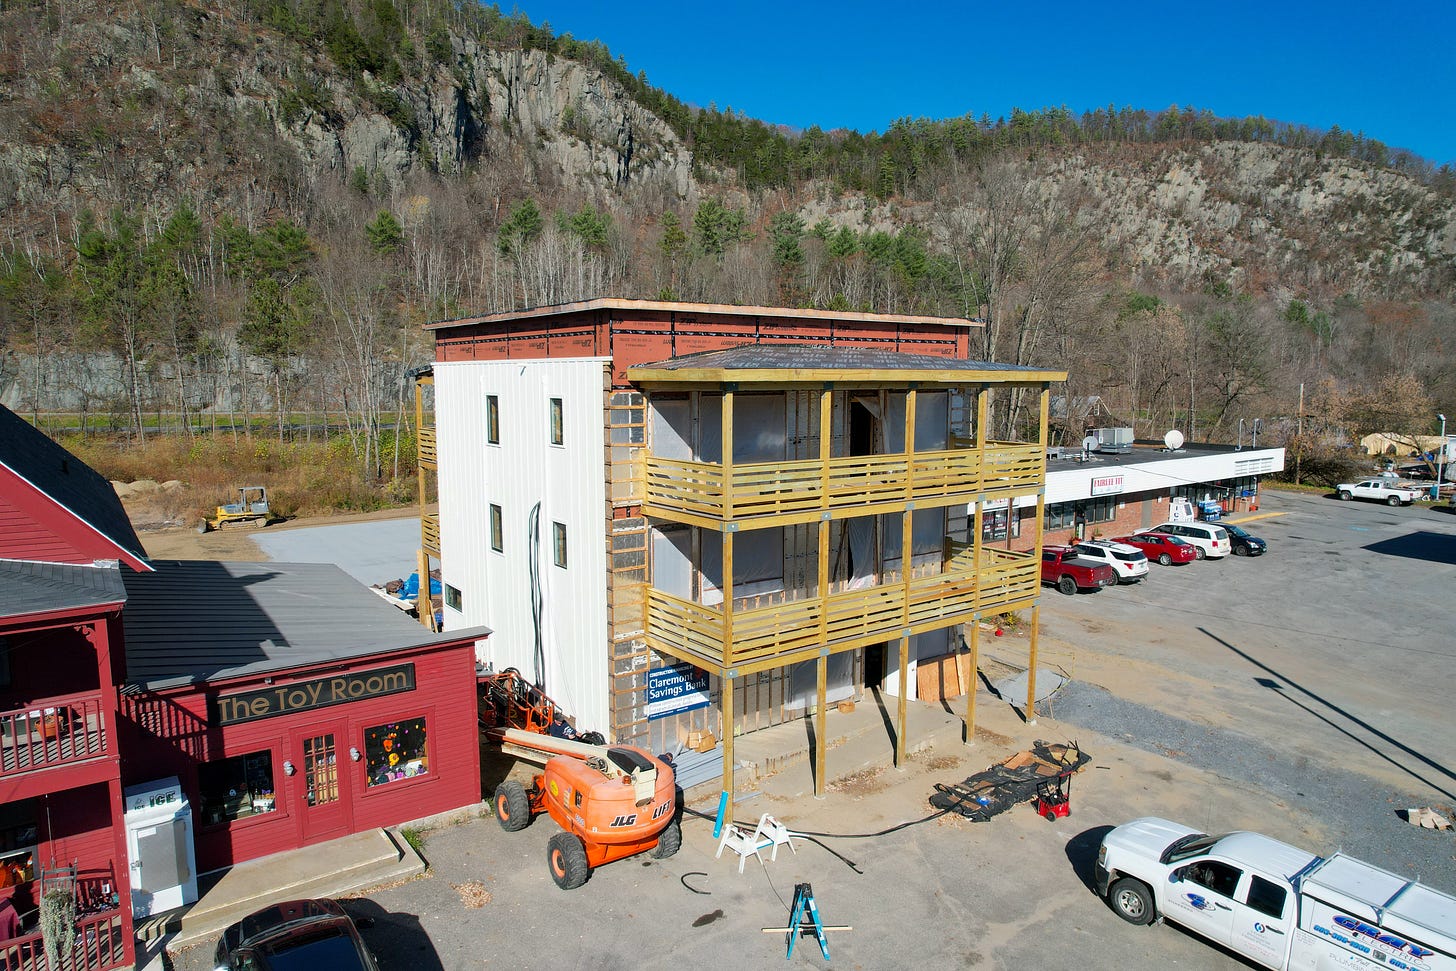
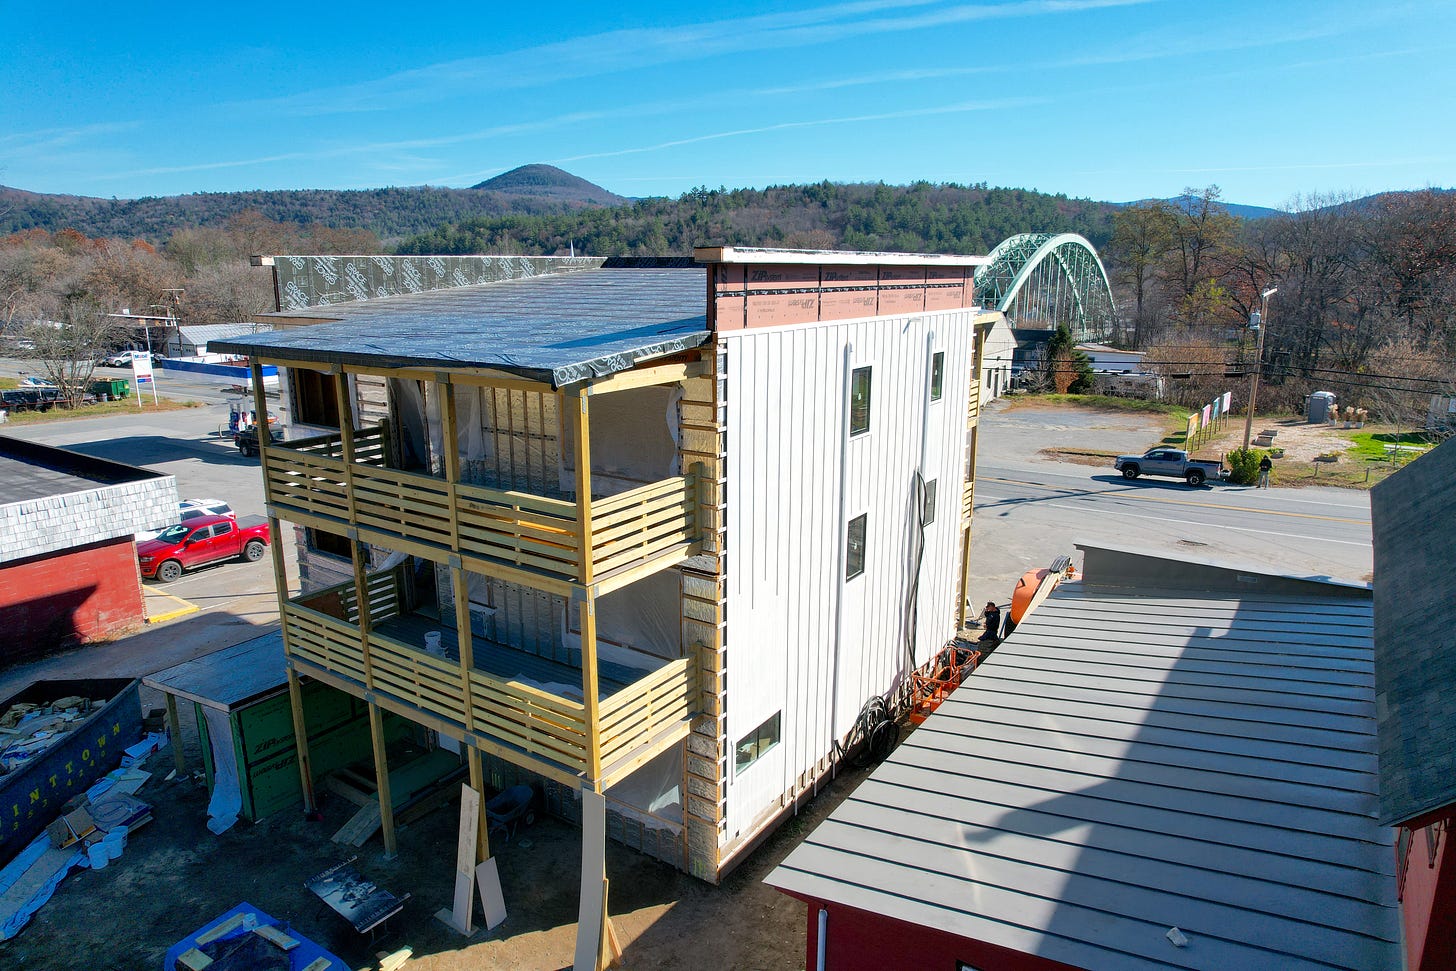
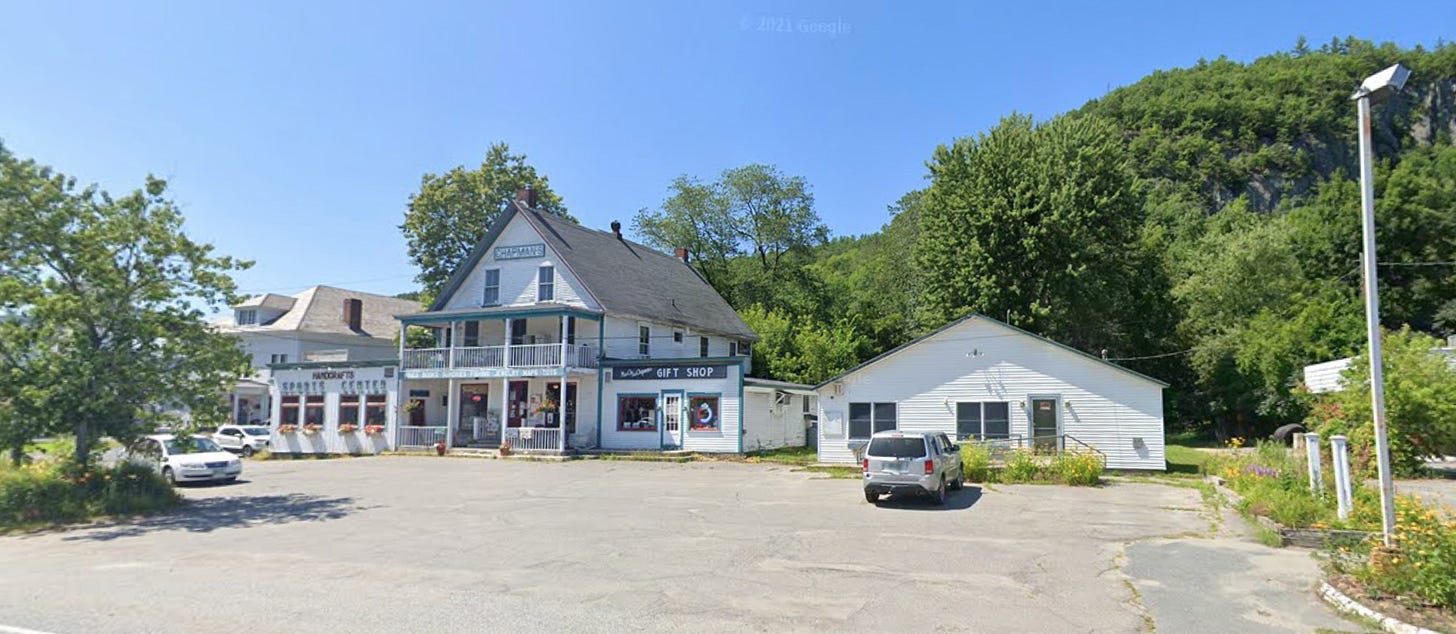
Address: 501 US-5, Fairlee, VT 05033
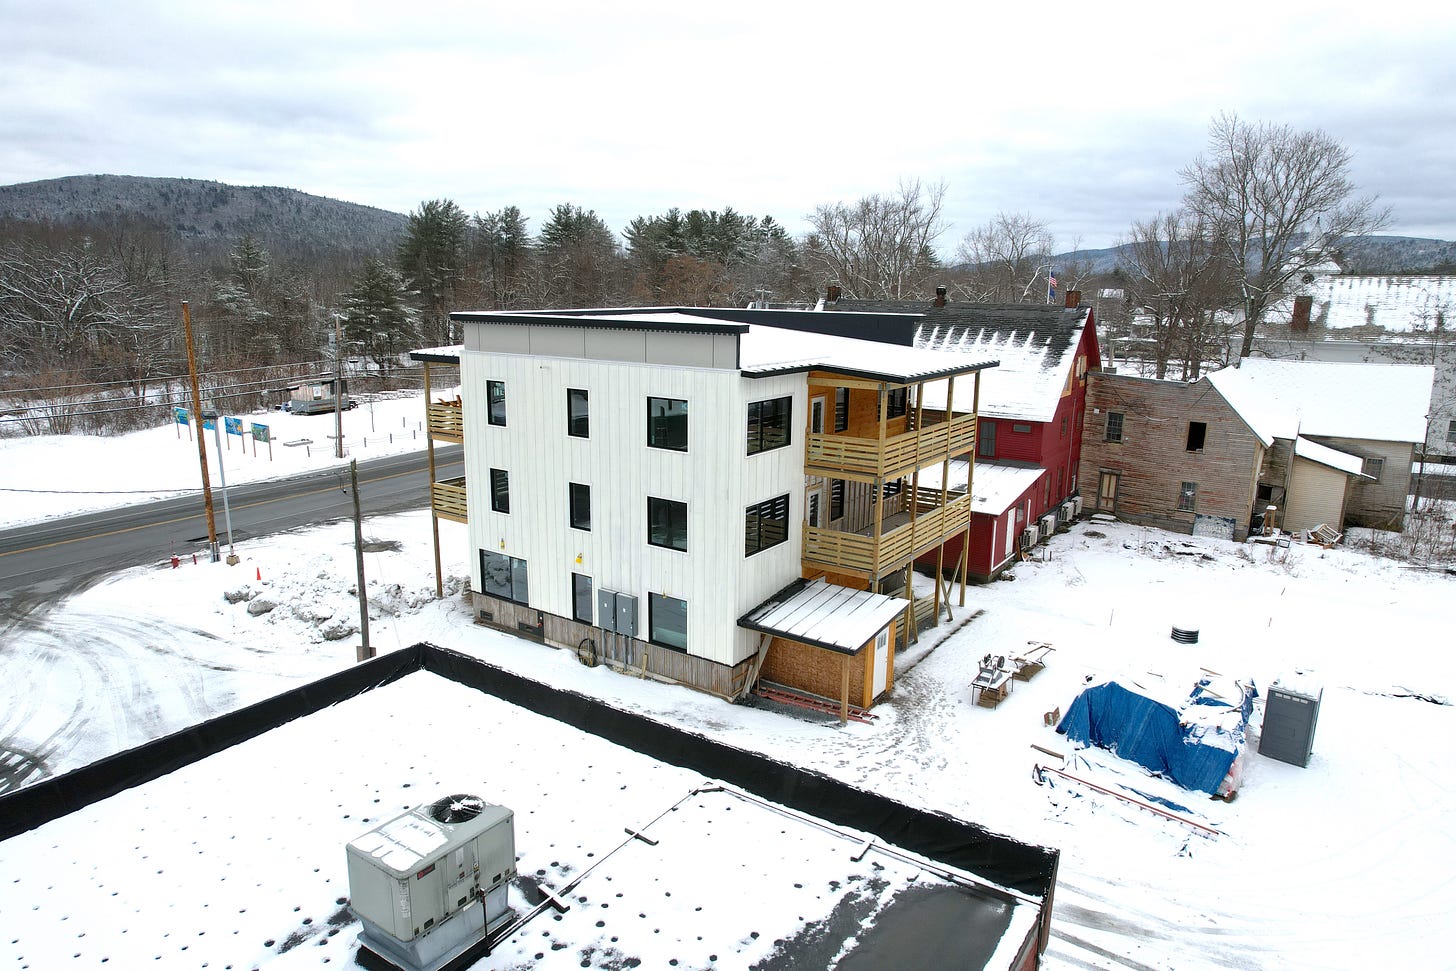
About the project: At the time of purchase, 501 Main was a vacant single-story commercial building originally constructed as the town’s first post office in 1934. The plan is to add two levels of residential apartments and reconfigure the ground floor into retail and two handicap-accessible apartments.
Project financials: See Pitch Deck below for all relevant pro forma financials.
Where we are (⚫ = complete; 🔵 = in progress):
⚫ Acquisition
⚫ Schematic design
⚫ Municipal approvals
⚫ Equity investment
⚫ Debt financing & appraisal
⚫ Other funding sources (tax credits)
⚫ Design development
⚫ Construction documents
⚫ Building permits
🔵 Construction
🔵 Lease up
Relevant links:
Construction budget as of 2/25/2022
Progress pictures and videos on Instagram
Construction sets: 2/3/2022, 1/4/2022, 11/30/2021
Pitch deck (used to secure debt financing, equity investment, and tax credit funding)
Site plan review (10/13/2021): cover letter, site plan, elevations, and conditional approval
Valley News article on our tax credit award
Note: I update the space below in journal-entry fashion as progress on the project is made. To stay up-to-date, go ahead and subscribe:
January 22nd, 2023
December 11th, 2022
What we’ve been up to the past two weeks:
Remainder of windows are in—5 weeks delayed after a 17-week lead time
Standing seam roof is being installed
Majority of MEP rough-ins complete—still a few miscellaneous areas in the basement to button up
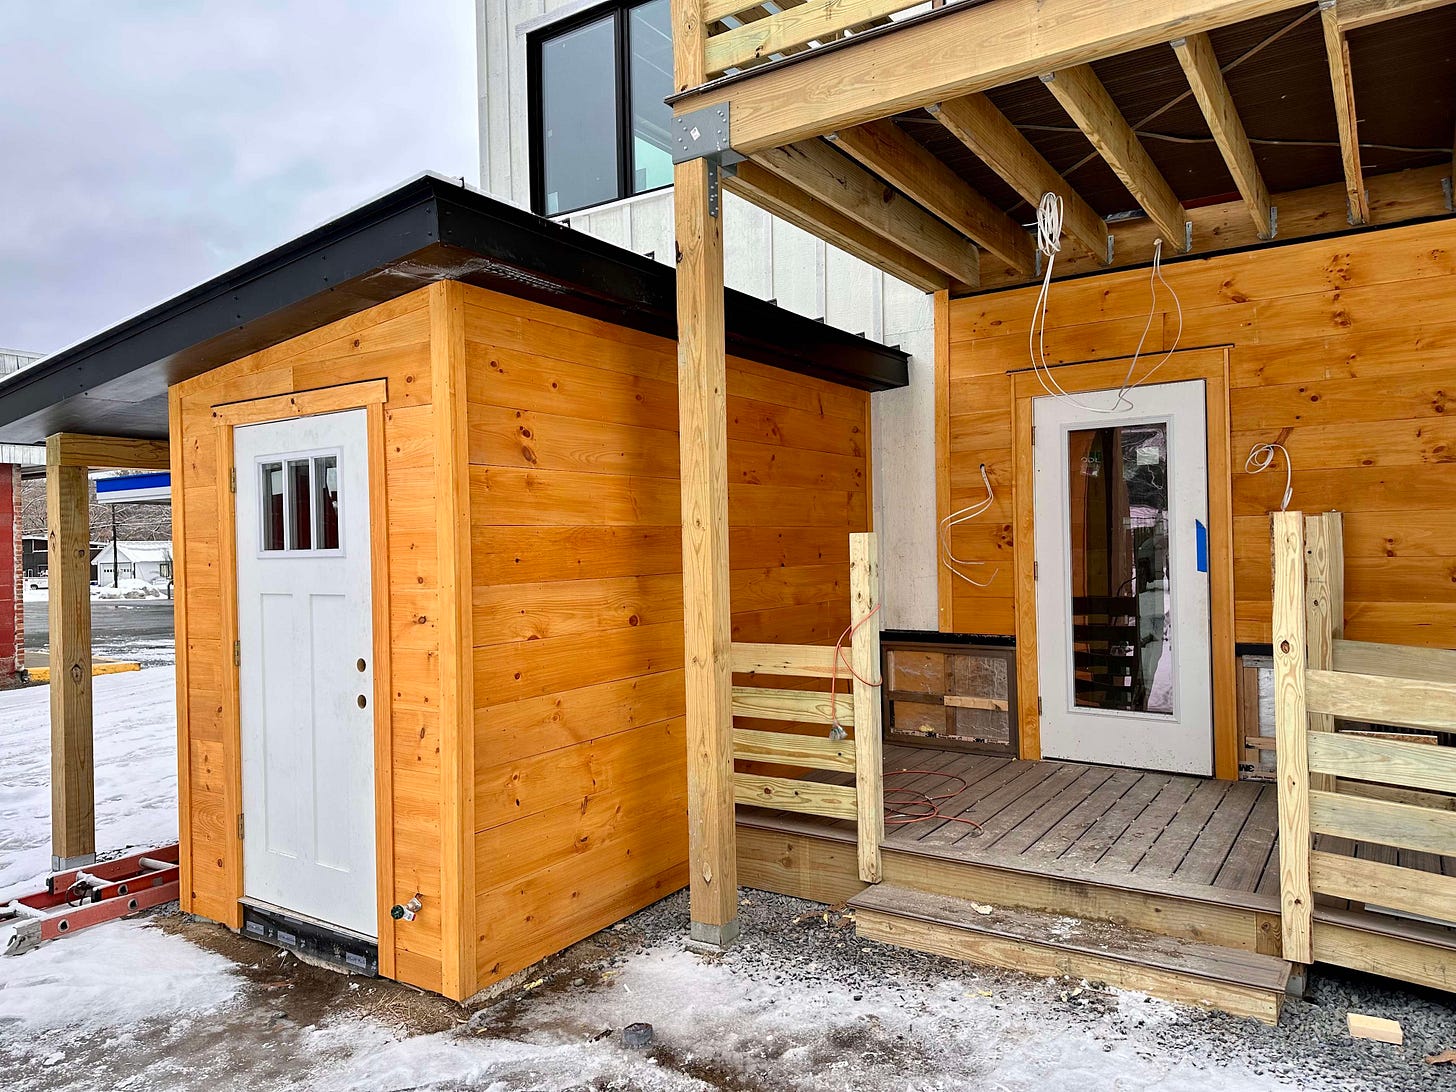
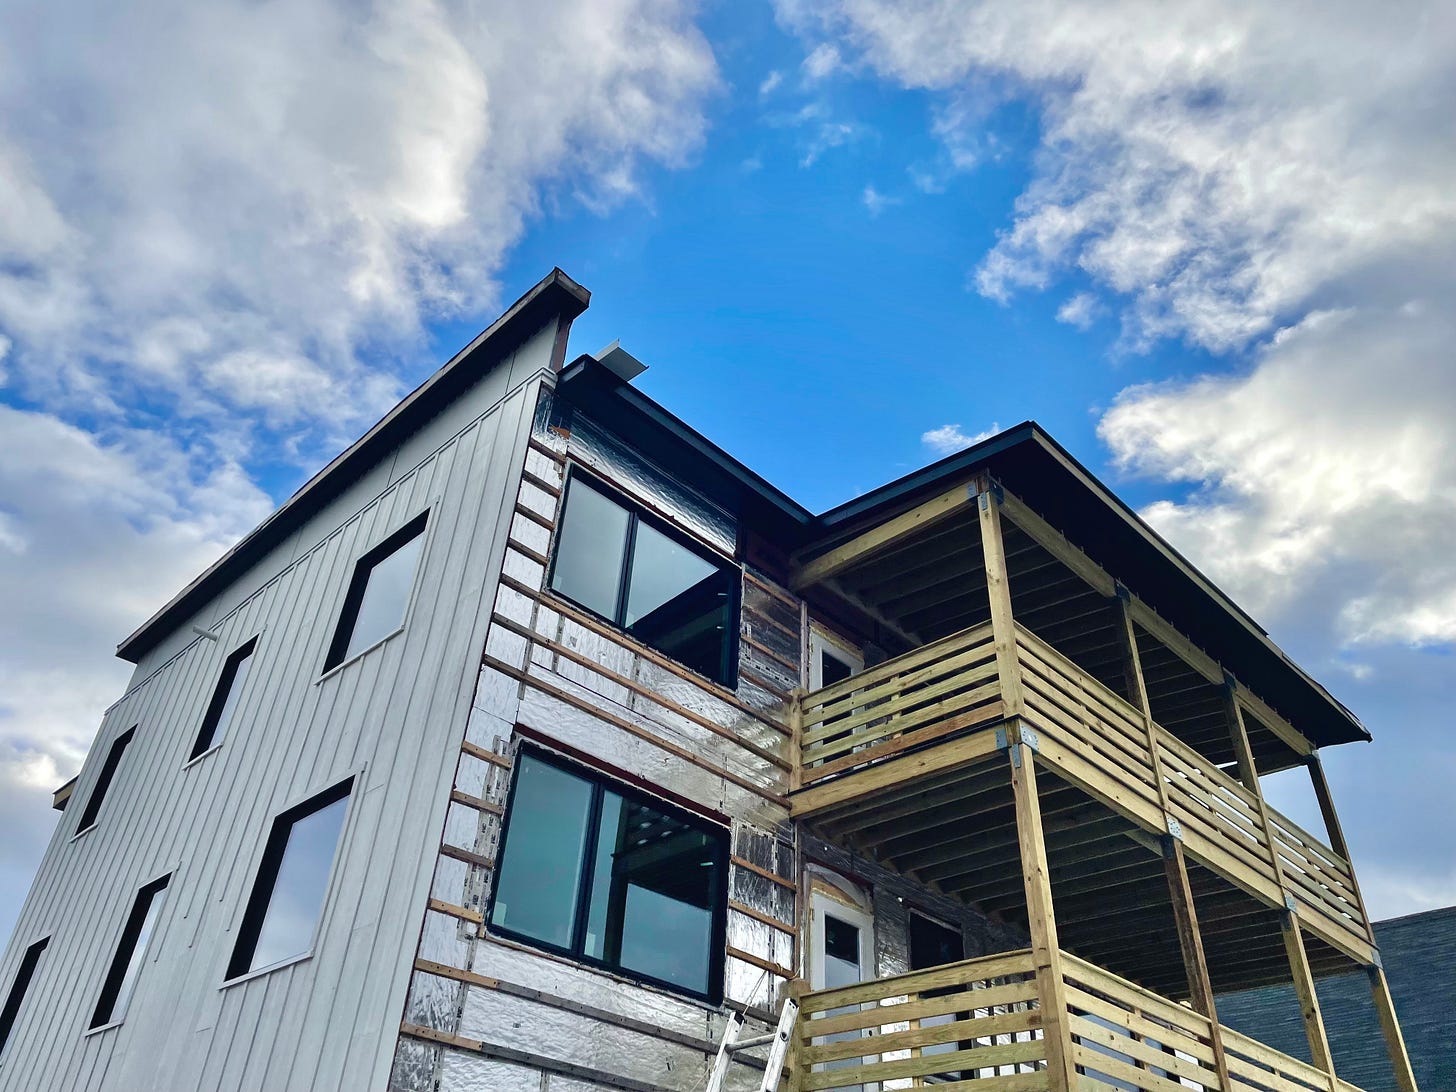
Continuing to put up siding—board and batten, parapet panels, shiplap, and corrugated Corten (we have to work around the roofers since we only have one boom lift)
Air sealing and some drywall to prep for insulation
Next week, we’re bringing in a contractor to install AeroBarrier and insulate the attic, exterior walls, and partition walls with cellulose.
November 20th, 2022
We have two more weeks with the boom lift.
Making hay while we can.
In between snow storms this past week, we were able to install siding boards and trim on the north side. Next, we’ll finish up that side with battens, metal wainscot, and painted panels on the parapet.
November 13th, 2022
Most of our windows finally arrived this week.
3 weeks delayed after 17 weeks in production. And we’re still missing 6 of them.
But, hey, at least we’re able to start making progress again.
Apart from a couple that came with defects, I think they look pretty slick.
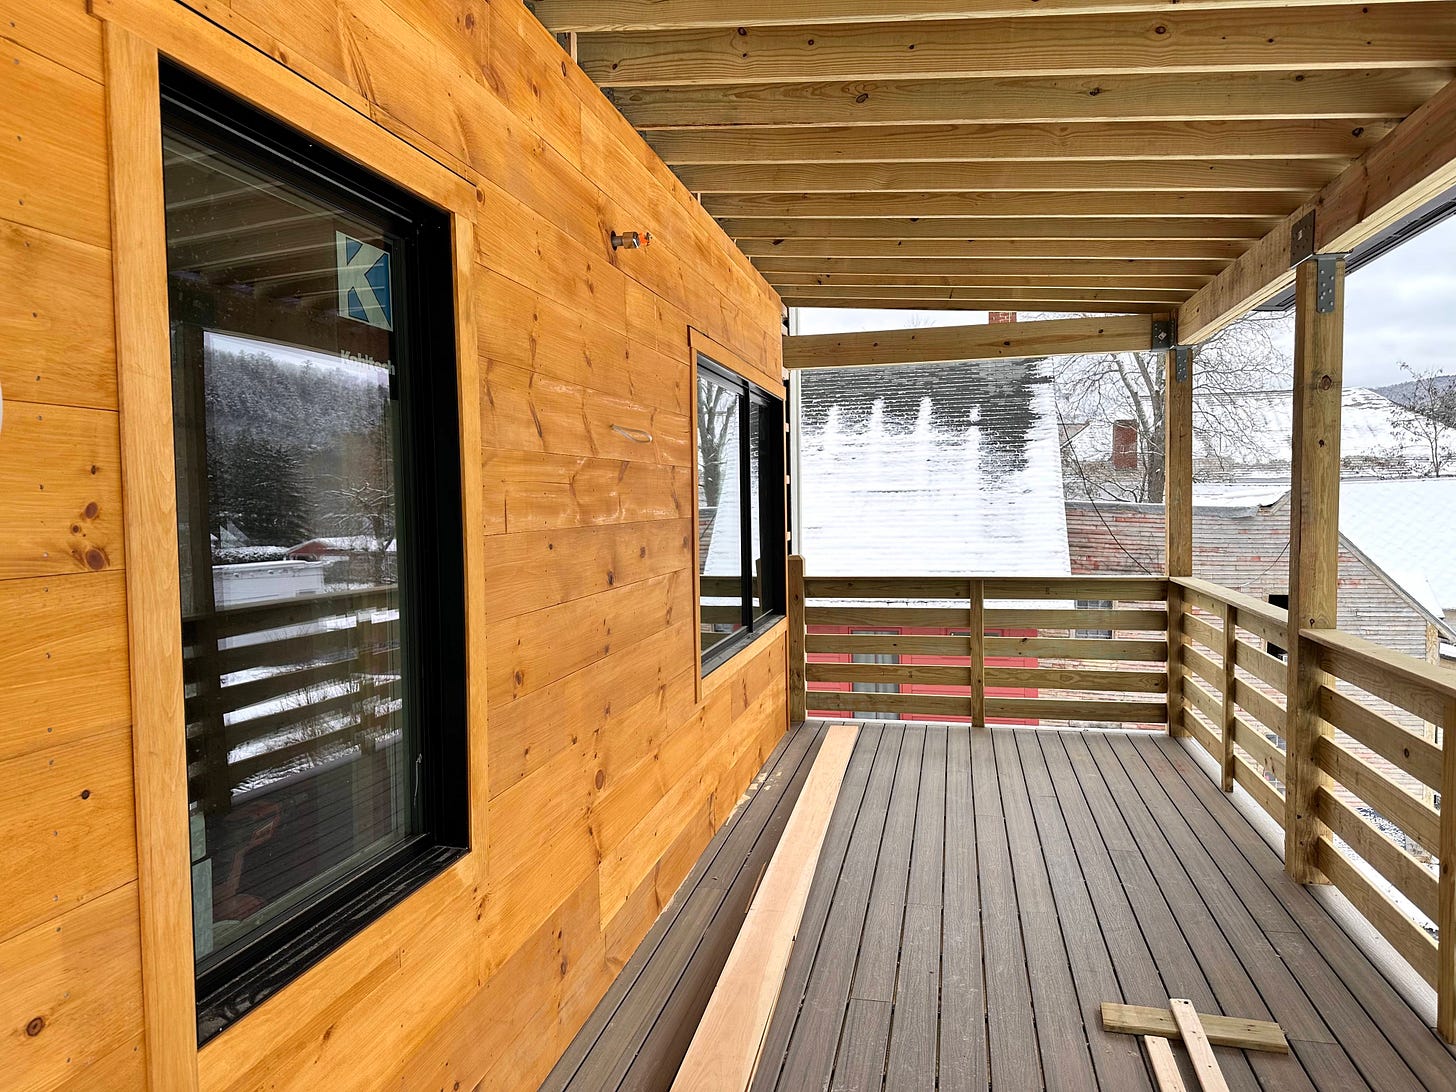
These are a mix of fixed and casement windows from Kohltech. All triple pane (here’s my rationale on going triple).
Some of these windows were HEAVY. We took bets and settled on 300 lbs for the big boys.
And they all had to be installed from the exterior.
So, after some thought, we rigged up the setup below (full credit goes to Jeremy for the idea).
A couple 4x4s ratchet strapped to the boom lift with a 2x4 stopper running perpendicular. This allowed two guys in the lift to transport a window into place while another two helped position it from inside.
It was a tiring day and a half but we made it.

************************
We’re gearing up to install drywall so I started pricing our 600 sheets.
So far, I’ve purchased 90% of materials through the local building supplier.
Partly because I’m a fan of supporting local. But mostly because their contractor sales guy is top tier and, as a long-time contractor in a previous life, he has been an invaluable resource for me on this project.
Well worth the added markup in many cases.
But, on some things—like drywall—I don’t need that level of high touch. It’s a commodity product that just needs to get from some warehouse to my site.
So I shopped around.
Turns out (big surprise) that Home Depot is cheaper.
$7,000 cheaper, in fact. That’s a 40% discount we’re talking about.
Well, it also turns out that HD doesn’t send a lift with the delivery (the local yard does for free).
Just a forklift.
So, barring any other planning, that means we’d have to haul 200 sheets to the 2nd floor and 200 more to the 3rd.
By hand.
And we’re talking 5/8” drywall at 70 lbs/sheet.
My back hurt just thinking about it.
So I called up the crane operator we used to set trusses. For a modest $500 fee, he came one morning and lifted the pallets of drywall into our window openings and we shuffled it inside.
In and out within 90 minutes. Compare that to the 6+ hours it would have taken our 4-man crew to haul by hand.
The point is—it’s this kind of thinking that’s allowed the project to reduce costs in significant ways.
At every step, I’m thinking about budget. Whereas a 3rd-party GC may have just purchased the more expensive material if it meant getting a lift with delivery.
A single instance of this might not move the needle that much. But the cumulative effect of these incremental cost savings over the course of a whole project adds up.
Sure, there are efficiencies gained from experience that I likely miss (though I’m getting better every day!).
But the net effect of GCing myself remains positive.
I haven’t run the numbers, but the savings are easily now in the tens of thousands of dollars ($25,000-$50,000 if I had to guess).
November 6th, 2022
MEP is coming to a close. We’re on the home stretch for electrical and plumbing rough-ins. Woohoo!MEP is coming to a close. We’re on the home stretch for electrical and plumbing rough-ins. Woohoo!
Still waiting on most of the windows. They are now 3 weeks delayed after 17 weeks in production.
Thankfully, we received 5 of them and, after installing, we were able to start cladding one of the sides with LP Smartside board and batten.
Most of the site work out back is now done, too. And our massive septic system is in.
Nice to see the whole picture start to come together.
September 11th, 2022
I’m treating 501 Main as an experiment in sustainable development. A major goal of the project is to reduce energy consumption and reliance on fossil fuels.
In pursuit of this, we’re electrifying heat, hot water, and all appliances. Great talking points for sure.
But implementation is another story.
The greater the electrical load on the building, the greater the power service required from the utility company.
Furthermore, for anything greater than an 800 amp service, a pad-mounted transformer is required. This adds (easily $20k for 501 Main), not to mention the nightmare of trying to locate one on a property with no side setbacks and minimal land to spare.
Fortunately, we were able to keep the service at 800 amps (which means no EV charging for now, compact/efficient appliances, and high efficiency heat pumps). This took a slew of planning and coordination with my electrician and the utility company.
In the end, we were able to avoid a pad-mounted transformer. Phew.
But that’s just the beginning.
Then, you need to procure a meter bank that has the capacity to handle such a large electrical load. No running to Home Depot day-of for this.
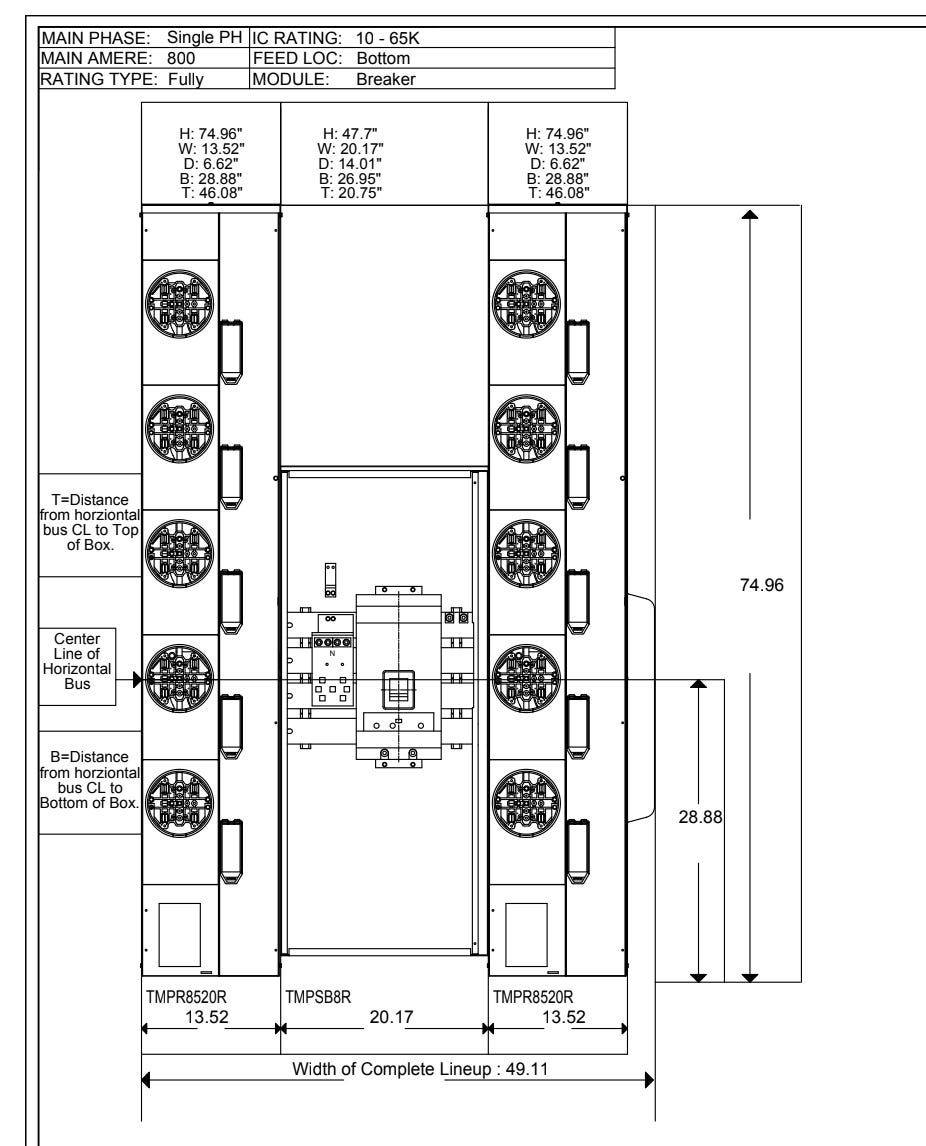
Instead, my electrician’s supplier custom designed this for our project:
At roughly 4’ x 6’, it’s a monstrosity.
And the utility company has been pushing emphatically to keep it in an area that’s highly visible from the road. Before getting the dimensions, that didn’t seem so bad. Now, having a chance to mock it up, I’m not so sure (queue the foreshadowing).
Now take a swing at the price.
$17,000.
SEVENTEEN THOUSAND DOLLARS. Just in materials, not including install. That’s mind boggling. Two years ago, we would have paid 1/4 of that.
But ok. A necessary evil. This is just another cost of doing business, I can accept that.
Until we get to the lead times.
My electrician knew this was going to take a minute for the manufacturer to build so he ordered it in January—months before the project broke ground.
With an 6-8 month lead time, we should have gotten it before we needed it in September. At the 6-month mark in June, my electrician reached out to the supplier to confirm delivery.
Turns out, there was a massive miscommunication. The order never went through.
So now, we would be looking at 6-8 months from the new order date for delivery—January 2023 was quoted.
While that was painful to hear, we worked out a path forward where this didn’t hold us up.
With a target of January 2023 to open doors, this would just be one of the last items completed. We could do all rough-ins and finish work and come back to install the meter bank at the end. Not ideal due to added complexity for testing and temporary power, but certainly doable.
So we kept plugging away.
That is, until this past Friday.
We get an updated delivery date: May 2023.
Holy f***. That would delay opening by 4-5 months. And cost us $50k in lost revenue.
We immediately meet up for a pow wow. First, we call my electrician’s four other suppliers. All are quoting 12-month lead times. No dice.
What if we think outside the box?
Say, 10 single meters with individual disconnects. The Home Depot special.
We call the inspector. He doesn’t approve. Apparently, there’s a “6 passes to the hand” rule where, in an emergency, the fire department needs to be able to shut off all power with 6 motions. Totally fair, but nonetheless disappointing.
I keep pushing for more creative options. My electrician eventually gives up. I don’t. There must be another way.
I go back to my office (aka my truck, a laptop, and a Verizon hotspot) and start calling suppliers, trying to find another solution.
After calling 30-40 suppliers, I discover a solution that may work: two Schneider Electric Square D 5-gang meter packs with two 400 amp disconnects. Not immediately available, but only a 6-12 week lead time.
I take this back to my electrician. He thinks it can work and is able to get inspector and utility company sign-off.
Ok, great. Only question remaining is does the new setup fit in the space identified by the power company?
So yesterday, I go to the site and measure.
No, it doesn’t—we need to find a new location. Perhaps this isn’t a bad thing since it gives us a reason to reposition away from public eye.
But, it’s the weekend and no one else is working (crazy, right?). I’ll have to wait until Monday until I discuss with electrician and power company. Hopefully, we can convince the utility to allow us to bring the meters inside the basement.
Although I don’t want to jinx it, there is a silver lining here. Total cost of the new setup that I patched together is $10k. So, if it works, it may have been worth the headache.
In situations like this, it’s easy to pass the blame. Why did my electrician wait 6 months to confirm the original order? Why can’t the manufacturers pick things up a notch?
But, really, all of this falls on the GC. As a GC, you need to anticipate and plan for supply chain delays (this is a similar scenario to the windows we’re still waiting for. Only 5 weeks to go though!).
Lead times are constantly changing. A 10-gang meter pack that once took 2-3 weeks to deliver pre-pandemic now takes 12 months. It’s the GC’s responsibility to keep a pulse on supply chains.
And it’s not overly complicated, either. Really, it just means staying up-to-date with your subs and suppliers. Have materials identified before breaking ground and create a calendar of when to order various items based on input from the folks in the trenches. Then, check in regularly.
I suppose that’s just basic construction management. But we all have to learn somehow.
Thankfully, I’ve managed to stay organized enough to get by. And I’m fortunate to have a stellar team of subs and suppliers that make up for my deficiencies.
But, rest assured, with each toe stubbing like this, my processes and systems get more and more refined.
“Fool me once, …”
July 24th, 2022
As a disclaimer, this isn’t a blitz at my lender.
They’ve actually been very accommodating and pleasant to work with—two adjectives rarely used alongside “lender”.
The lesson here is more about managing funds as a smaller developer.
Specifically, I want to show you a costly trap I almost fell into that you can avoid with the right planning.
First, let’s define a few terms:
A draw is the funds released from your construction loan by your lender
A distribution request is the packet you send your lender to initiate a draw. This includes notarized request forms, a construction budget tracker, contractor lien waivers, & more
Working capital is the money you have in your bank readily available to pay subs, buy materials, cover holding costs, etc
As working capital gets low, you submit a distribution request for more money (the draw).
Ok. Storytime.
I closed on my construction loan for 501 Main in January. At the time, my lender requested I wire them all equity funds to retain and administer.
Naively, I obliged.
This meant that, when the project started in March, I had no funds in the account to buy materials or pay subs. And draws can only be made for expenses incurred retroactively.
Fortunately, I had already spent $50,000 on soft costs before closing the loan (architecture and engineering) and I immediately submitted a distribution request for that amount.
The draw was processed quickly and this $50,000 became my working capital.
$50,000 roughly translates to one month of working capital—the average sum I spend each month on project expenses.
And this worked for the first few months.
At the beginning of each month (once all prior month’s invoices were received and paid), I submitted a distribution request for the amount spent. My lender would pay out the draw a few days later and that would replenish my working capital.
My monthly expenses were mostly split between two vendors during that period:
The local building supplier where I purchase most materials. Invoices are released on the 1st of month and due on 10th to be eligible for a 10% discount (average $30k/mo in spend)
The carpentry crew framing the building. Invoices are paid every Friday (average $15k/mo)
Then, last month, we hit 25% project completion.
This triggered a 3rd party audit—a process where the lender hires a consultant to analyze expenses incurred, do a walkthrough of the project, and prepare a formal report.
Although slow, the audit serves as a safety precaution to both prevent fraud and identify areas at risk of going over budget.
There’s no question as to the value this provides the lender.
But watch how this unfolds for me…
…me, the sucker with only one month of working capital.
June 1st rolls around. And in comes the May statement from the building supplier for $41,000. But hold up. I only have $20,000 of working capital left in the bank after paying subs throughout May.
Time to prepare a distribution request.
It takes me a few days to pull these together. Administratively, they’re a headache (although, to be fair, all administrative work is a headache). Every purchase is manually entered into a tracker that reports how we’re holding up against the initial budget projections. I do this across 150+ categories.
This tracker is something I came up with (send me an email if you want a copy).
Regardless, the lender has their own version. One with broader categories (e.g. soft costs or framing). Whether you like it or not, some level of manual data entry is required. I just go one step further because I want the data for future projects.
June 6: I submit the distribution request to my lender. They then initiate the 3rd-party audit.
By June 10th, it is clear that the disbursement will take time. So, to avoid losing out on the 10% discount from the building supplier, I put the $37,000 invoice (90% of $41,000) on my credit card.
A week goes by. Then, the site visit happens. The auditor is in and out within 15 minutes (plus 3 hours of round trip travel billed at $175/hr).
He takes some pictures and asks a few basic questions (“are you the GC?”; “can you tell me about the project?”).
My one takeaway was that he was impressed by the quality of the products we used. And, naturally, I extrapolated that as a compliment to the team for their craftsmanship. Because, like, who just compliments the use of TJIs and LVLs, right?
Another week goes by. The auditor asks for additional information (site plan, old lien waivers, etc). I oblige again.
And another week goes by. I check in with my lender. Turns out, the forms I had been sharing with my disbursement requests were not “industry standard.” I receive new forms to fill out (here and here if you’re curious what industry standard looks like). I clear my schedule that afternoon to complete the new forms.
But wait. Another week goes by. I’m starting to get worried. By now, it’s early July and a new $34,000 invoice from the building supplier has been issued.
I check the project bank account—$103 left. Wow. Plus a maxed out credit card. Yikes. If I don’t pay the new $34,000 invoice by the 10th, I lose out on the $3,400 discount.
Not only that, but the payment for my maxed out credit card is coming due. Or else I accrue a $750 interest charge.
Every day I check in with my lender. My hope is to make it very clear the position I’m in.
And then, voilà.
On July 6th, my draw shows up in my bank account. I scramble to pay off my credit card before the interest charge hits, then turn around and pay the July invoice from the building supplier.
Finally, the cherry on top.
I get an invoice from the auditor. $1,800. For a report that was just a copy/paste of information I provided him. Alongside a few pixelated pictures of the site. Take a look (don’t worry, it’s redacted).
In the end, this single draw almost cost:
$4,100 in lost discount from June statement
$600 in late charges from building supplier for not paying June statement by the 30th
$750 in late charges on credit card
$3,400 in lost discount from July statement
$1,800 in auditor fees
Or $10,650 total. Just to access my own money.
Instead, I was able to avoid $8,850 of that by getting a little creative with the credit card. Although I’m still in awe of the amount paid to the auditor.
It’s easy to look from the outside in and think: that’s a million dollar construction project, what does an extra $8,850 matter?
But, in that $1m budget, every penny is accounted for. And those 10% discounts from the building supplier are critical to us staying on track financially.
Yes, there’s some contingency. But that’s reserved for serious cost overruns, not artificial bloat from a routine administrative process.
So, what’s the lesson here?
Short answer:
Make sure you have enough working capital.
Two months is ideal (vs the one month I’m working with).
Project out your monthly run rate before you close on the loan and hand all your equity funds over to the lender. Then make sure you’re able to retain those two months of working capital from your equity contribution.
Maxing out your credit card as a bridge loan is not a good strategy. And not one that I would like to repeat. Although who knows—I’m stuck with one month of working capital and there are three audits left before project completion.
There’s nothing that you, as a small developer, can do about long draw cycles—it’s generally outside your control.
However, you can control how you mitigate the risk. So plan accordingly.
Over the long term, I’d love to see changes to how draws are administered for smaller projects. In bigger development shops, there are back office jobs dedicated to managing the draw process.
But for the small developer without the overhead, it’s cumbersome. And every minute (or hours in the case of managing draws) is time that could be better used on pushing the project forward—marketing units, choosing fixtures, researching systems, writing this blog (?), etc.
What changes would I like to see? That’s a topic for another day.
For now, lesson learned.
Don’t. Run. Out. Of. Money.
June 19th, 2022
Re-purposing building materials and structures (A.K.A. adaptive reuse) makes for two easy talking points:
Sustainability—fewer new materials means fewer embodied emissions
Cost avoidance—a penny saved is a penny earned
And that’s great. There’s real value in both of those.
But there are also added costs that come with adaptive reuse which are rarely discussed. Costs that can spiral out of control if not properly accounted for.
Take 501 Main—my 3-story apartment project constructed on top of the original 1-story building’s foundation.
Let’s explore three hidden costs I found directly tied to the decision to keep the existing foundation and floor system intact.
Cost #1: Structural reinforcement
This goes without saying but, for a project like this, you need a structural engineer. Expensive? God, yes. $20,000 for 501 Main. But non-negotiable.
An engineer will detail every spec you need to make your structure safe, including steps to reinforce the foundation.
Here are a few examples of what we had to do at 501 Main:
Half of the original foundation walls lacked footings or rebar. To account for this, we had to strengthen the design of the balcony piers and bulkhead (thicker concrete, higher PSI rating, more rebar)
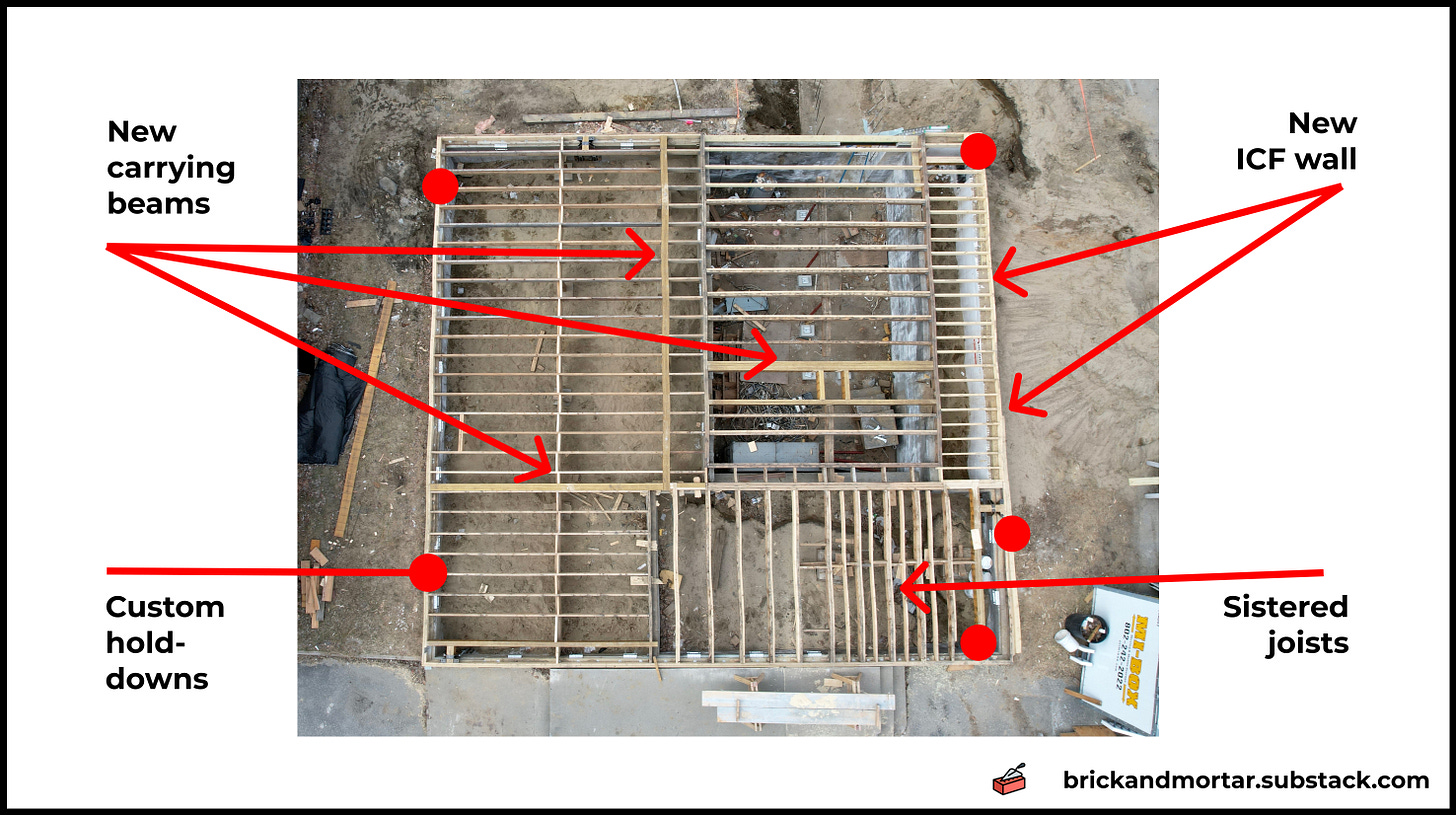
We installed a new carrying beam across the basement. This required custom piers and a massive beam ($1,000 in lumber alone). See pic below
Custom hold downs around perimeter of foundation were needed to tie new building down to the foundation. This was a nightmare—it involved concrete drilling, onsite metal fabrication, and a tedious installation process (here’s a quick video)
Cost: $20-25k in material and labor.
Cost #2: Leveling and squaring
Once we had the building demolished, we found two issues:
The existing floor system was out of square by a few inches. This is worse than it sounds and you would not want to build up without fixing
The floor was out of level, meaning there were noticeable peaks and valleys throughout. You could place a ball on one corner of the floor and it would roll 40’ across the building
To rectify, we had to:
Strip off existing subfloor (I had initially hoped to build off of that)
Shim underneath joists to get rid of valleys
Strengthen or replace half the existing joists
Cut out and replace any rot (mostly rim joists)
Cost: We spent roughly three weeks on this. 3 guys, 3 weeks = $18k.
Cost #3: Modifications to existing design
Outside of structural work, there were several activities to prepare for the new building:
Cut a doorway into the concrete to allow for basement access via bulkhead instead of interior staircase
Cut new hole in concrete for new water line
Excavation to set exterior insulation around foundation
New ICF frost walls for bulkhead and small addition to building footprint
Cost: $10k.
So…
In total, salvaging the original foundation cost around $50,000.
The alternative would have been to scrap everything and start from scratch.
Meaning:
Added excavation and dumpster costs for demolition of foundation
Pouring a new foundation
I never priced this out but I’d guess it would be similar to what I paid to salvage: $50,000. Although much less complex and time-consuming.
So why did I do it?
It came down to simple deal economics.
I was fortunate to receive a $86,000 grant from the state. And one of the requirements is that the project be adaptive reuse.
So, if we had fully demolished the building, the project would not have qualified.
Grant funding was necessary to make the project work. The project was too costly to develop compared to what rents are attainable here.
Simply put, this grant allowed the development to move forward by closing the funding gap.
Next time, I may think twice before building on an old foundation. It certainly isn’t the easy path. And, from my experience, it likely doesn’t pencil without subsidy.
June 12th, 2022
I just spent $60,000 on 38 windows for 501 Main.
Well, $55,243.25 to be exact.
At 5% of our budget, that’s one of the largest line items for the project. And, with 15-week lead times plus a hard no returns policy, it took a few months of research, shopping around, and coordination to get right.
There are a mind-boggling number of variables when it comes to windows—trim, color, style, tempered, fire-rated…
But the choice between triple or double pane gets a lot of attention. And it’s a key decision where the cost/benefit is often misunderstood.
Here is my rationale for choosing triple pane.
Ok, so first—I went with Kohltech. They’re known for high quality, energy efficient vinyl windows. And they’re sold through a local distributor that I’ve come to trust (shoutout to Chad at Loewen Windows in WRJ).
The triple pane option on Kohltech casements gets an 11% premium over the base price with double pane—a $4k add-on for the entire window order.
Next, the benefits. Two pros here:
Benefit #1: Ongoing Cost Savings
Warning: this requires putting on your math hat for a sec.
I’ll try to be brief.
Window efficiency is measured in U-value, or BTU / [h * SF * °F] for the other engineers out there.
U-value is a measure of heat loss. The higher the number, the lower the performance of the window.
Kohltech casement triple pane windows have a U-value of 0.15. Double panes are 0.25.
To compare overall building performance with triple vs double pane, we need to calculate the U-value of the entire building.
U_building = [ 7% * U_window ] + [ 60% * U_wall ] + [ 17% * U_roof ] + [ 18% * U_foundation ]
The percentages represent the relative square footage of each component (i.e. 7% of our building is covered by windows).
Then, we input U-values for each of the components (I won’t get into those calculations here but comment below if you’re interested).
U_building (using triple pane) = 0.038
U_building (using double pane) = 0.045
The result?
Triple pane windows reduce heat loss across the entire building by 19%.
At 501 Main, each unit will have its own ½-ton Mitsubishi heat pump for heat and AC. These are highly efficient with a projected $1,000 in heat/AC costs per year per unit.
That’s almost $200 in annual savings per unit. And with resident-paid utilities, this is money that goes back into residents’ pockets.
So, no, that savings doesn’t directly hit my bottom line. But, the long-term play here is to increase resident retention by reducing their overall costs of living.
Benefit #2: Comfort Levels
Comfort is hard to quantify. But it’s still an important factor.
Poorly insulated windows create cold drafts in the winter, especially in northern climates like Vermont.
501 Main’s studio apartments are small (450 SF), so it’s critical to maximize every square foot. Cold drafts around the oversized windows will make the apartment feel inhospitable. This, in turn, may spur resident complaints and lower retention.
Also, double pane windows can allow condensation to build up on the interiors. Over time, this could lead to water damage if severe enough. Maintenance issues are the secret killer of good real estate investments and we want to do what we can upfront to minimize them.
Summary
At 501 Main, triple pane were the way to go:
Only 11% increase in cost, or $4k
19% energy savings on heat/AC
Added comfort levels in small apartments
But, keep in mind—the math will be different for each project depending on window manufacturer, building layout, and mechanical design.
Just make sure you dive into the numbers.
And, in case you want to see what a window quote looks like, here is 501 Main’s.
May 8th, 2022
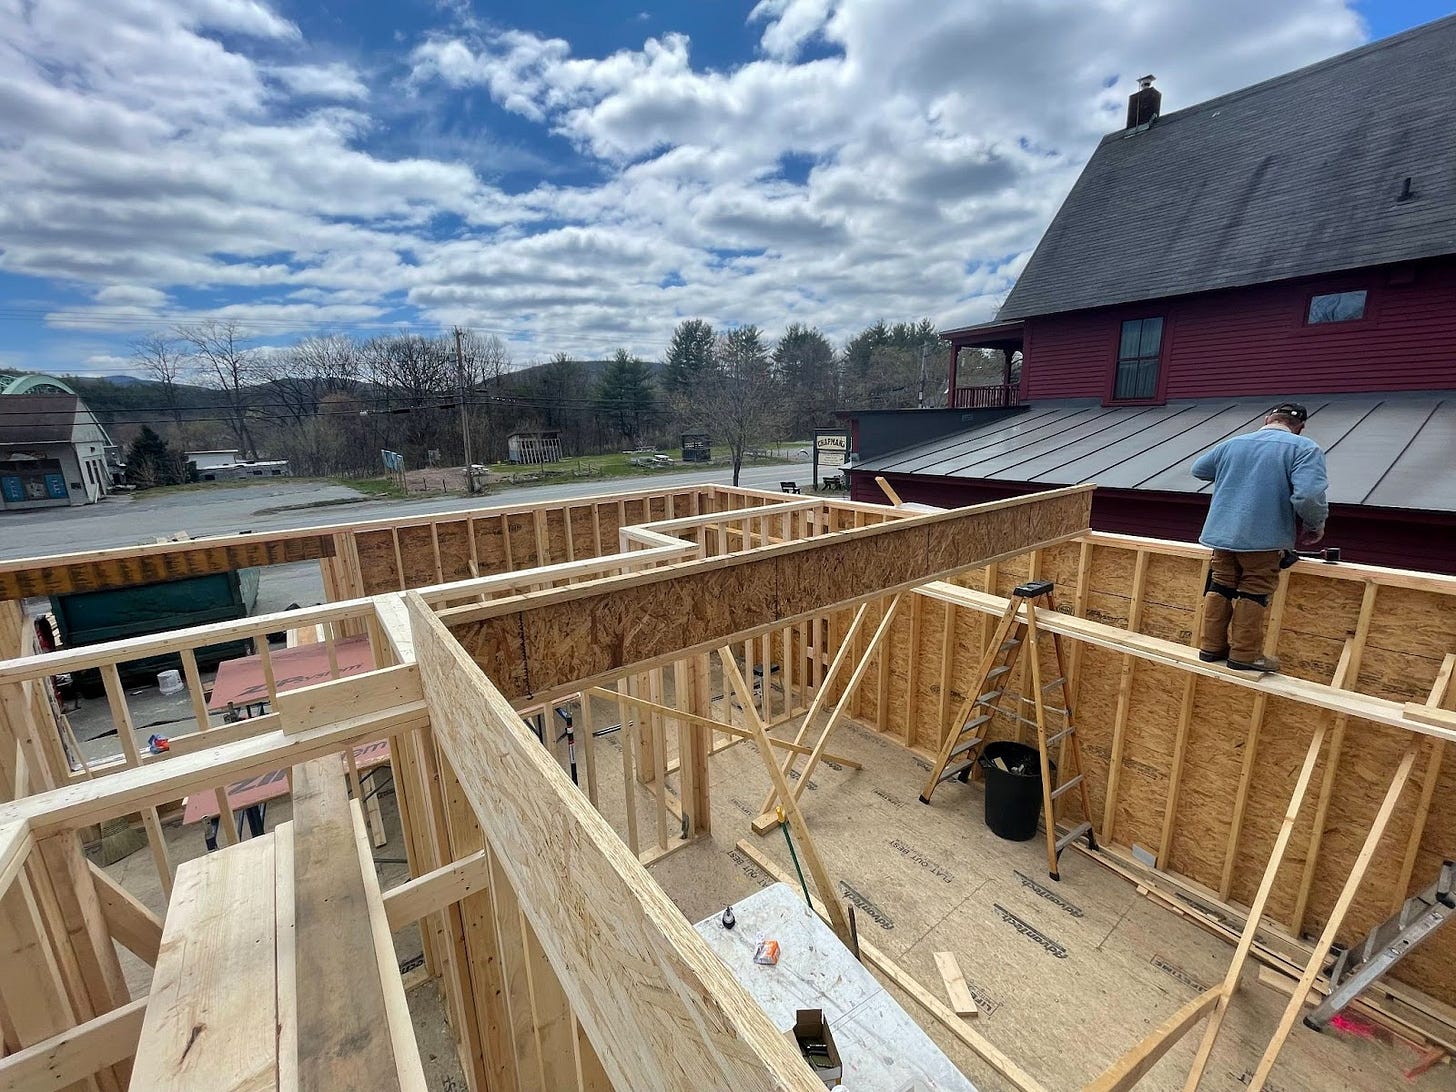
In my last post, I shared a photo essay on the first two weeks of construction. Five weeks have gone by since then.
To give a sense of timeline, I’ll add dates. We started construction on 3/14.
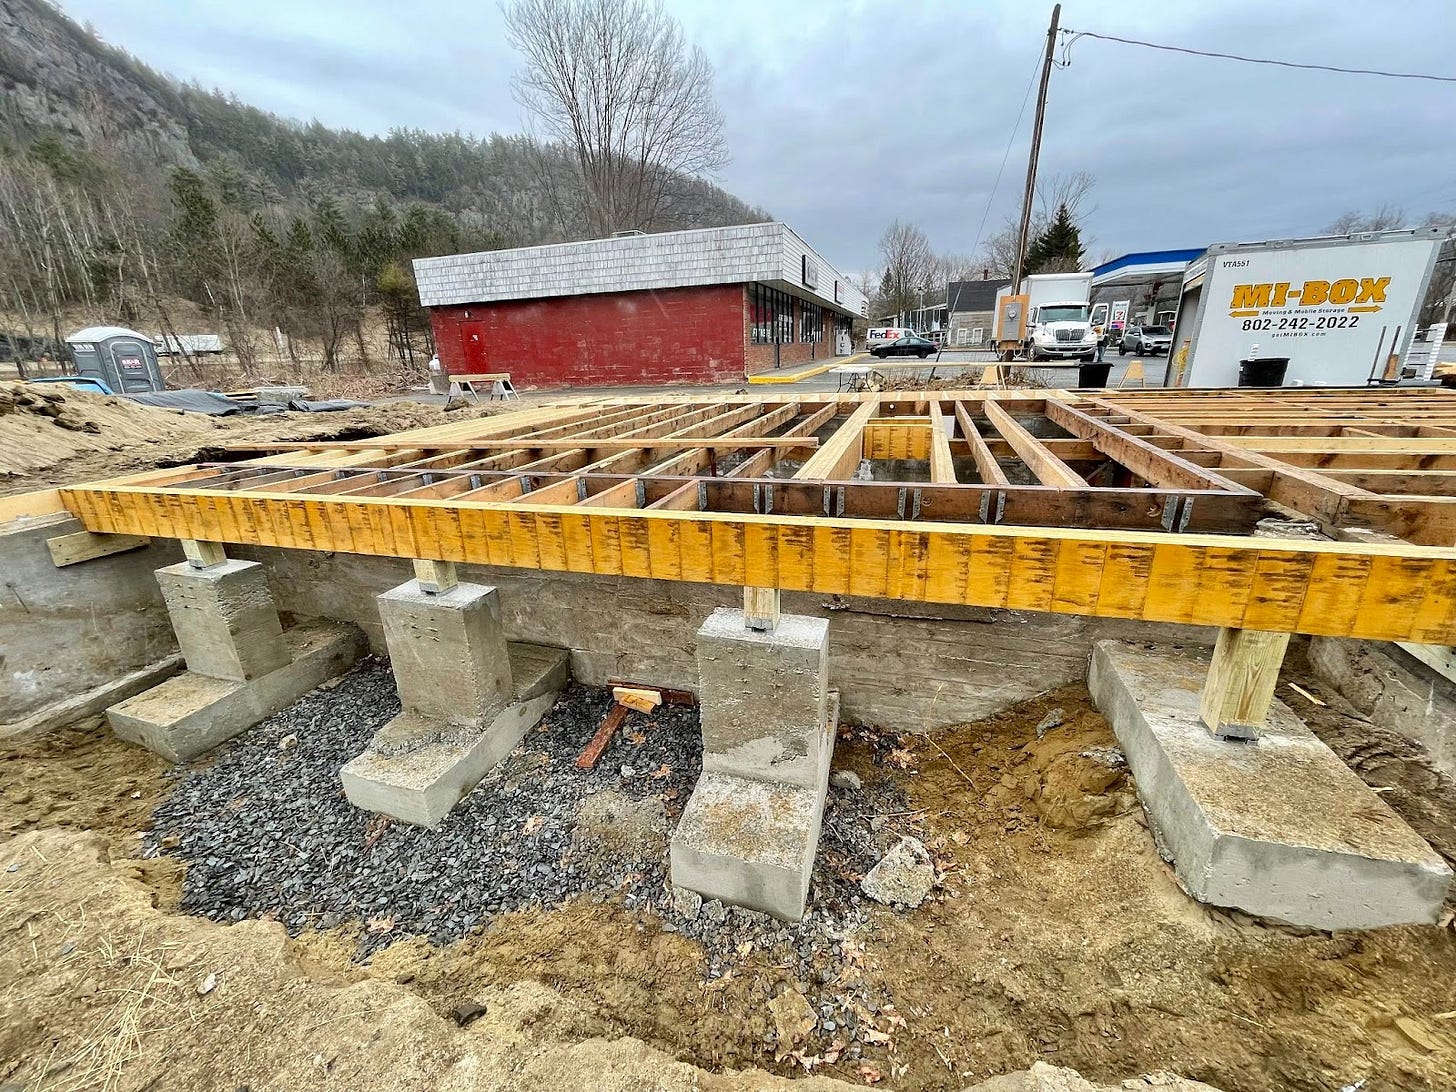
In addition, a slew of mechanical fasteners were specified by the engineer to tie the new building to the old foundation. We’ve got Simpson HDU11s, DTT2Zs, A35s, HDQ8s… the list goes on. Structural fasteners for the first floor cost $10,000.
We even had to get our local metal fabricator to custom build several monster brackets. Here’s a glimpse of what those look like:
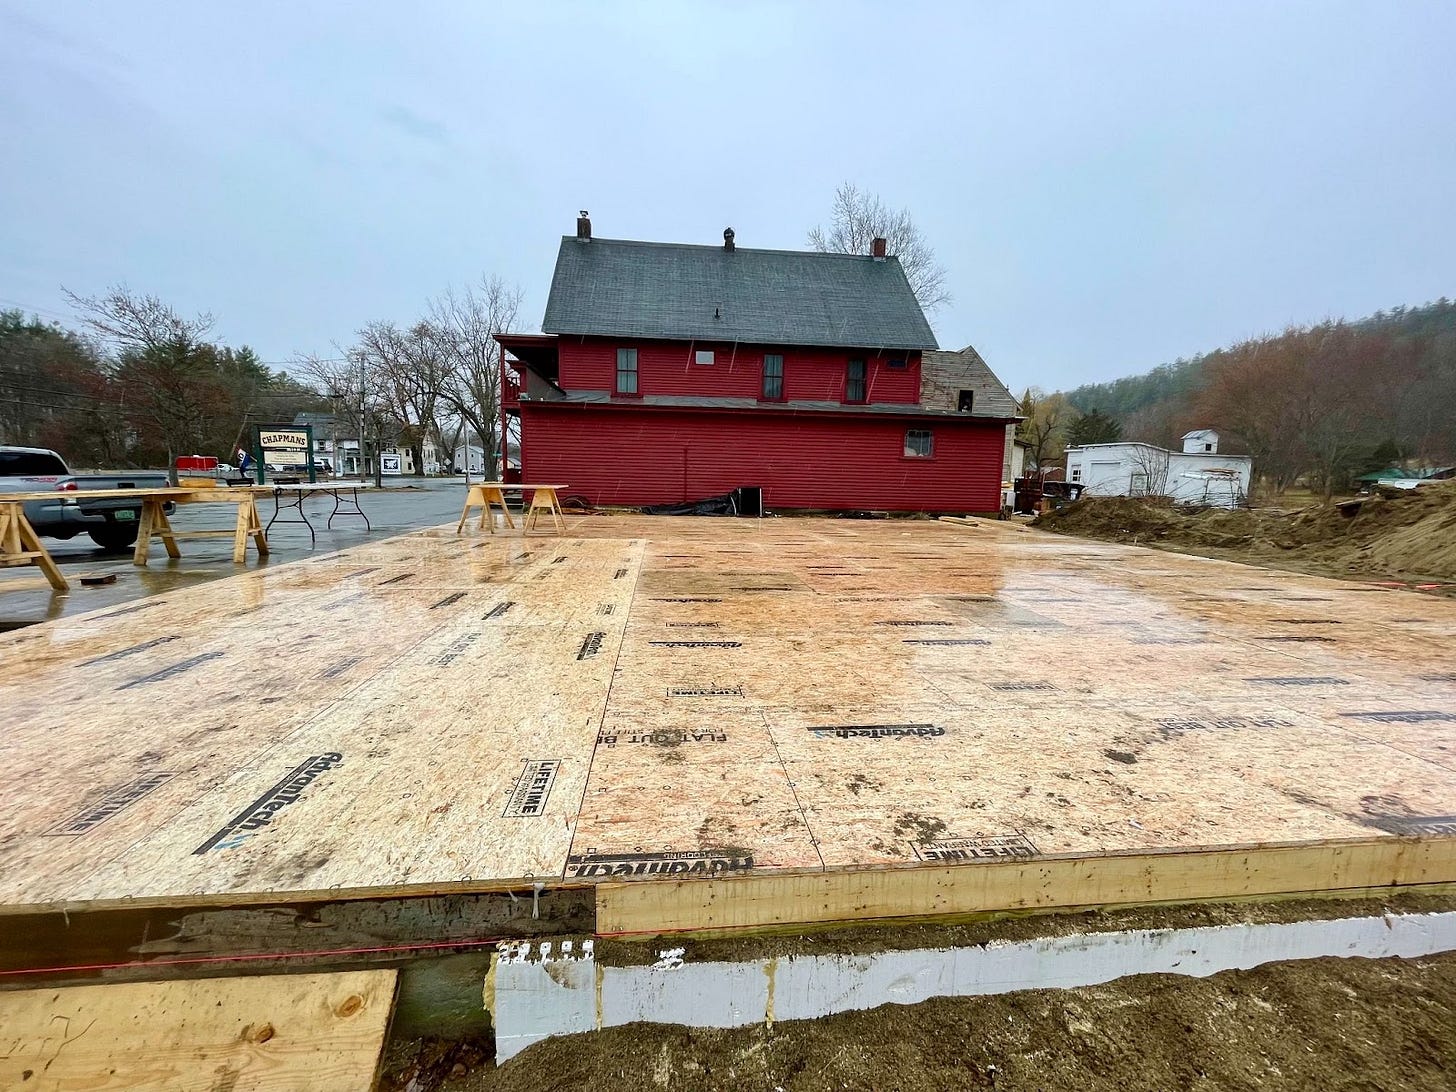


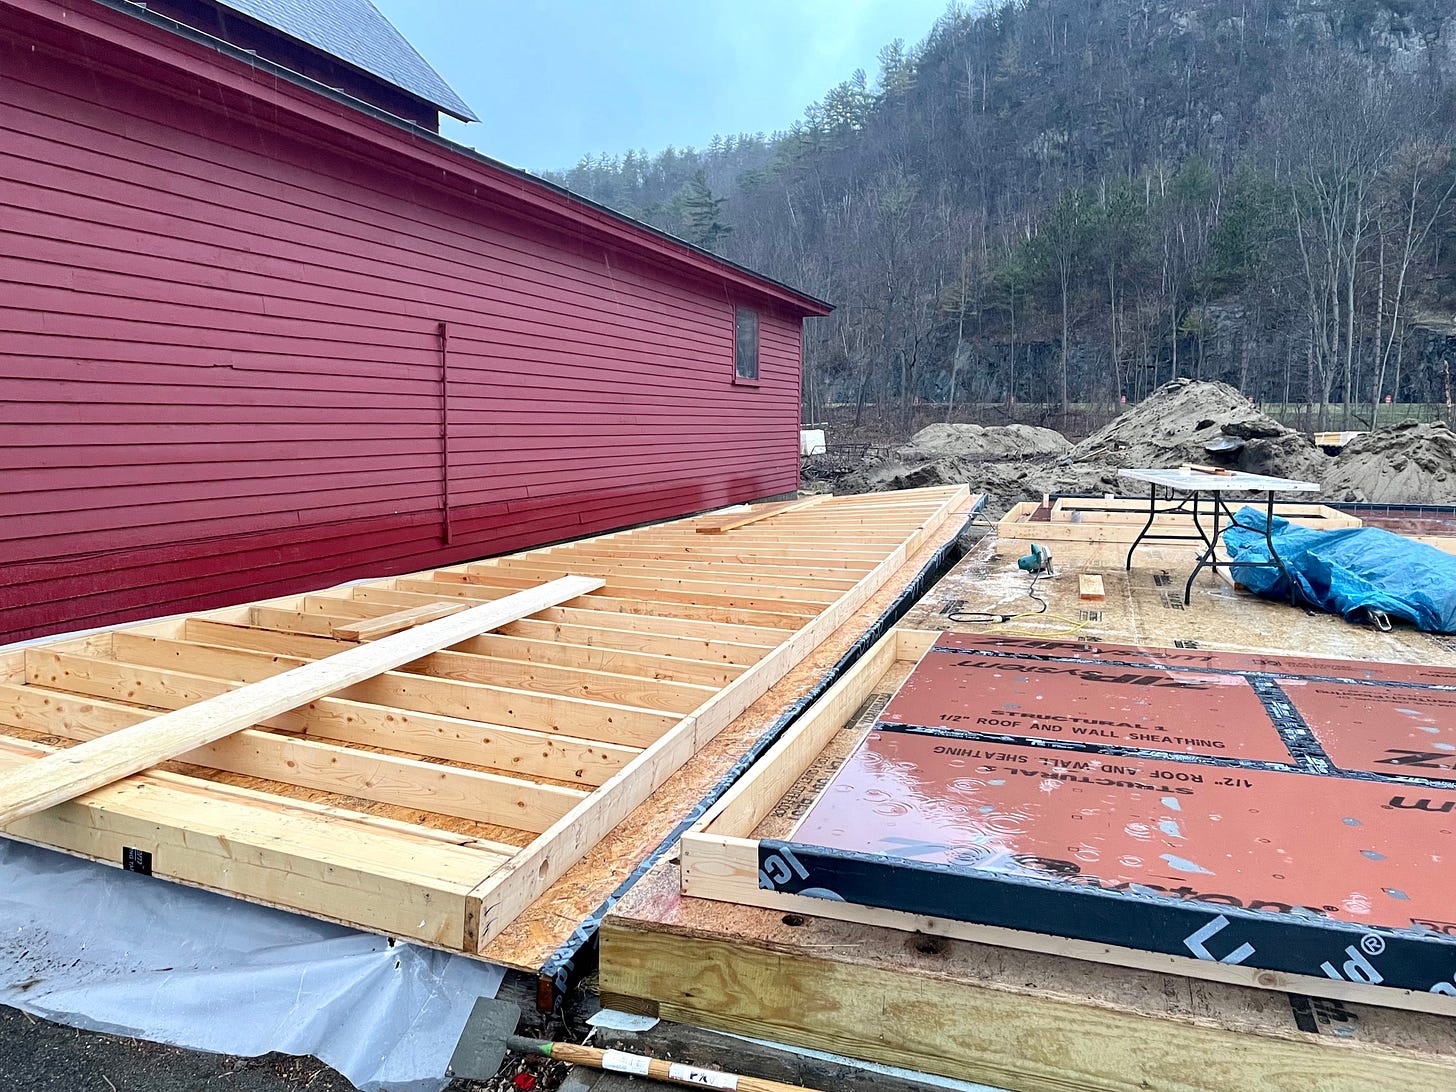
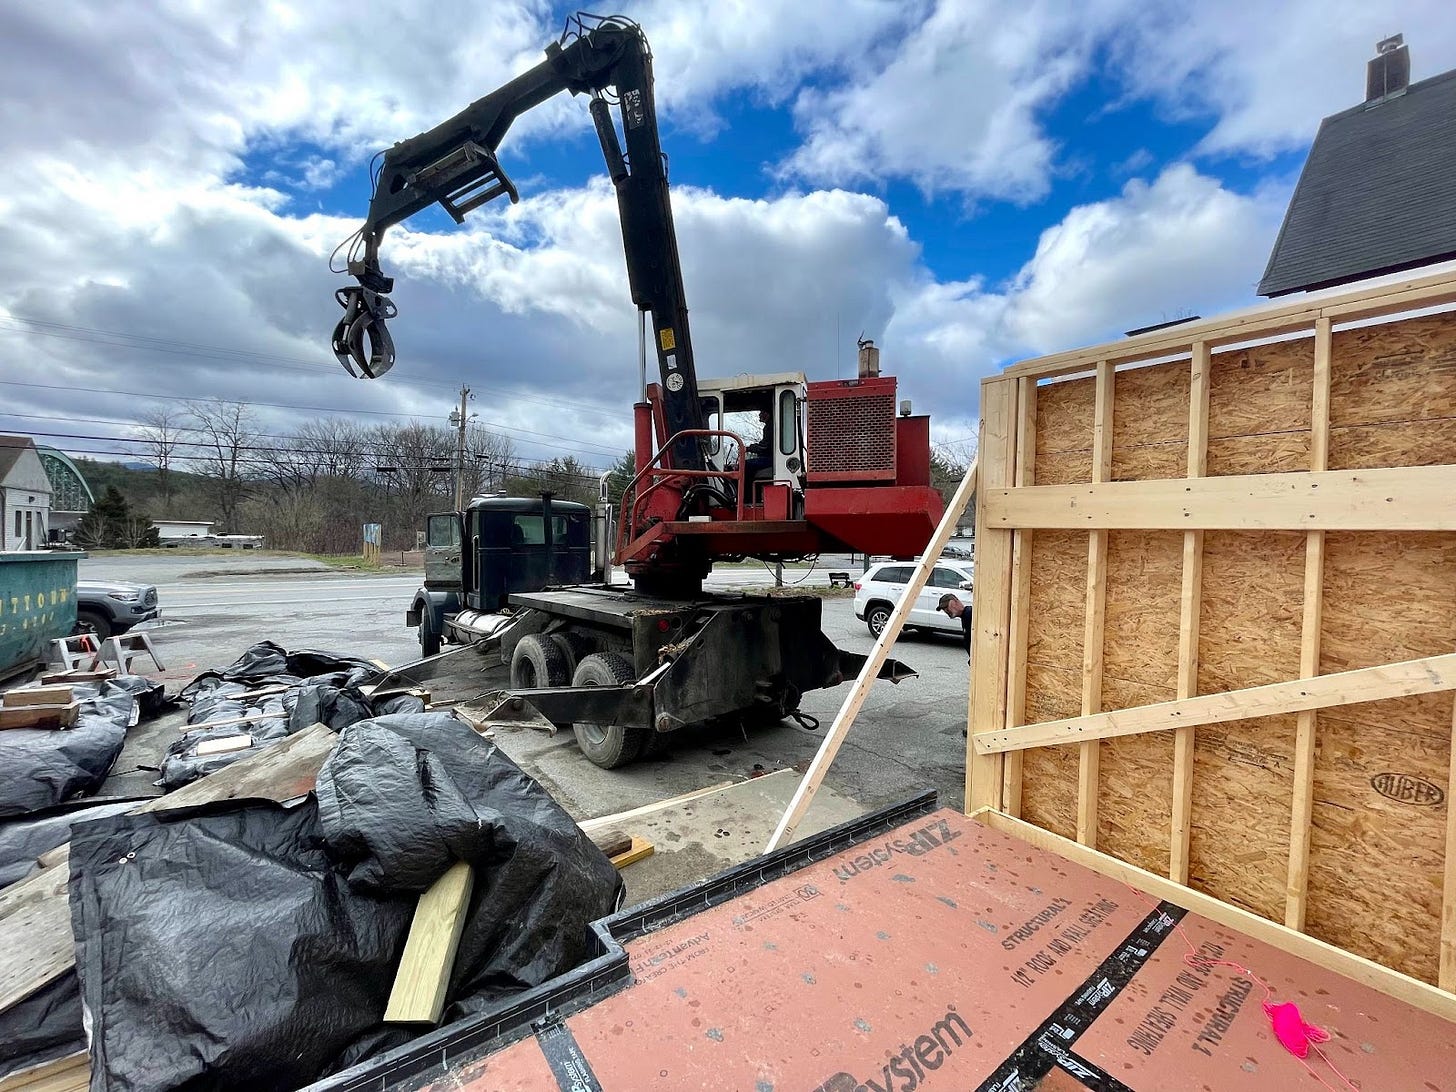
Here’s a video of us raising the wall back up:

Here’s a video of us raising the remaining ground floor walls using jacks.



March 28th, 2022
It’s been a few weeks since I last posted about 501 Main. Not for lack of things to share—we’ve seen the most progress on the project to date.
Two weeks ago, two experienced carpenters started with me full-time. With the building demolished, we had our work cut out for us before we could start framing up.
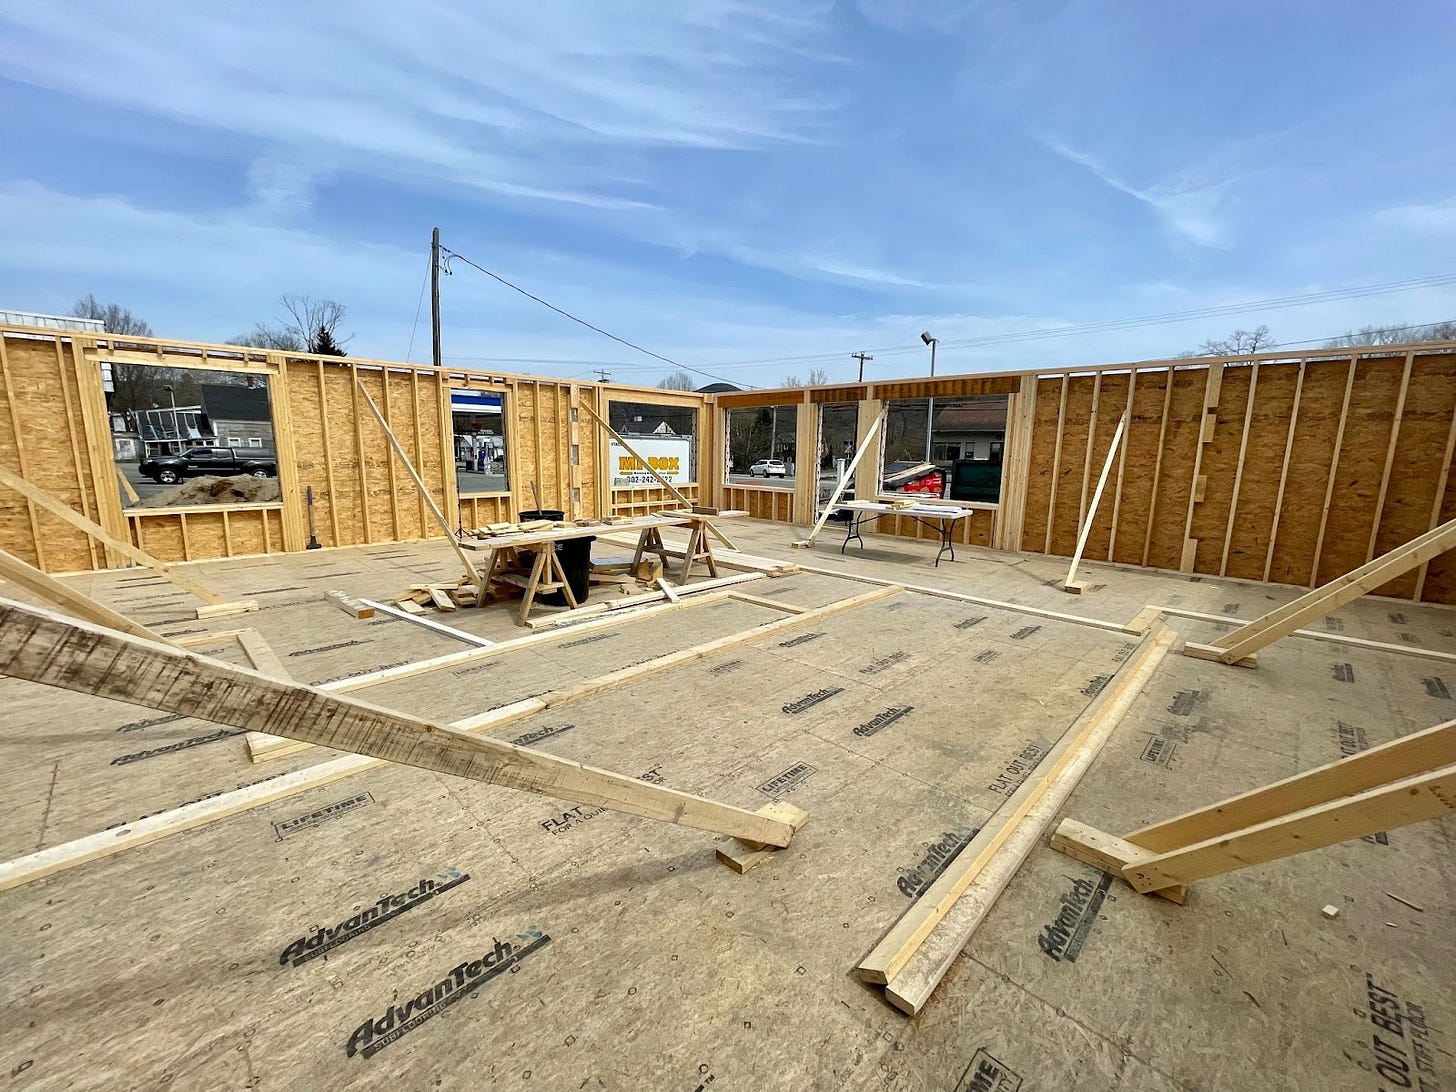
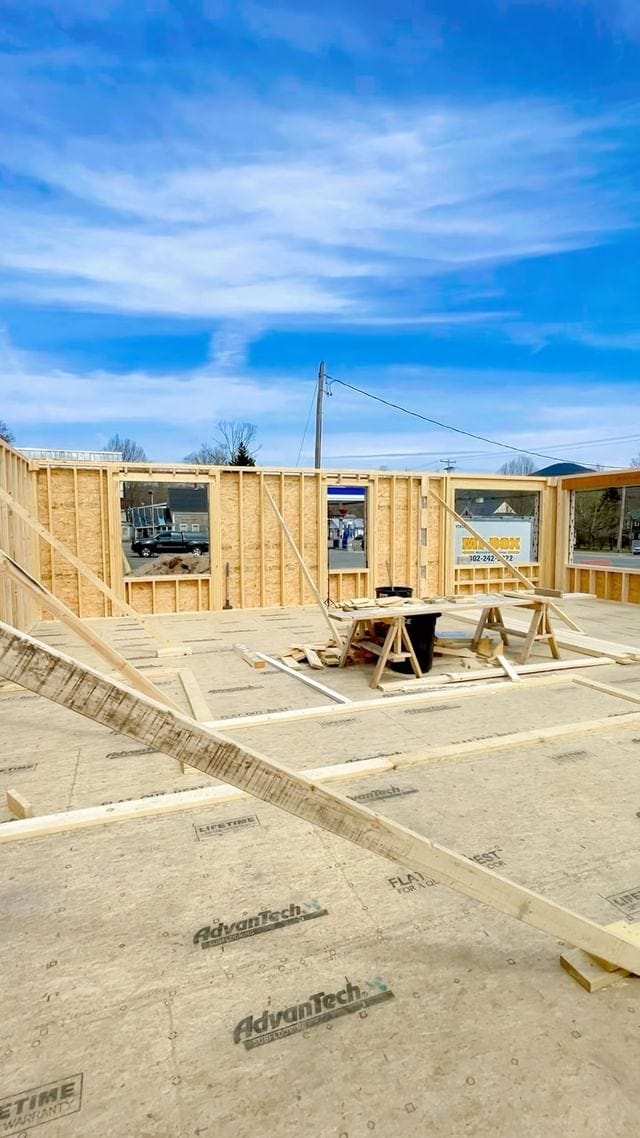
This included:
Leveling and squaring the existing ground floor system
Installing a variety of hold downs fastened into the concrete specified by the engineer
Installing new carrying beams, joists, and hangers
Excavating, building forms, and pouring concrete for new piers, bulkhead, and frost wall
Here’s a quick photo walkthrough on progress.

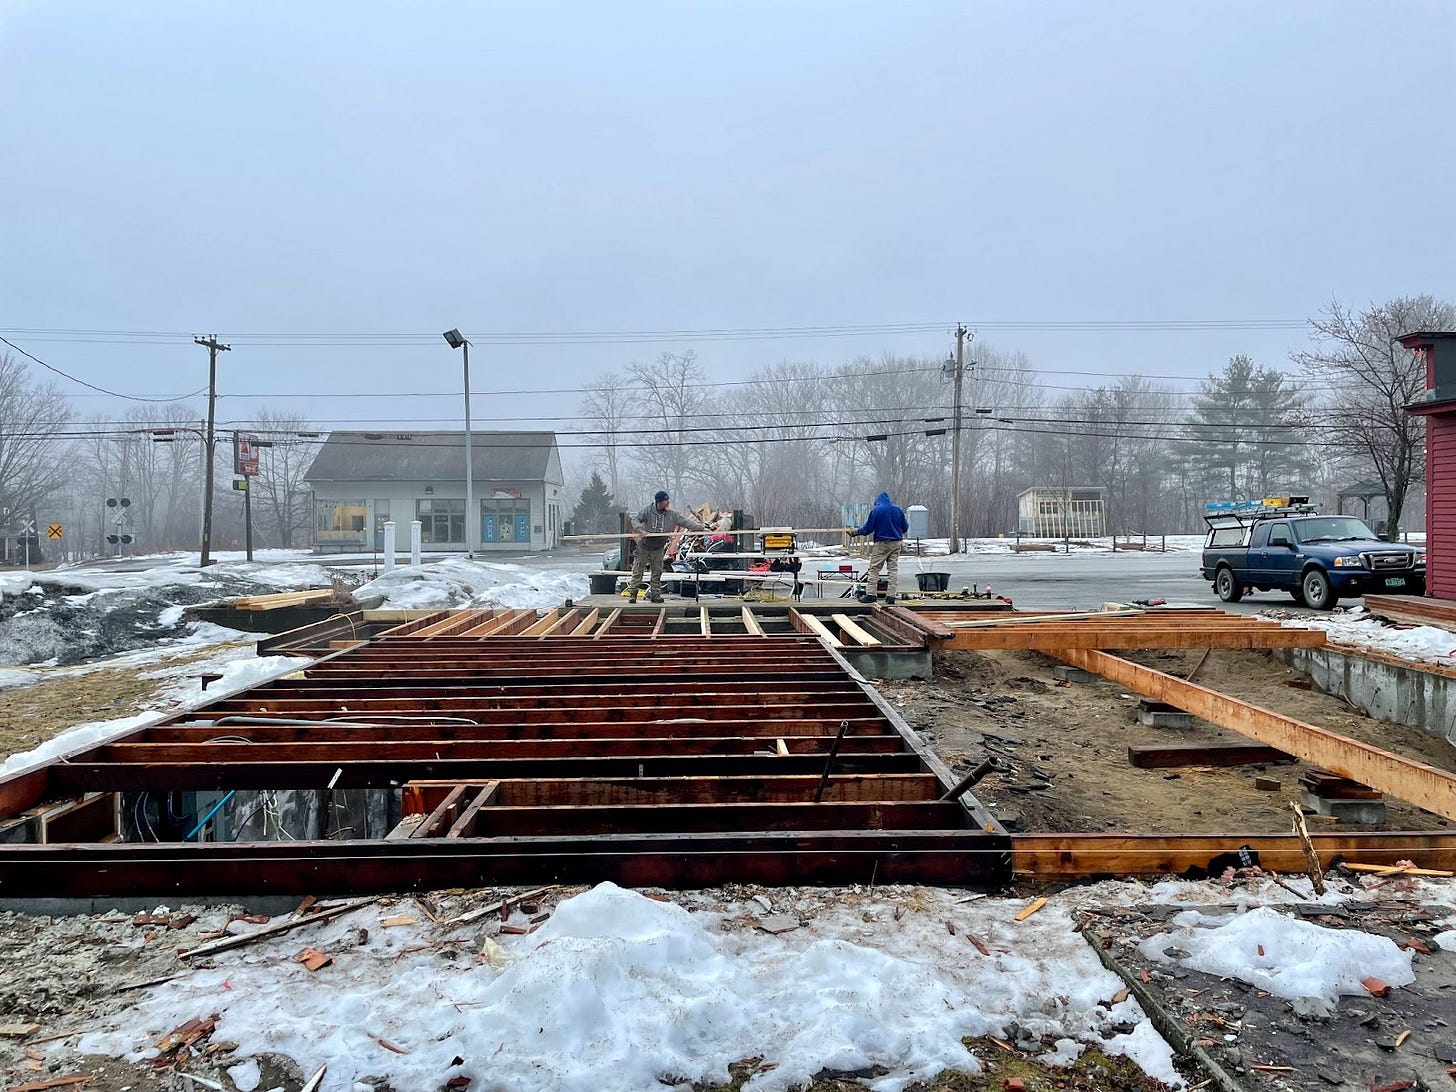
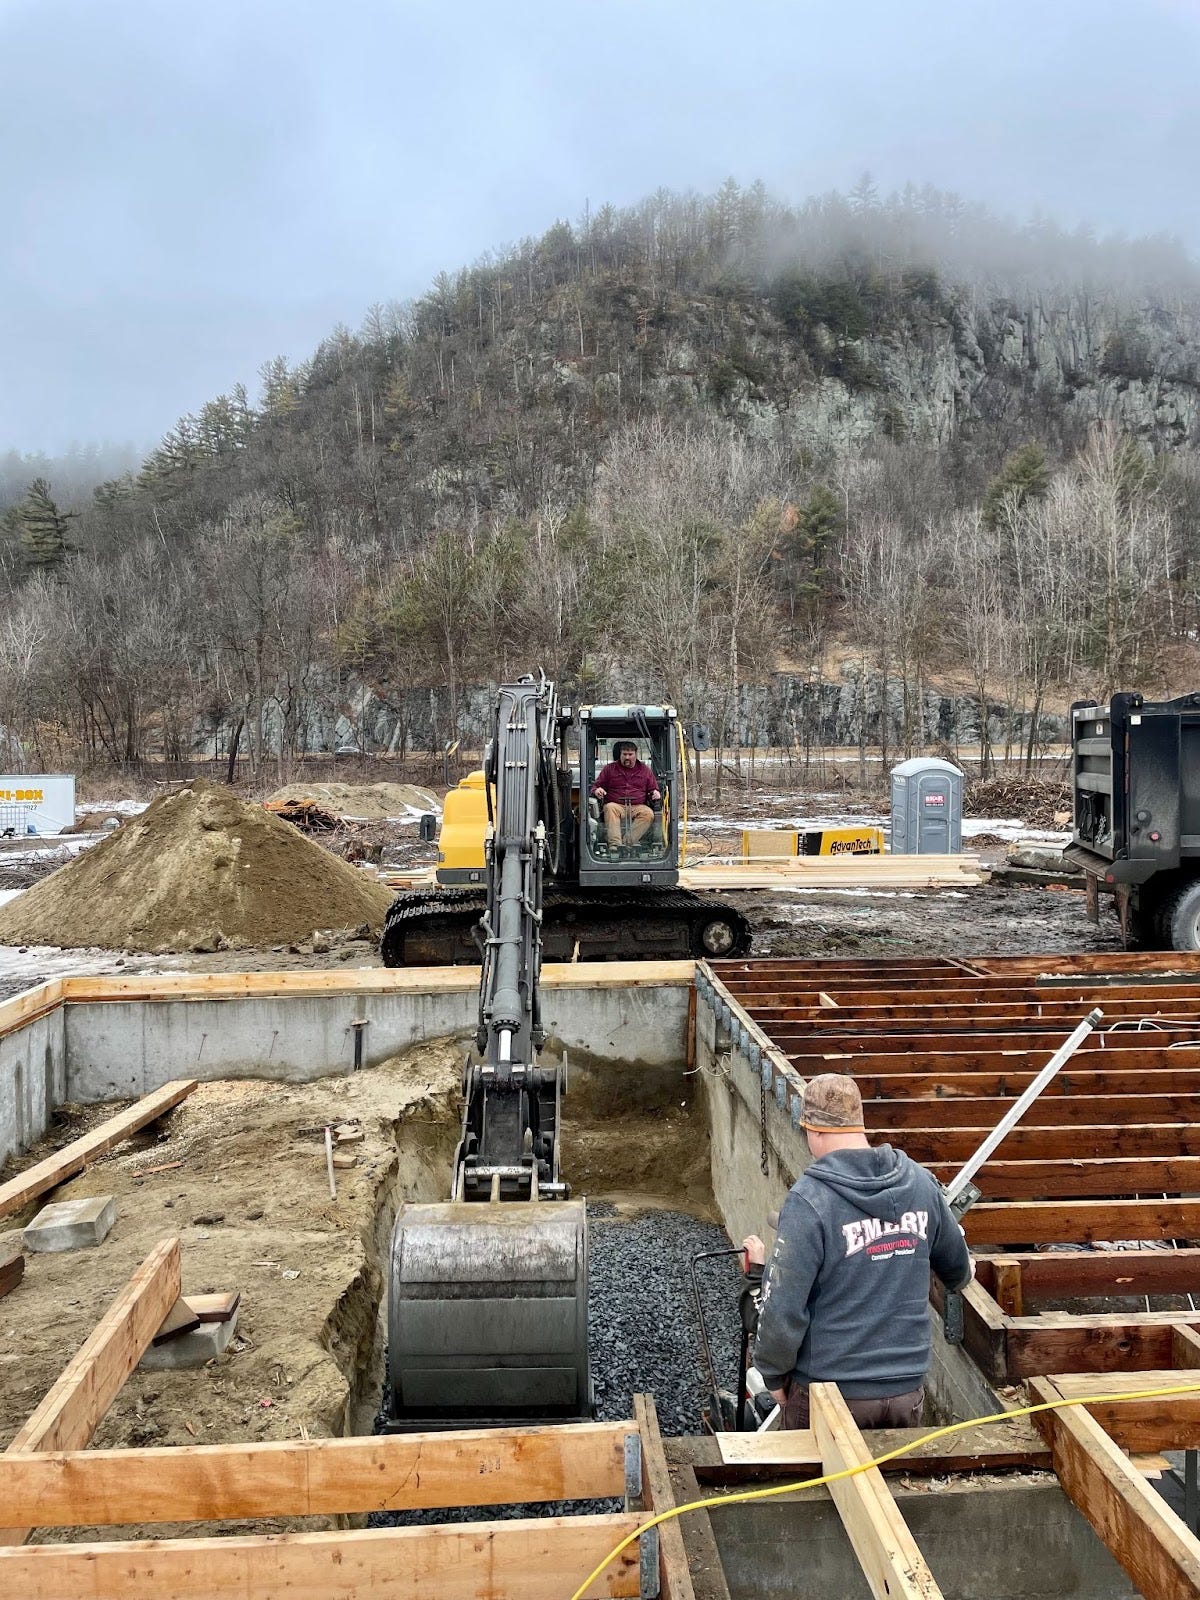
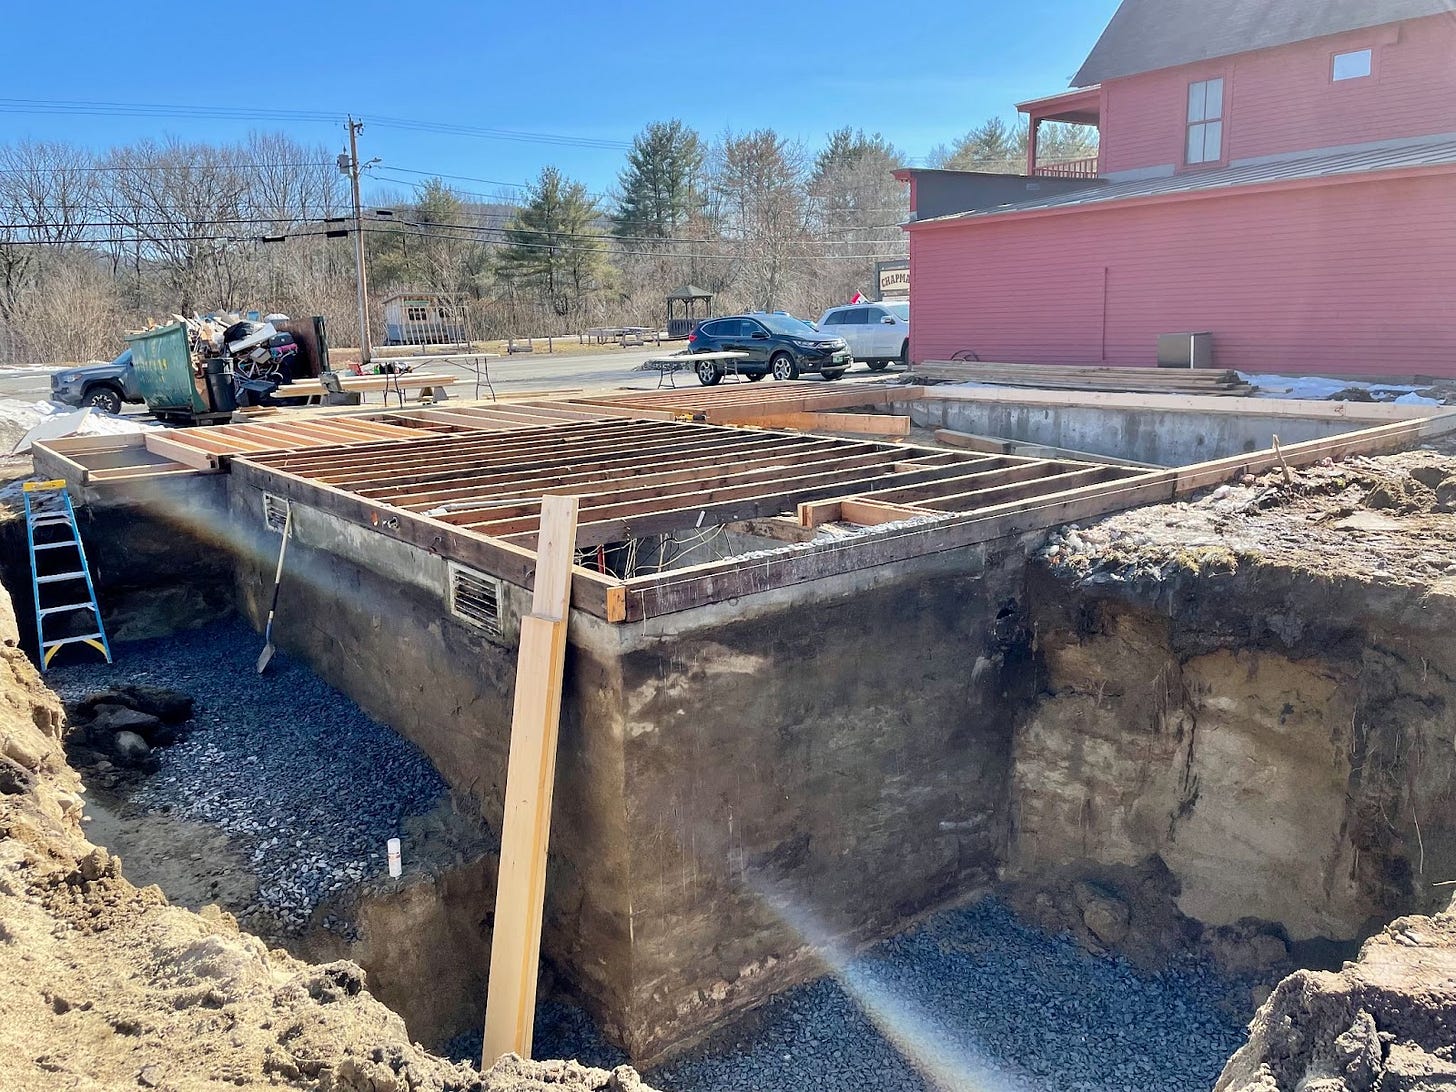
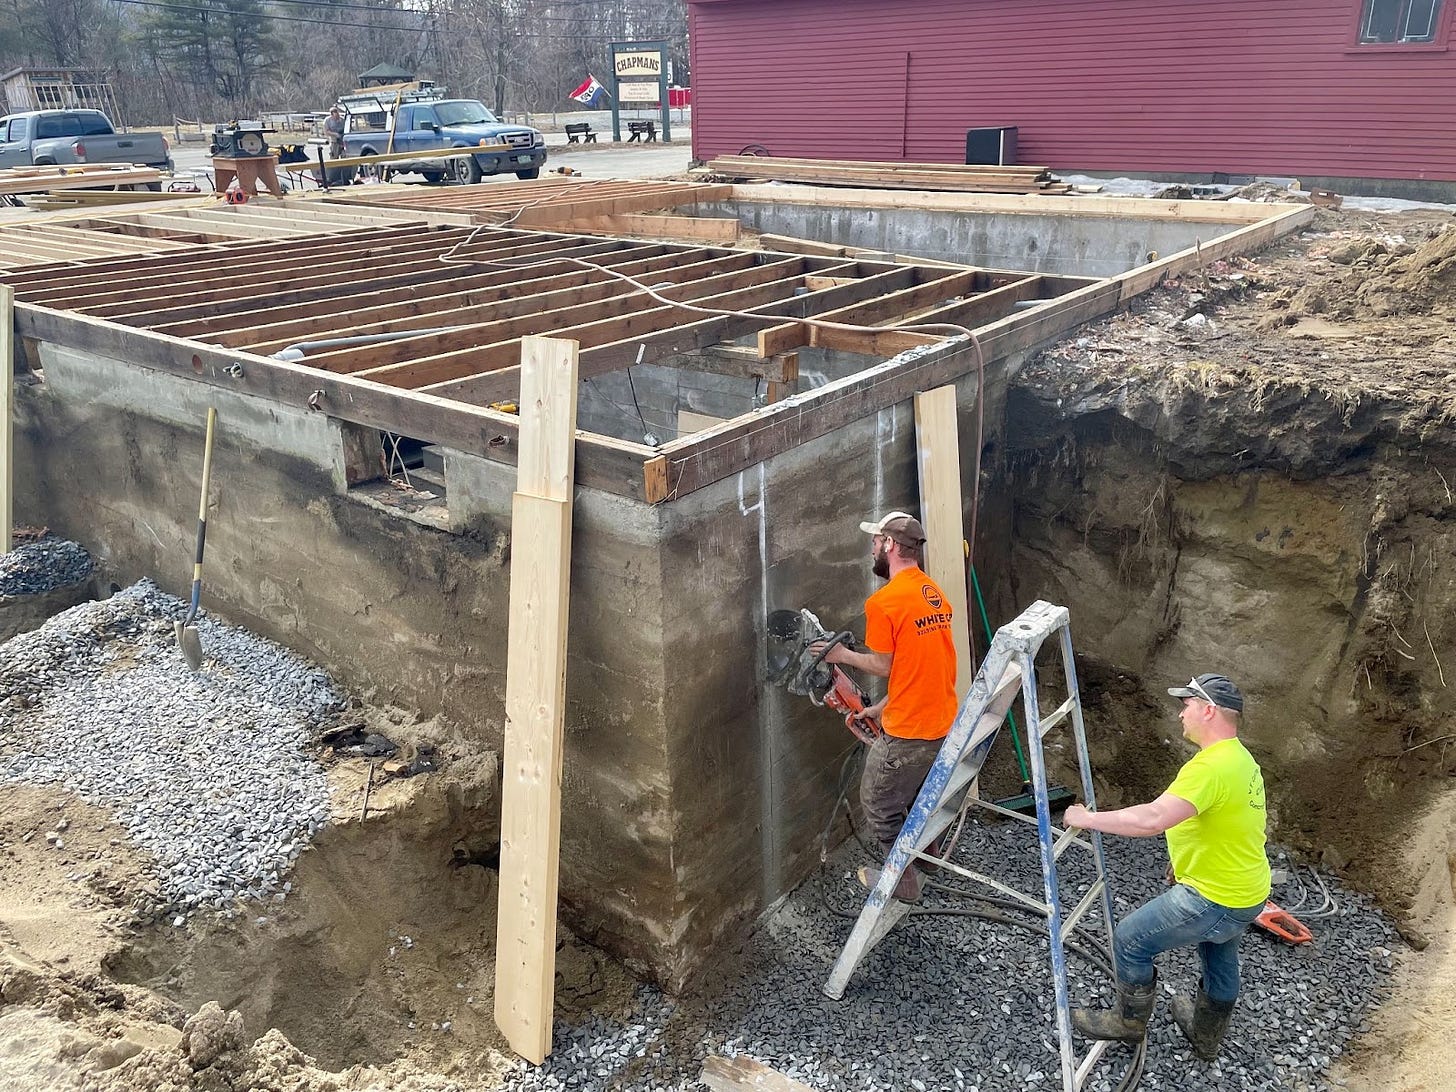

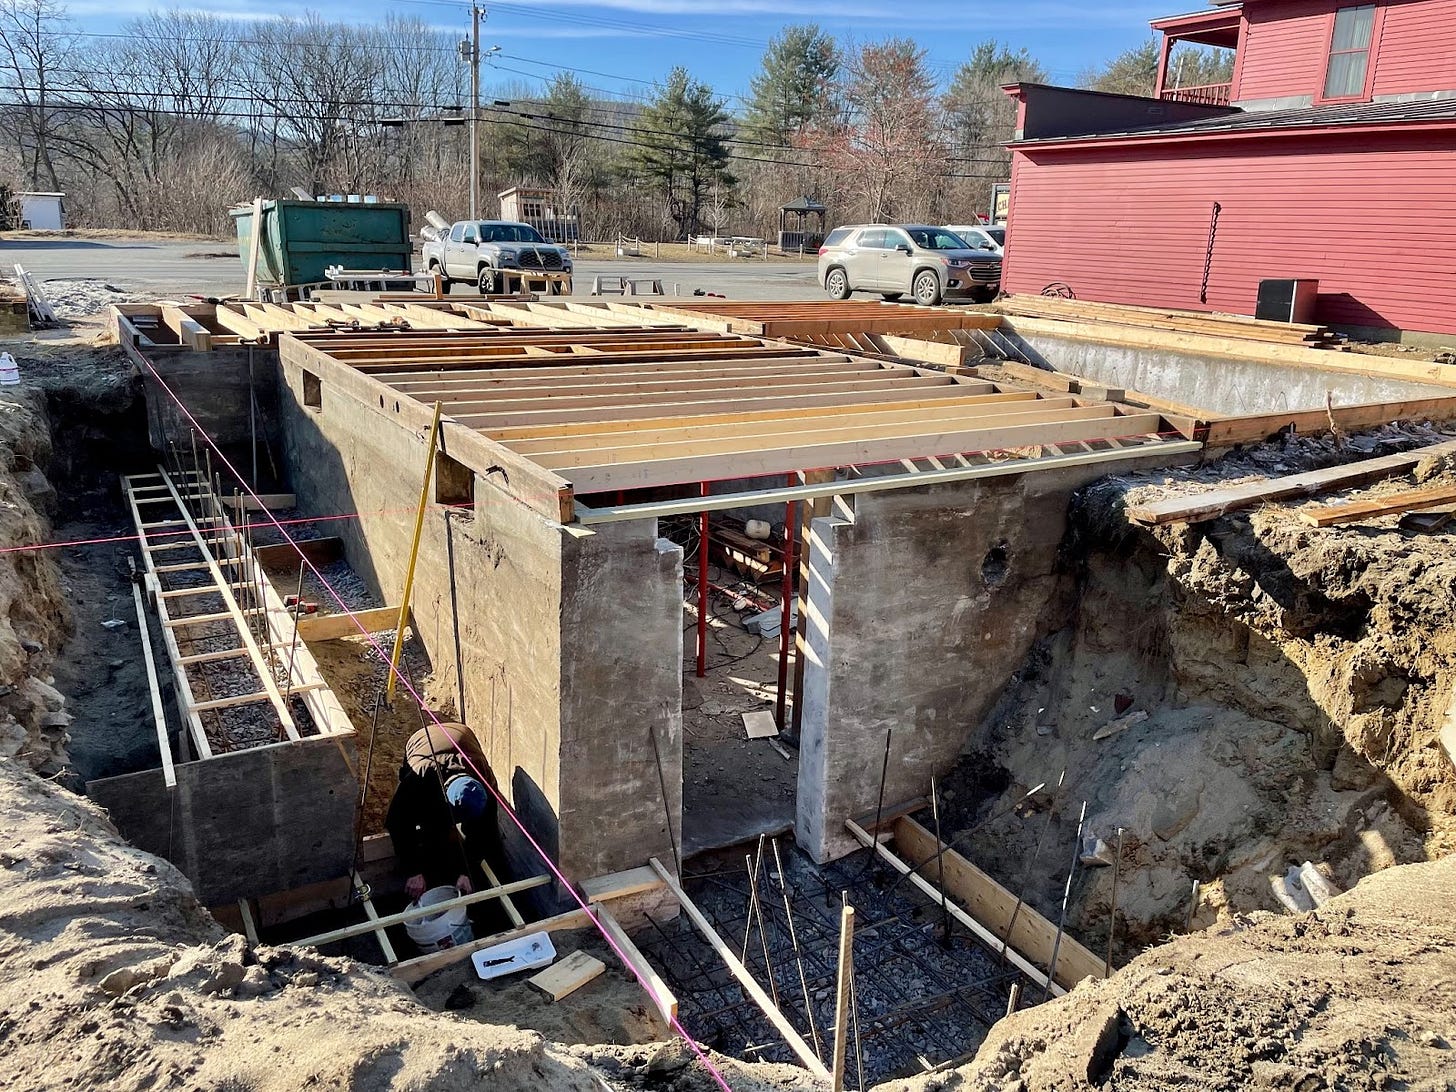
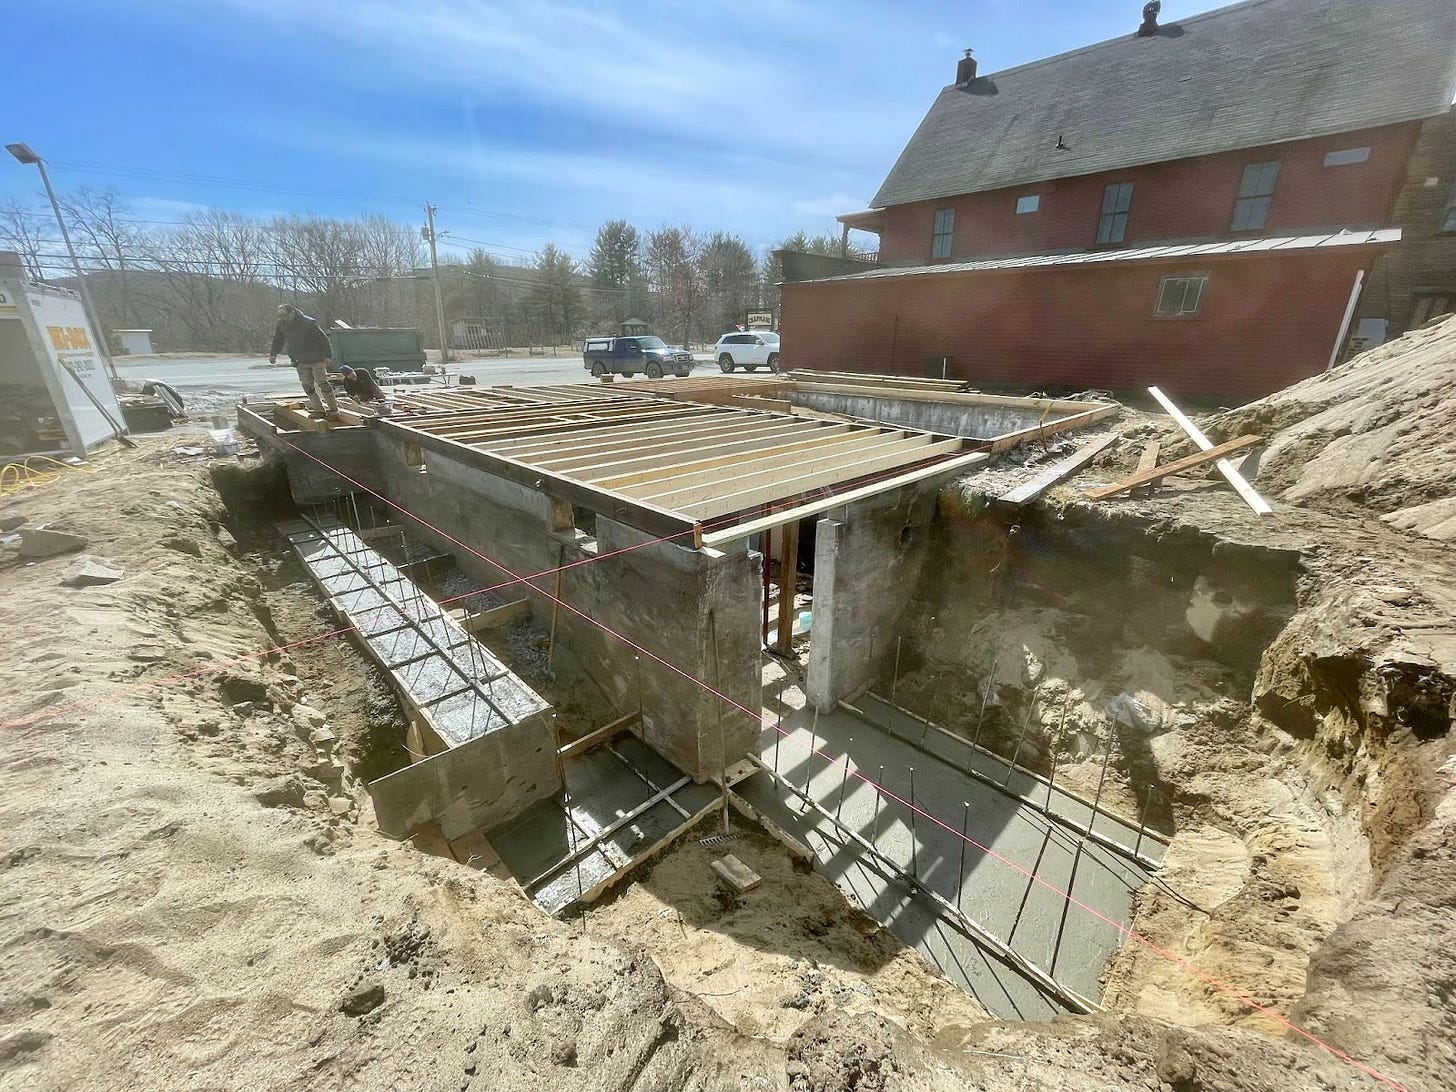
Our First Major Construction Miss
We had our first major construction miss last week at 501 Main.
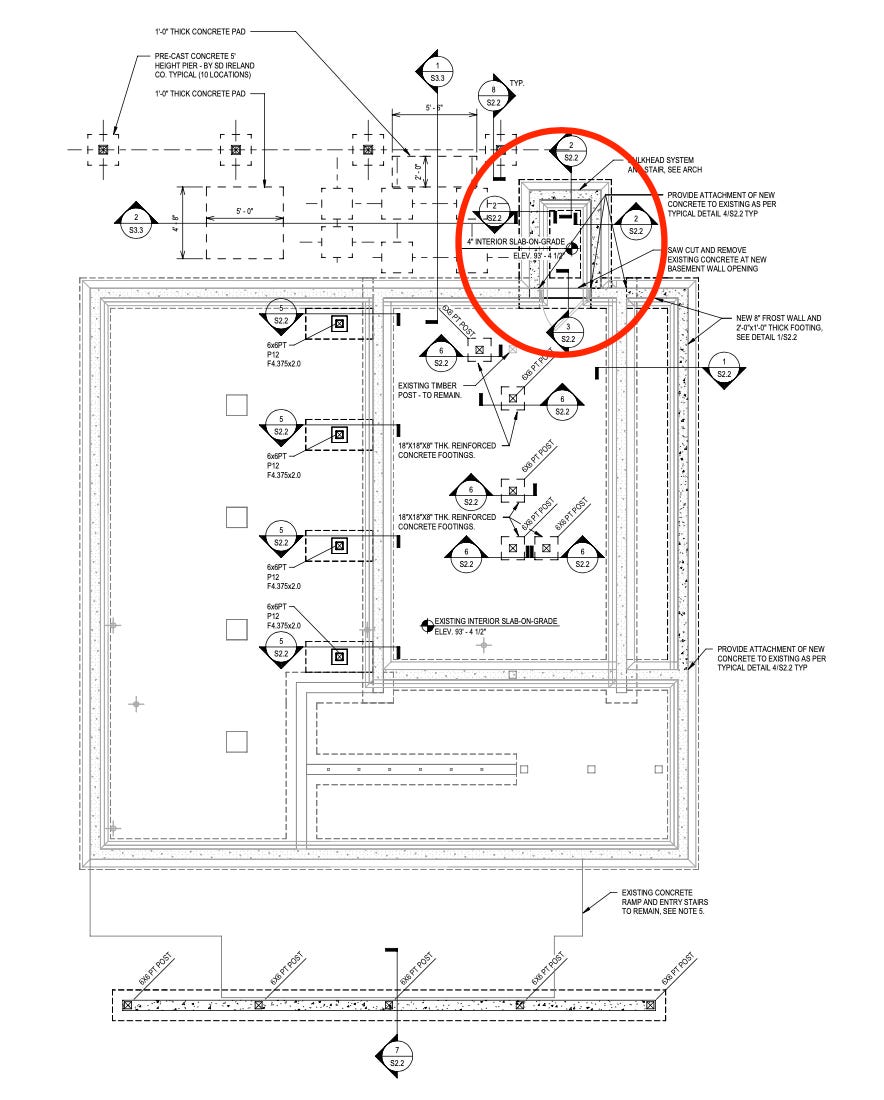
The architectural and structural plans call for a bulkhead extending six feet from the foundation wall to access the basement of the building. Circled below.
We brought the site contractor out last week with his excavator to dig the area for the bulkhead, new frost wall, and interior piers.
We dug the bulkhead area a bit larger—nine feet long instead of six—just to be safe.
Well, it turns out that the extra 3’ didn’t cut it.
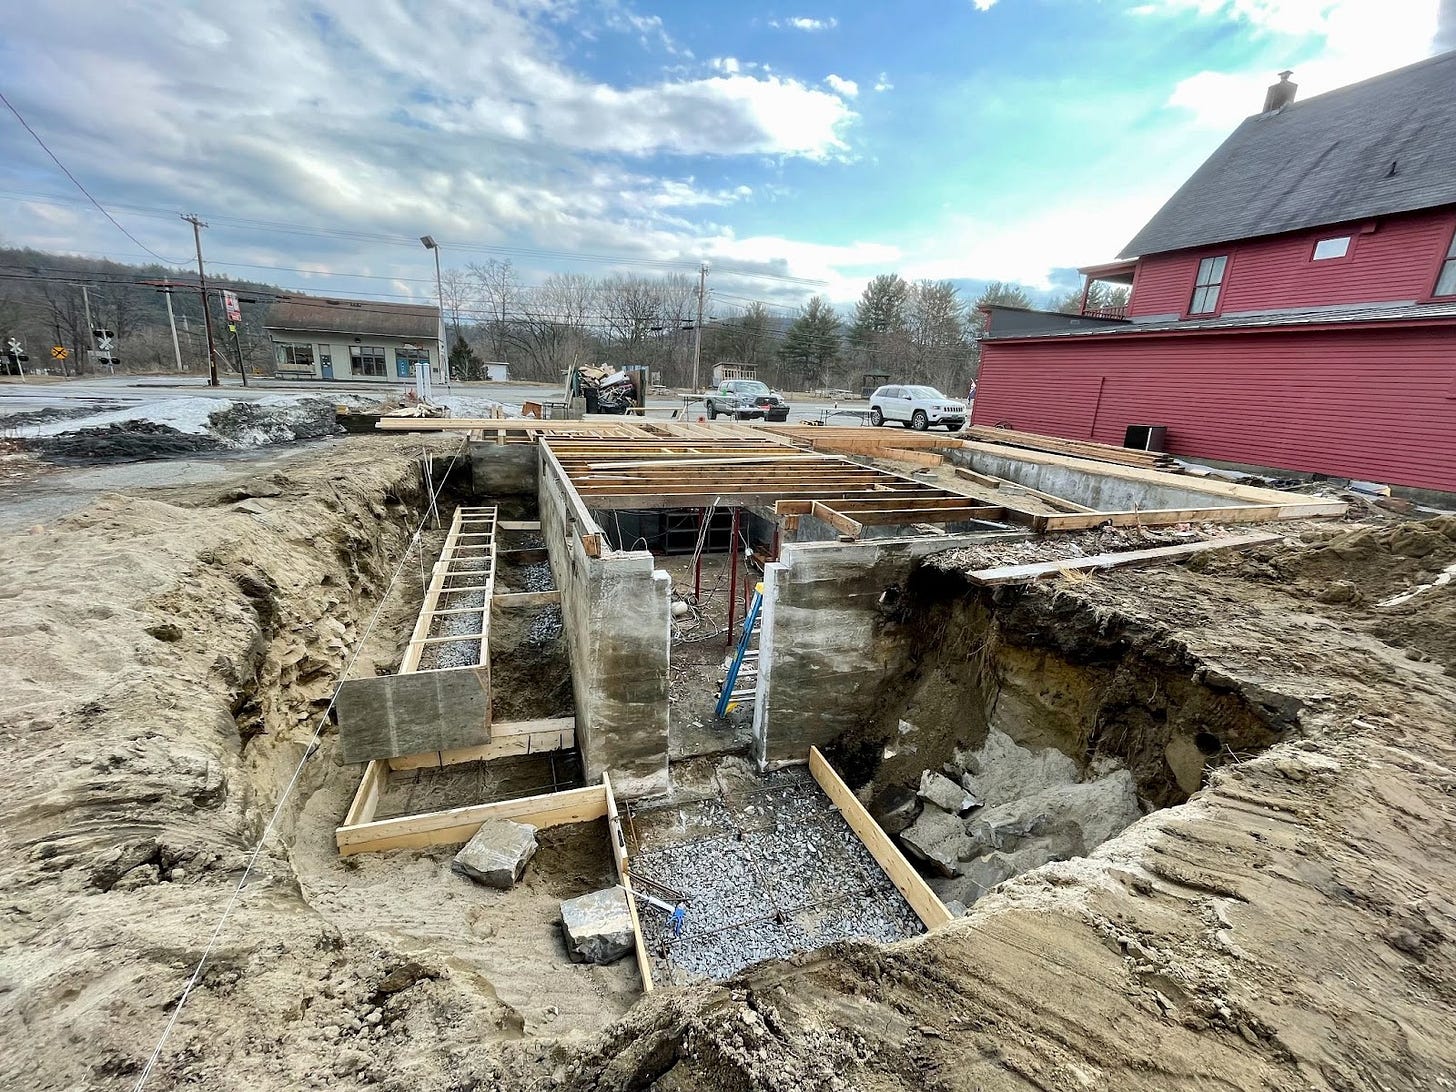
After we built forms and laid rebar (see below), it dawned on us that a 9’-long staircase might be steeper than code allows. After running the numbers on tread depth and riser height, the framers confirmed this.
We would need an additional 3’ to get a code-compliant staircase. That means further excavation extending perpendicular from the foundation. And additional formwork.
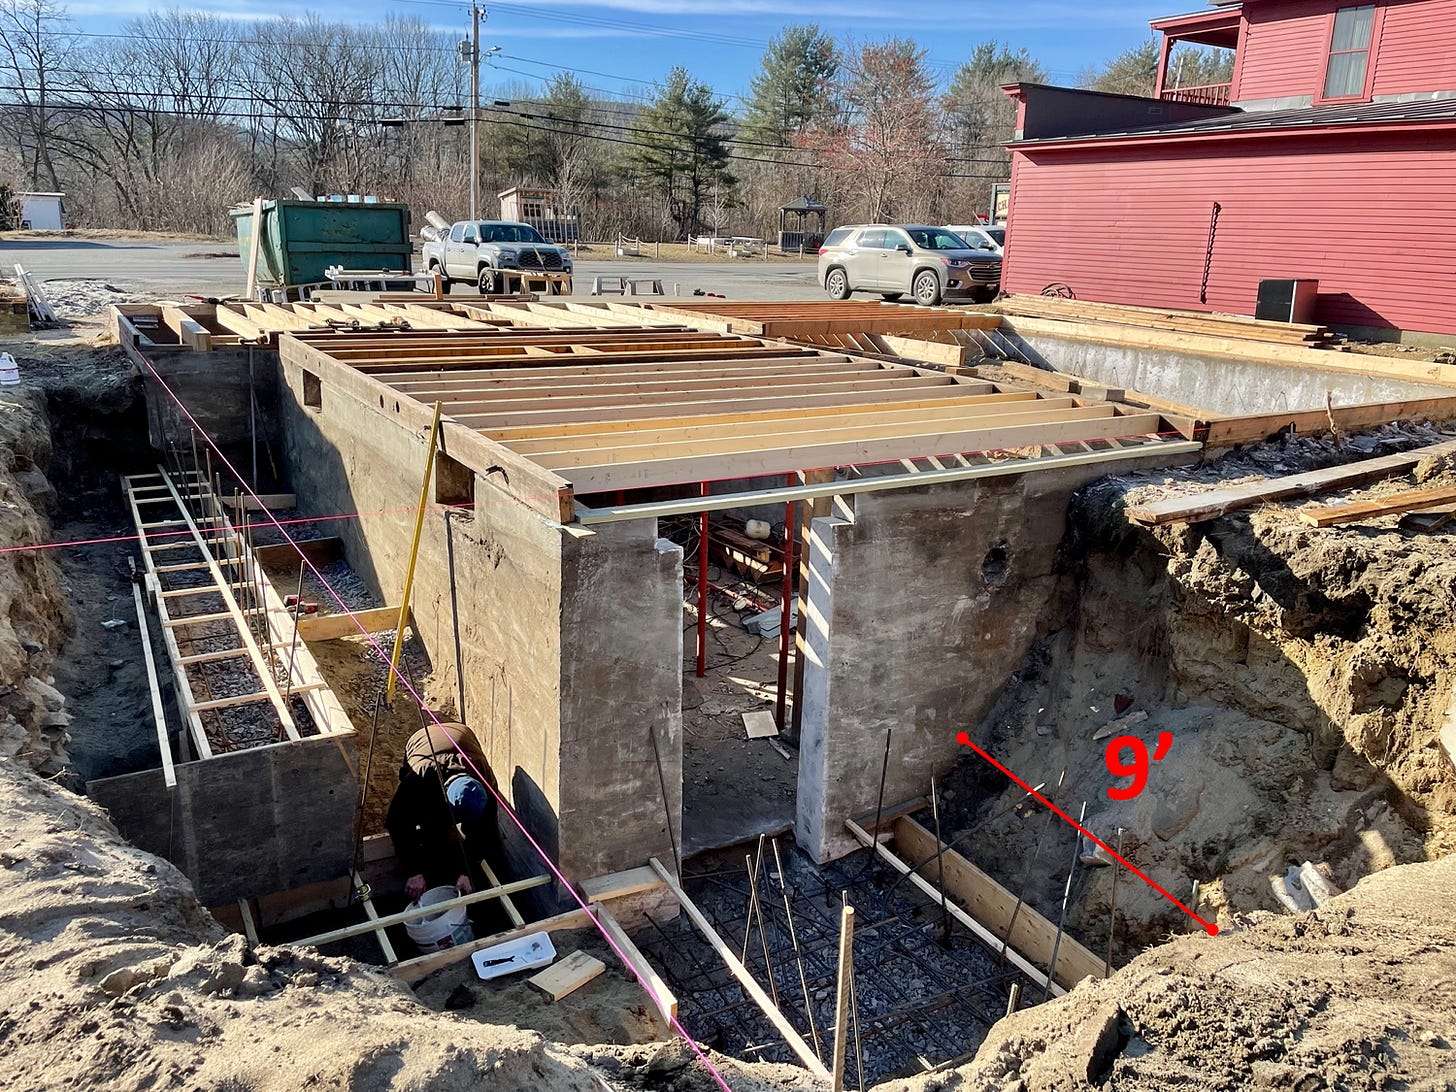
The architects then affirmed this. But, at this point, we were already scheduled to pour concrete the following day. So, we had a couple options:
Cancel pouring of bulkhead slab until we had a chance to excavate the additional 3’, build new forms, and lay rebar
Push forward as initially planned and add the extra 3’ of slab later
A couple considerations at play:
The walls of the excavated area were starting to collapse. It became a morning ritual to dig out the dirt that had fallen into our forms the night before. The longer we waited, the more we risked a full collapse
Every day spent in limbo costs money. Perhaps no labor costs, but there are still holding costs for insurance, debt, property taxes, etc. The faster a project is completed and leased up, the less holding costs incurred
The new frost wall is critical to begin framing the first floor. The bulkhead is not. It is priority getting that frost wall completed so that the framers can start building up
As you might have guessed from the earlier pictures, we pushed forward with path #2 and poured what we could, including what we had formed for the bulkhead slab.
We’ll ultimately double up the excavation of the new 3’ slab with the backfilling of the frost wall in a week or two. This will at least ensure some efficiencies with excavation costs—having the site contractor cart his excavator out for a special trip to dig an extra 3’ would be wasteful.
Luckily, this was more of an emotional, not financial, stress. Yes, there will be added material and labor cost for building a 12’ vs 6’ bulkhead access. But at least we have to undo any work already completed. With a little foresight and collaboration, we were able to salvage the effort and material already invested.
Onwards!
March 6th, 2022
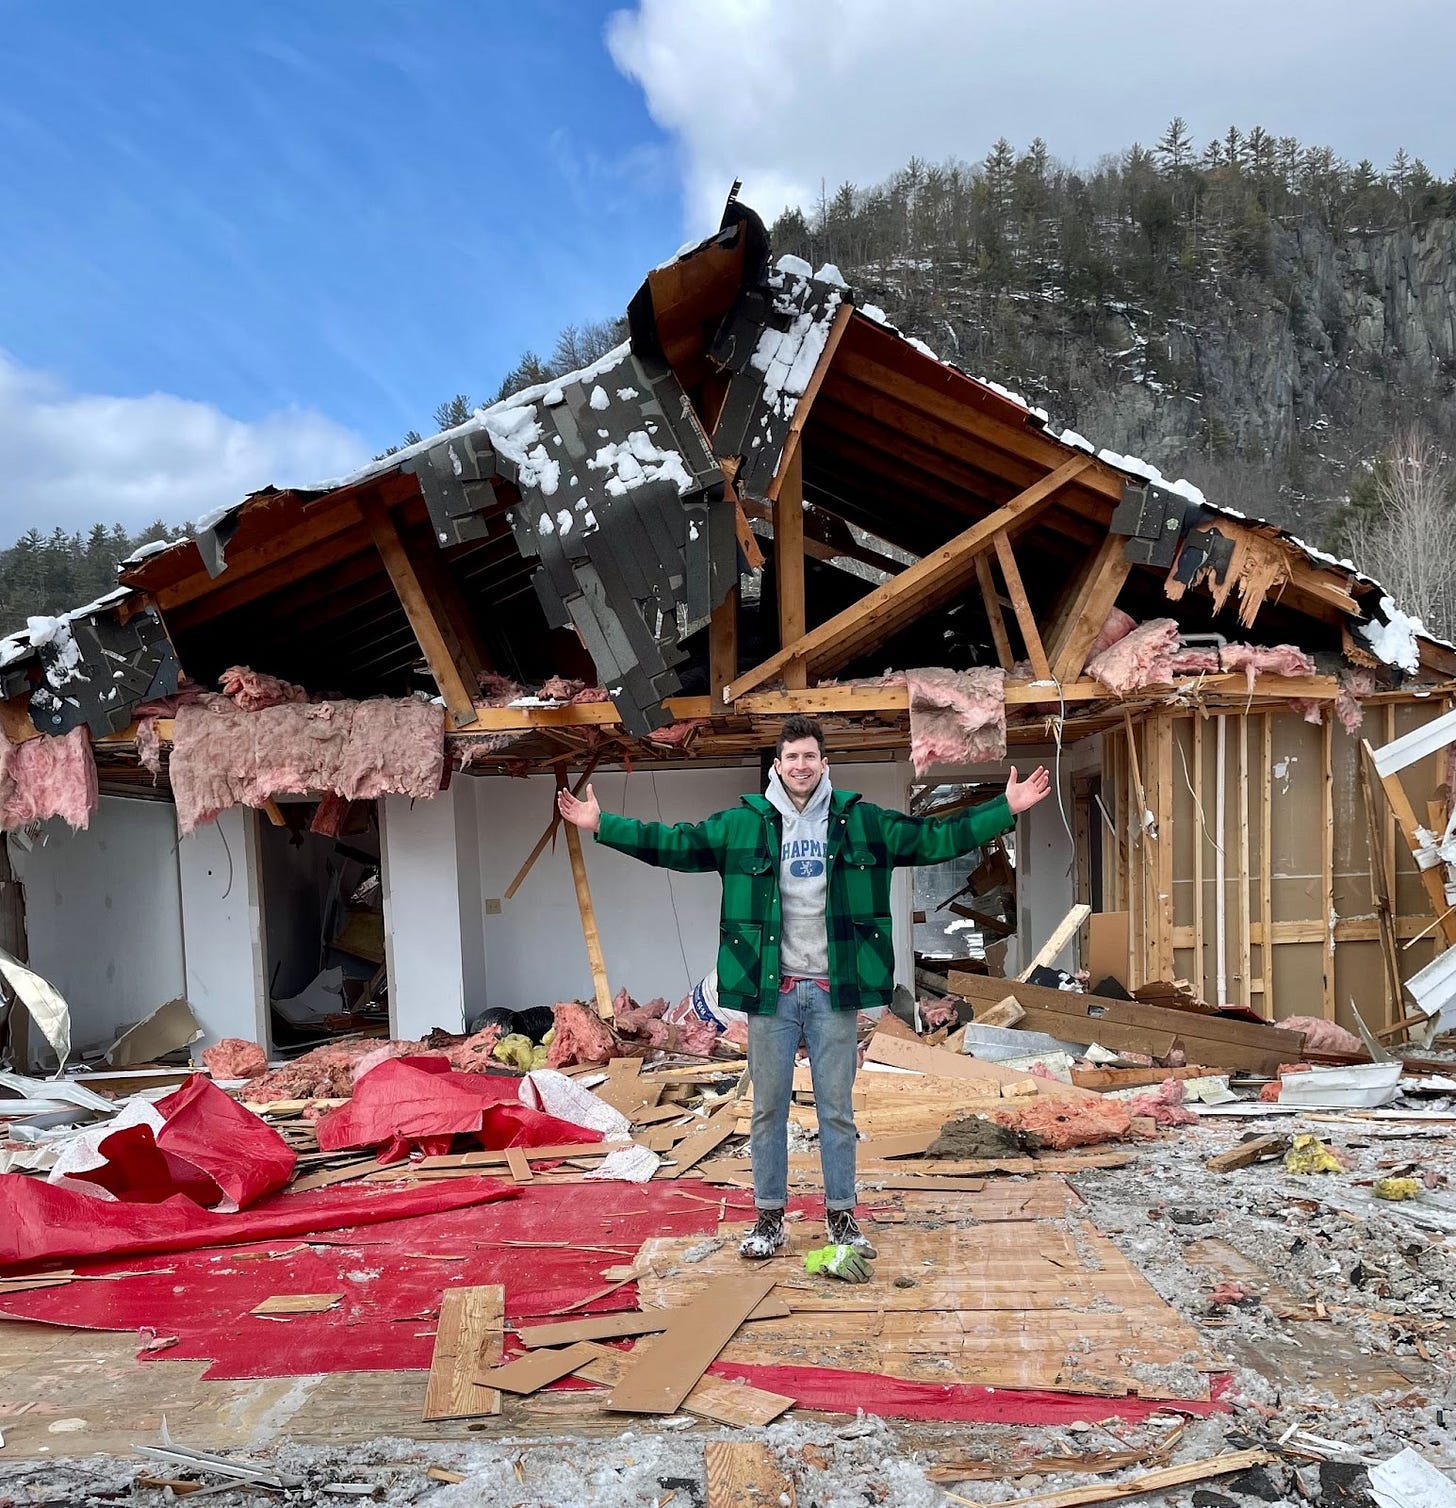
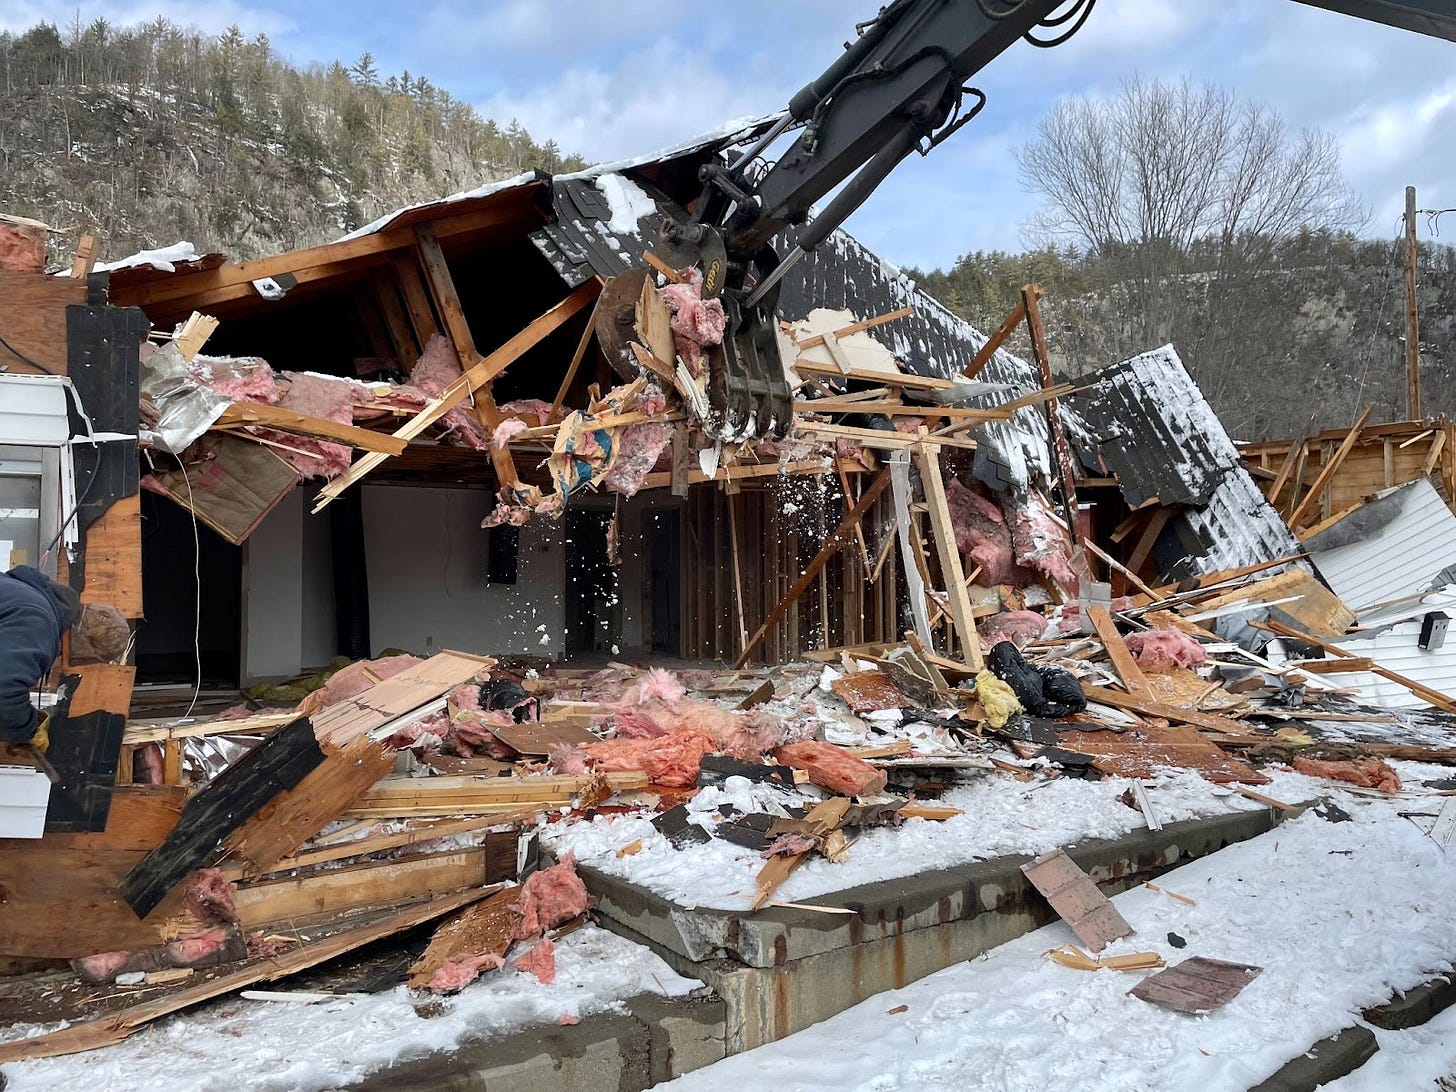
We demolished 501 Main this week and, man, it feels good to see some real progress!
Five hours from start to finish with an excavator. Five hours. That’s it. And four 30-yard dumpsters.
What’s crazy is that I even attempted to deconstruct the building by hand. All-in, I’d estimate that would've taken 120+ hours. With another 20 to de-nail the wood.
Before I came to my senses, I had 15 hours into removing all the reusable items (windows, doors, boiler, etc) and scrap metal. And another 20 into demo.
Solid lesson learned. But I’m still happy we were able to find new homes for most of the reusable items—a homeowner couple took the insulation for their new house and I donated the pile of 1x4 trim board to the local trade school.
The excavator made me nervous knowing we had to keep the foundation and floor system intact. I even went around the building the day before with a skill saw and Sawzall to rip the sheathing at the rim joist.
But, in the end, my site contractor (shoutout to Nate Locke) was flawless in execution. It’s amazing how precise such a massive machine can be with an expert operator at the helm.

The last piece of demo we have remaining is the removal of the subfloor—substantial reinforcement is needed to the joist system to prepare to build up and this will allow easy access to it. We will have to do this by hand.
In parallel, we’ll pour 30’ of new footing and frost wall in order to square off the building (you’ll see in the picture above that the foundation is slightly L-shaped today).
Powering 501 Main
Bringing sufficient electrical power to 501 Main has either been a compelling thought exercise or severe headache depending on the day.
It’s certainly not something I anticipated having to spend so much time on.
If you’re looking at redeveloping a building into a higher use, it’s worth having some sort of strategy defined up front. Because it’s not always as easy as just tapping into the closest power line.
In January, I discussed a few options we were looking at for getting power to the site.
That thinking has continued to evolve. Both as a result of my electrician getting more involved and me learning more about the nuances of supplying power to a building.
For any new development, an electrician will conduct a load calculation—essentially, they’ll add up all the various electrical demands for the project (outlets, appliances, heating system, etc). This number will determine the size of the power service requested from the utility company.
The building previously had a 200 amp service. We will need 670 amps for the new one.
There are a few variables to juggle when mapping out how we’ll run service to 501 Main:
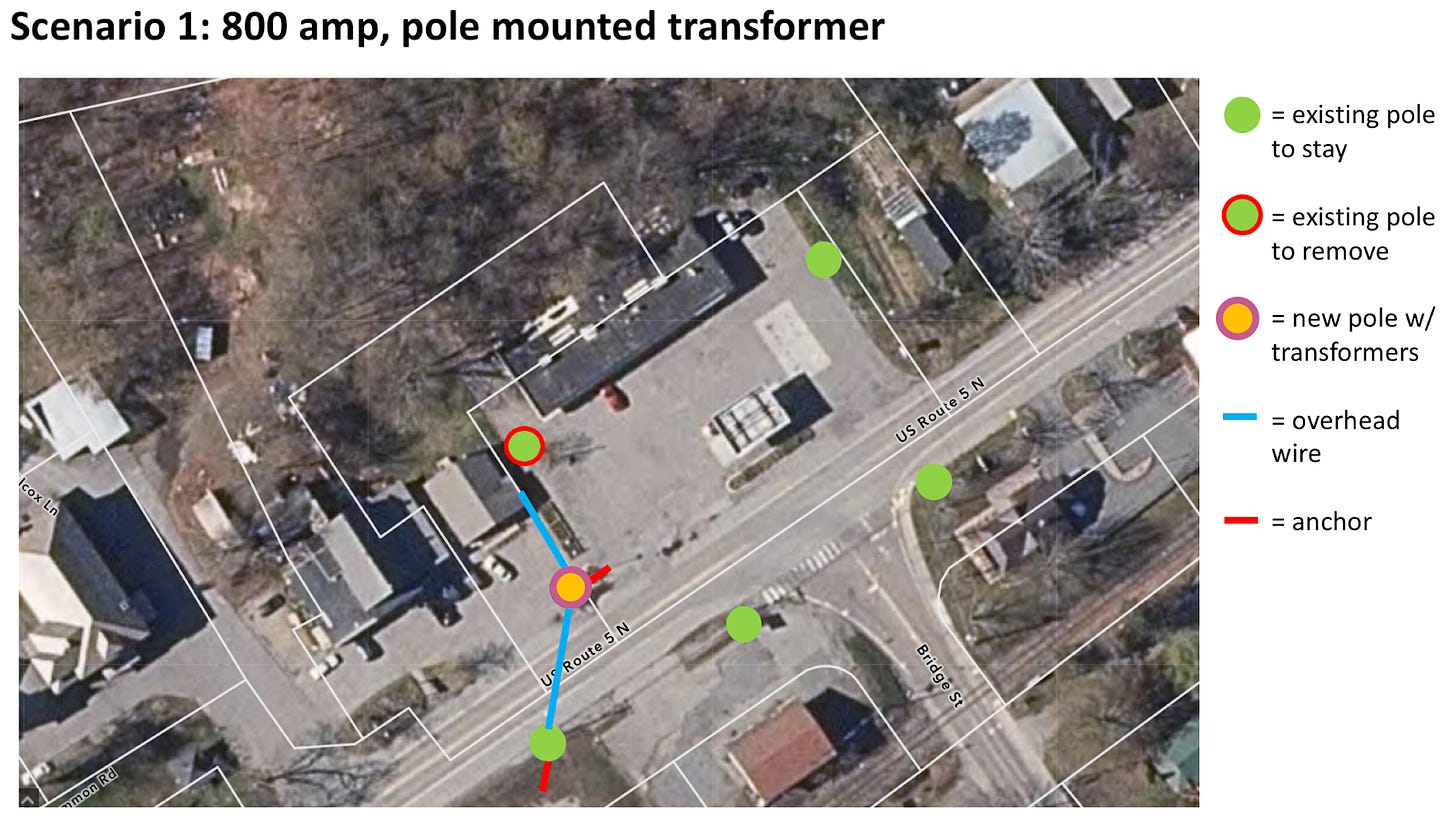
The pole providing service to the building previously sits in the center of the driveway needed to access the new parking lot out back. It will have to be removed
The next closest pole is across the street. An overhead service drop (the wire going from pole to building) can only span 100’ according to VT utility code. Unfortunately, that pole is 110’ away so some intermediary pole will be needed
Utility companies provide power service in increments—for this project, we can either go with 800 amps or 1200 amps. 1200 amps allows for more flexibility with future EV charging but requires ~$20k in additional upfront cost (3-phase power + pad mounted transformer vs single-phase + pole mounted)
Pole anchors (i.e. the metal wires that come off the top of the pole at 45° angles to secure the pole in the ground) need to be accounted for. For example, Scenario 1 below would require anchors extending 15’ from the base of the poles on 501 Main and the property across the street. Permission would need to be obtained from affected property owners before the utility company could proceed
Here are two scenarios I’m looking at. 501 Main is the L-shaped lot in the center.
Scenario 1 costs $4,500 in utility company fees (the customer is responsible for new poles, additional wire installation, and transformer upgrades). Scenario 2 is $7,500. This is outside any excavation or electrician costs to run conduit and cable for the service entry into the building.
The major benefit of Scenario 2 is the ability to eliminate street-side wires and poles that detract from the building’s curb appeal (and view from balconies). This would also eliminate anchors out front which would affect flow and layout of my parking lot.
Still TBD though. A few more conversations to be had before finalizing.
February 25th, 2022
We’re on Week 4 at 501 Main.
Demo is fully underway.
Initially, the framing crew was booked until mid-May. This meant I had the luxury of slow-rolling the demolition and site work before they joined the project.
With a few months to kill, I figured I could deconstruct the building by hand and salvage the majority of the lumber.
But… I got a call last week. Turns out the framers can start sooner. As in, next-week-sooner.
That’s an opportunity we don’t want to pass up. The sooner we can start, the sooner we can finish and avoid holding costs. Two issues though:
We don’t have permits in hand
The building is still standing
There’s not much I can do about #1. We submitted for state permits on 2/7 and were told three to four weeks. We had already reviewed the plans twice with the inspector before submission so hopefully we come in at the lower end of that range.
Regardless, for #2, we need to expedite demolition as I no longer have months to deconstruct stick-by-stick.
So I called my site contractor and arranged to have him come out next week with his excavator to tear the building down.
But, before that can happen, there were a few items to close out:
Salvage as many materials as possible, including windows, doors, boiler, and cabinets. I sold or donated about half within the past week. And then moved the other half offsite while they stay listed on Craigslist
Scrap the metal—electrical wire, HVAC ductwork, copper pipe, etc. Construction dumpsters are priced by the ton so the more weight you dispose of, the more you pay. By scrapping metal, we avoid that cost and get paid a little bit for the material
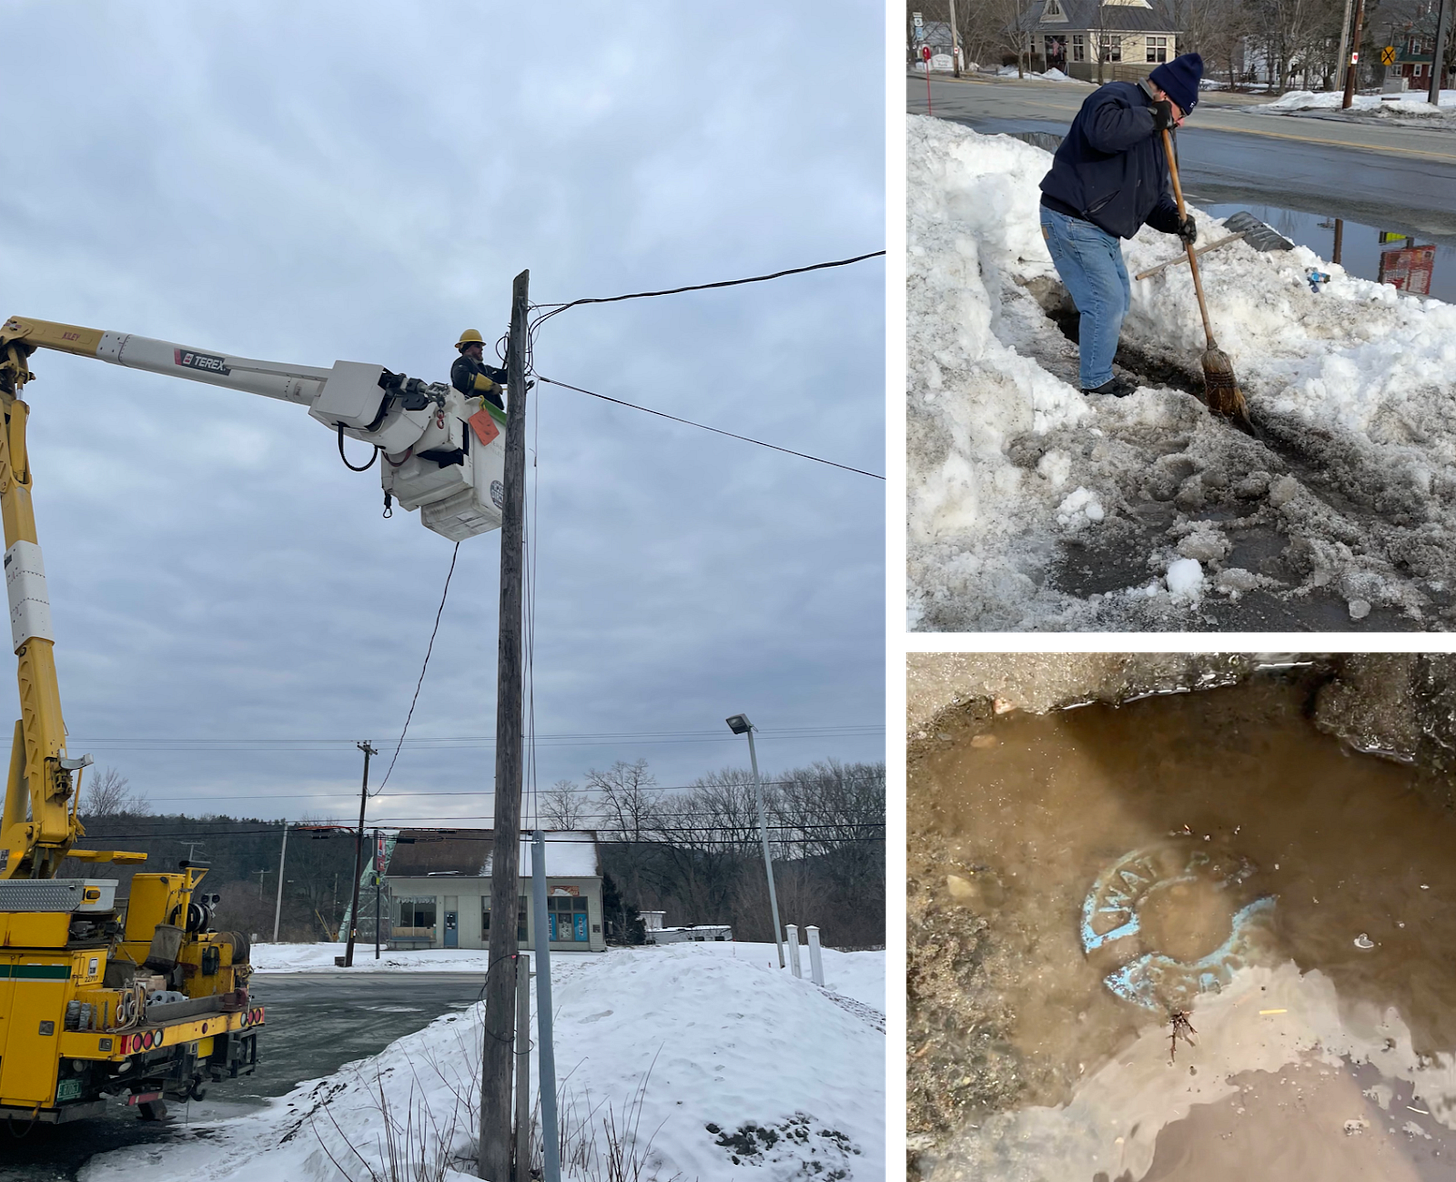
And, most importantly, power and phone lines need to be disconnected. And water shut off at the town main
This week, we focused on getting those things wrapped up in preparation for the final demolition.
Here are some pics.
From left to right:
Progress made on deconstructing the building by hand before changing demolition strategy. I was even able to donate all the 1x4 pine trim to the local trade school for use in their construction projects
Front of building with the windows removed. These were nice wooden double hung windows that I ended up selling
A 15-yard dumpster full of scrap metal. TBD on weight but safe to assume a ton or two. Between not paying for disposal and then receiving payment for scrap, we’re looking at a $500 savings. Not getting rich here but every penny counts!
From left to right:
Utility company disconnecting power and phone lines. We’ll set up temporary power for construction from the same pole once the building is demolished
The shutoff for the town water main was covered under a few feet of snow and ice. After two hours of metal detector probing and heavy shoveling with the town water commissioner, we found it
The little metal cap protecting the water main shutoff valve. A needle in the haystack!
All ready for next week’s fun with the excavator.
We’re getting hit with a big snow storm today so final demolition may be delayed depending on conditions next week.
Budget Breakdown For 501 Main
Let’s open up the books on the construction budget.
Hopefully it’s informative for folks considering their own small-scale development project.
I crafted the original budget in July 2021 as I structured the project, explored viability, and later pursued financing.
As we got further into the planning processes and new scope surfaced, I kept the budget up-to-date. Importantly, any changes were tied back to the proforma, ensuring the development continued to make sense financially.
Before we broke ground a few weeks ago, I conducted a final round of pricing including building materials.
As you might have guessed, we’re running high. In fact, 25% higher than the original budget, or $230,000.
There are two options to deal with an increased budget, both of which likely lead to higher rents:
Take on more debt. This requires ensuring projected rent revenue can cover the increase in monthly debt service
Raise more equity. This dilutes member equity and reduces returns. For this to succeed, you need to articulate the impact to investor returns and secure additional capital commitment from one or more partners
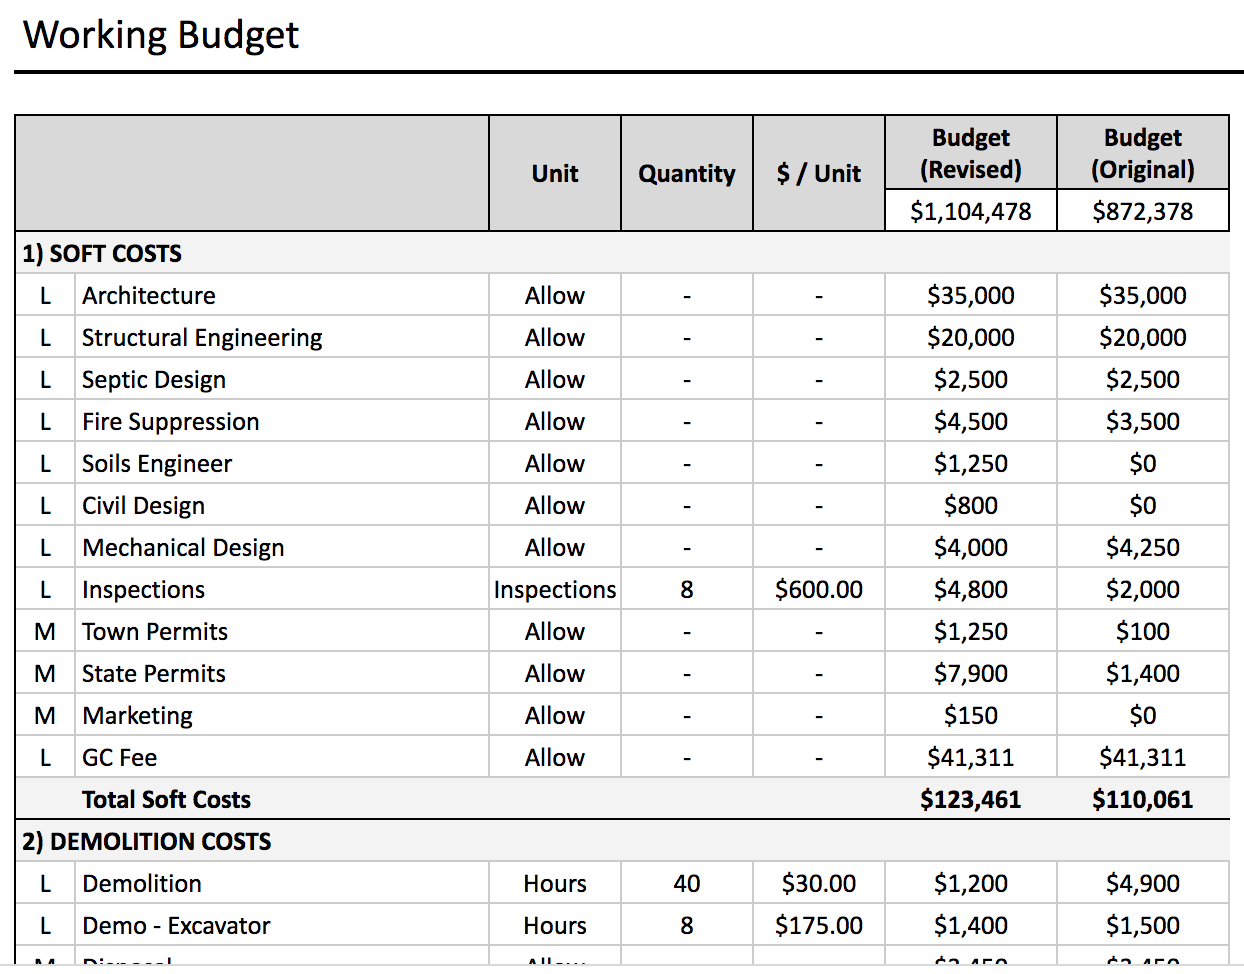
Here’s a snapshot of the working budget. And the full breakdown in case you’re interested.
The big questions then are—what’s driving this increase, how will the funding gap be filled, and what impact does this have on rents?
Let’s start with why we’re looking at such a large increase in budget.
Some of it can be attributed to scope change—addition of one apartment, increased building footprint, expansion of rear balcony to cover ADA ramp, change in roofline to accommodate parapet, and change of siding from cement-fiber shiplap to metal board and batten.
But much of it boils down to components that just weren’t anticipated. Not necessarily because of some massive oversight, though. Details have been naturally hashed out during the creation of the construction documents that were not known back in July. Here are a few examples:
Structural fasteners that were not specified until completion of structural engineering plans add up to $20,000. Take this Simpson ECCLLQ column cap for example—$350 each and we need 12
Double layers of Type X drywall and resilient channel for fire protection and sound proofing added $10,000
Fire-rated windows on the west wall required by the fire marshal added $10,000
The cost of a 10-meter rack (9 units + 1 house meter) is nearly $25,000 due to the need for a custom build. This was a cost not initially anticipated as a part of the electrical budget
Commercial storefront window systems are extremely expensive. I had originally budgeted the cost of residential windows for the retail space. Tack on another $10,000
So, how do we close this funding gap?
This is the stressful part. If you can’t fill the gap, you can’t complete the project.
After some financial engineering, here’s my solution:
$95,000 private note (additional debt)
$40,000 anticipated discount from building supplier by setting up a GC account
$40,000 additional investment capital from partners
$30,000 of my GC/developer fee rolled into equity
$25,000 incentive package from Efficiency Vermont for hitting their high performance building targets
All in, we’re now looking at $292/SF in total project cost (acquisition + holding + construction costs).
How does this cost increase affect rental rates?
Affordable housing for the average 1-person household is $1,100/mo in Orange County ($44,000 in income). $1,250/mo for the average 2-person household ($50,000 in income).
Unless we’re able to find some cost savings during construction (I’m not optimistic), we’re looking at rental rates around $1,200/mo at 501 Main. Utilities would be another $100-$150/mo. Perhaps lower. There will be significant cost savings on utilities when compared to the typical rental property due small floor plans, high performance building practices, and efficient mechanical systems at 501 Main.
$1,200/mo in rent is a bit higher than we’d like to see. Ideally, we could establish rents that are affordable to residents making 100% of area median income (AMI). But, with the way building costs are trending, the units will likely be affordable for households earning $54,000 per year—or 2-person households making 110% AMI and 1-person households making 120% AMI.
Keep in mind, we’ll be providing washers, dryers, and AC in each unit. Along with dedicated 75 SF balconies. So the amenities and location on Main St are more desirable than other rental apartments in the area.
February 13th, 2022
We kicked off demo at 501 Main last week!
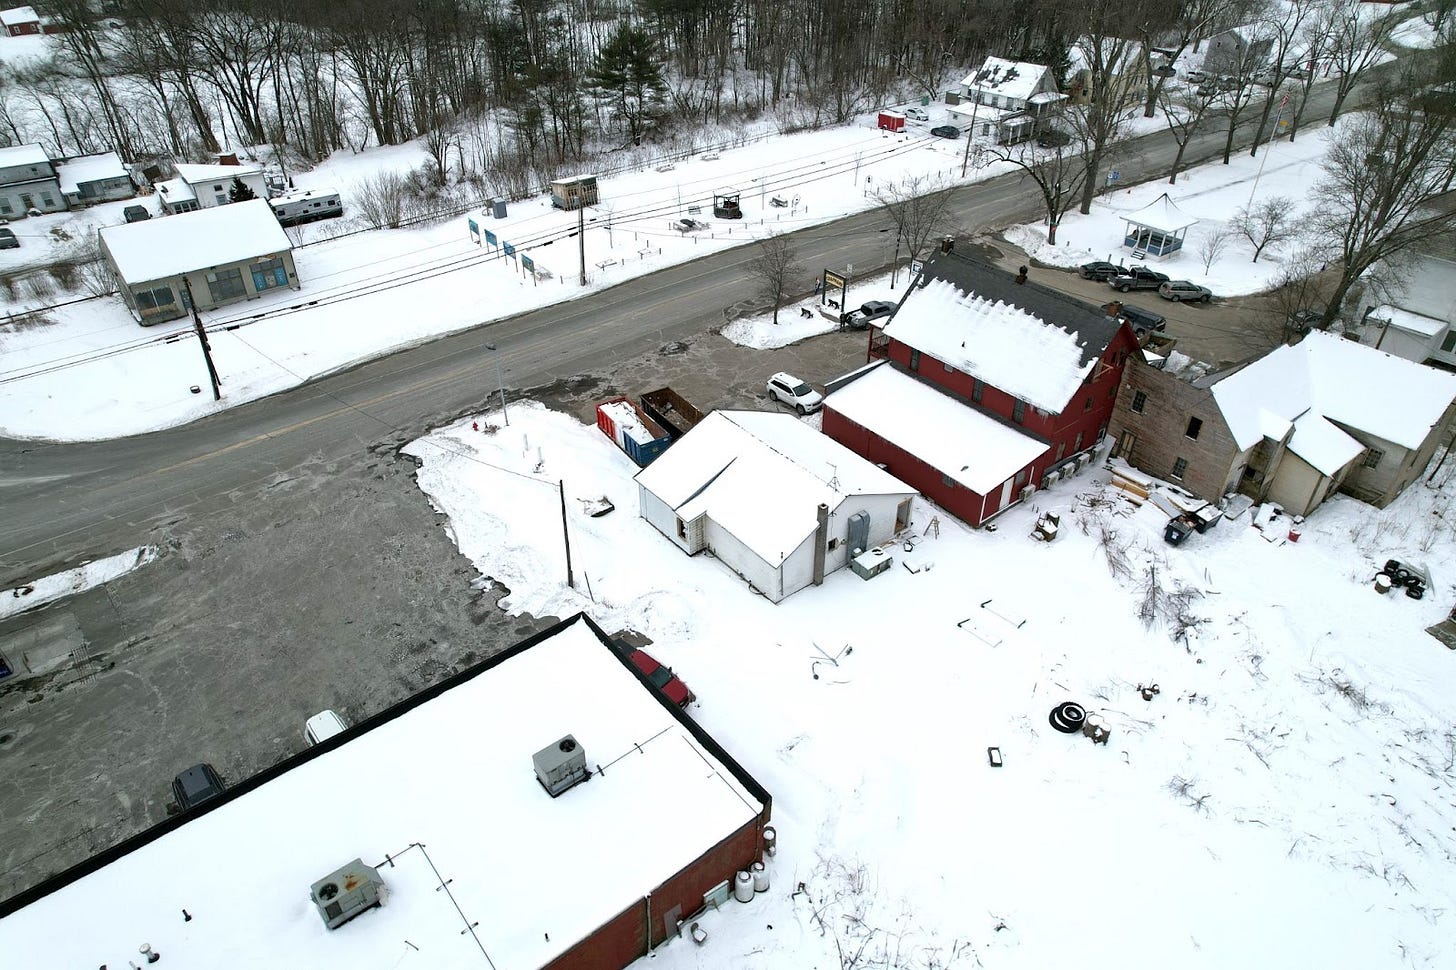
As a refresher, here’s the existing building on the right, a single-story, 1400-SF commercial space on Main Street. We’re redeveloping it into a 3-story mixed-use residential and retail building. Nine units total.
To reduce waste and embodied emissions, we’ll repurpose the existing foundation and decking. This means approaching demolition cautiously.
Instead of the wrecking ball approach with an excavator, we’ll deconstruct the building by hand. And, along the way, attempt to salvage materials and find new homes for them (windows, doors, HVAC, lighting, cabinets, etc).
Hopefully we’ll be able to reuse some of the lumber for this project—2x4s are around $8 at the local building supply company and we’ll need around 1,000 of them. And another 1,000 2x6’s ($12 per board).
After getting latest round of pricing back, we’re creeping up above our original budget. Thankfully, we were able to procure additional funding to cover the gap, but anything we can do to keep that cost down will help in the long run.
The other justification for slow rolling the demolition is because the framing crew is busy until May/June. So we have some time. And I can put in a little sweat equity to cut costs.
In the meantime, we need to take the building down to the floor decking. Then reinforce the foundation and floor system in preparation for building up.
To get a sense of the reinforcement required, take a look below at the structural engineer’s plan for the first floor.
501 Main was first built in 1934, then expanded in 1968. The structure wasn’t built to handle three stories.
But, not to worry. A few additional posts, a girder, and sistering a number of joists and we’ll be off to the races.
******************
Also on 501 Main—I started making short videos to capture the day-to-day on TikTok.
I’ll admit, the videos aren’t great (yet). But take comfort knowing they can only get better.
February 3rd, 2022
For the past two weeks, I’ve been heads down on 501 Main.
Here’s a quick highlight of what I’ve been up to:
Closed on the construction loan after several delays due to travel and Covid (not me, the attorney). We now have our funding in hand to start the project
Received an incentive package from Efficiency VT that helps offset some of the costs to construct a high performance building. This equates to roughly 2% of project costs
Finalized the septic plan and removed the $12,000 pretreatment system mentioned last week
Conducted the final plan review with the state fire marshal (building inspector) before plan submittal. He requested a few additional items not anticipated, including detailed electrical and plumbing layouts
Solicited plans for the new water supply into the building from a civil engineering firm (another item requested by the fire marshal that we had not anticipated). $800 for a single piece of paper showing a 50’ span of pipe running from the town water main to the building. See below for the link to the plans. This is the sixth engineer I’ve had to hire for the project, but who’s counting?
Received final structural plans from the engineer. I’ll admit, these were daunting at first (check them out in the link below). But after 15 hours pouring through them and several meetings with the engineer, I’m feeling good
Started creating a material takeoff and soliciting final pricing for the framing package. Thankfully, lumber prices have fallen since last summer when I last priced this out (e.g. 30% drop in 2x4 prices) but changes to the plans (addition of front and back balconies, individual heat pumps and hot water heaters per apartment, and a more complex roof by mandate from town) have forced an overall net increase in budget
Curious what the plans are looking like at this point? Here’s the full set of architectural, structural, mechanical, septic, fire suppression, and civil plans. While almost final, there are still a few kinks we’re working through (e.g. handrail and guard design).
Total soft costs so far are around $60,000, or 6% of overall project costs. Additional architecture and engineering effort during construction will be above and beyond that. I’ve baked in some allowance to accommodate oversight and input throughout the construction phase.
January 16th, 2022
Septic plans are coming along.
Although Fairlee’s village center has municipal water, it lacks a town sewer. This means each property owner is responsible for building and maintaining their own wastewater system.
There are different septic systems with varying costs and complexity—the choice depends on soil conditions and space constraints.
The first step in the design phase is to dig a few 6’-deep test pits with an excavator. This allows the septic engineer (another $2,500) to check soil composition for compactness and drainage. We completed this step last fall.
The engineer then designs the system based on the test pit findings and the project site plan.
Below is the first draft of a design my engineer developed:
The images are poor quality so apologies for that. I literally received these 2’ x 3’ printouts in the mail and had to scan them with my phone to mark them up and provide feedback. Old school engineer I guess.
If your eyes are glazing over already, I don’t blame you. Most people didn’t sign up to read about septic plans.
But there are serious cost implications that make it important to consider carefully. And, by reviewing and suggesting slight modifications to the site plan, we may be able to avoid $12,000 in cost.
Here’s why.
Because of the way the site plan is laid out, the engineer determined a pretreatment tank was necessary. For the sake of simplicity, pretreatment allows the size of the leach field (i.e. the drainage area which takes up most of the space in a septic system) to be cut in half.
It also comes with a price tag of $12,000.
Tweaking the site plan, though, might allow for the removal of the pretreatment tank. For this to happen, we would need to double the size of the leach field (and the backup leach field).
You’ll notice we have unused space on the right hand side of the property. And it would be much more economical to shift the parking lot over a few feet and cut out the pretreatment rather than pay the cost for pretreatment.
The engineer didn’t point this out. It took me probing with questions and then marking up his plans to communicate a possible design change. This isn’t a critique of my engineer (they are paid to develop plans based on requirements provided)—it’s more so a reminder that no one will care about the success of your project as much as you do. Particularly when operating at a small scale, it’s critical to be involved in the details.
I’m currently awaiting feedback from my engineer but I’m optimistic that we will be able to design an alternative to achieve some cost savings.
******************
We’re also starting to get a better feel for siding materials on 501 Main.
Here is a sketch my architects drew up that includes three cladding materials:
Vertical metal board and batten
Horizontal stained wooden shiplap
Flat metal wainscoting on base of exterior walls
The balconies will be wood framed and finished.
For metal siding, we’re looking at companies like Bridger Steel for sourcing. Here are examples of their batten and flat panel products.
January 8th, 2022
Plans are starting to firm up at 501 Main. We’re targeting submission for the state permit application mid-January.
Funny enough, we’re working with the same fire marshal as 61 N Pleasant. Which I’m sure only adds to the confusion with all the back-and-forth emails and phone calls between us.
Anyhow, here are a couple things happening on that side.
Kitchen design
My kitchen supplier has been working on mock-ups of cabinet layouts. Here are a couple drafts for two of the units. Still a work in progress so no need to point out the flaws in the initial designs :)
Note: Washer/dryer combos cannot be stacked in ADA-compliant apartments. They must be side-by-side to allow access.
A lesson learned
I learned an expensive lesson in order of operations recently.
This summer, I onboarded the fire suppression engineer while the architects were still shaping the floor plans. Given the complexity of the project, my architect suggested we do this. The idea being that the engineer could provide valuable insight on efficient wall and chaseway placement as plans were being developed.
The caveat was that the plans were subject to change as we got deeper into conversations with the fire marshal, town planning commission, and other stakeholders.
Fast forward to December when we had our first meeting with the fire marshal to review the plans (long gap in between due to appraisal delays and municipal approval process). He quickly pointed out that the retail bathrooms did not meet ADA regulations. Based on this feedback, we ultimately had to combine the two retail spaces into one as we couldn't accommodate two full ADA bathrooms.
There are a couple lessons here actually. Perhaps most importantly, make sure your architects are designing to code. But I won’t harp on that as there will always be a few things that get overlooked.
Second lesson here is to watch out when different trades and engineers are being introduced to the plans. Once we realized the ADA design mistake, I sent the updated plans to the fire suppression engineer who responded that these were significant changes beyond the allowance in the original scope of work ($3,500). Another $1,000 in time would be needed to modify the plans. Although some of this cost is also due to the shift from one bedroom to studio units in four of the apartments.
In retrospect, I should not have engaged the fire suppression engineer until the architects and structural engineer had completed their plans. I’m still kicking myself—I’ve never seen $1,000 evaporate so quickly.
But the only path worth following is forward so I'll write it off as an educational lesson. I’m sure there will be plenty more.
Electric service
Moving away from onsite fuel consumption for heat, hot water, and appliances to electricity is a great goal—simplified systems, ease in submetering, and less emissions (depending on your utility provider).
But the electricity loads that come with it are insane. As we dig deeper into the electrical scope, we’re potentially looking at a 1,200 amp service (the average house is wired for 100 amps). Because of the high load, primary service (i.e. a big pole and an ugly transformer) will need to be brought close to the building.
The initial guidance from the utility company was that a new pole carrying primary service would need to be installed directly in front of 501 Main. Although all this focus on façade design and cladding materials seems futile if we’re going to clutter the aesthetics with a bunch of wires and a transformer.
One alternative would be to bury the cable, but that would mean boring underneath Main Street and running 150 feet of expensive wire. Unless we were developing luxury apartments at $3,000/mo, no budget would be able to support that cost.
Alternative #2 is potentially more appealing. Next week, I’m meeting the field tech from the utility company to discuss running the service behind the adjacent gas station. This would require the installation of a new pole or two. However, they would be hidden behind the gas station.
We’ll also discuss installing a pad-mounted transformer but that still doesn’t solve the issue of how to bring the power to the site. We’ll need some poles installed no matter what.
Here’s a quick look at alternative #2 for getting service to the building:
December 6th, 2021
We’re getting close to finalizing floor plans for 501 Main.
At 1,400 SF per floor, space is tight. We’ve had to get creative with layouts, systems, and appliances. And we’re now at the point in the process where everyone is scrutinizing the plans: architects, engineers (mechanical, structural, fire suppression), electrician, plumber, and HVAC contractor.
Here are some examples of the types of issues we’re collectively working through:
Because we’re building such a tight envelope, mechanical ventilation is needed. Do we go with an Energy Recovery Ventilator (ERV) or a Heat Recovery Ventilator (HRV)? Individual units per apartment or a central ducted system in the basement? Each option has downstream implications for air sealing, moisture control, and framing.
We chose a central HRV system (HRV because we want to expel excess moisture in the winter; central system to minimize number of holes in the outside assembly and reduce maintenance requirements), but that requires ductwork. The 16” x 16” chase originally built into the plans isn’t big enough so where can we capture an additional 12” x 12” of space to run the ducts?
The ground floor plan was so tight it became difficult to accommodate the basement staircase. We opted to go with a bulkhead on the back of the building. This adds scope (concrete work, materials, complexity), but frees up high-value interior space that can be absorbed by one of the apartments.
Vermont building code requires both of the ground floor apartments to comply with the Fair Housing Act for handicap accessibility. The fact that the federal government has a 334 page design manual says it all. Accessible design is not a walk in the park and careful attention must be given to the guidelines upfront to avoid rework later on.
All this optimization of spatial arrangements has made two things clear to me.
Development of small apartments causes brain damage. Each tweak in the design requires intense rationalizing. Every component is interconnected to the extent that even a slight modification in floor plan could have major downstream impacts. Want to move that wall back six inches? Watch out that it doesn’t affect the load transfer from the roof or interfere with plumbing runs or handicap requirements. Numerous stakeholders now need to be consulted each time a change is proposed (engineers, architects, contractors, etc). This is normal for any development, but is more pronounced when size constraints are introduced and there is inherently less flexibility.
Decisions need to be made using a cost-benefit lens. At $2.50/SF/mo in rents, residential space generates 2.5x more revenue than retail ($1.00/SF/mo) in my area. Hallways and common areas generate $0.00/SF/mo. The way the numbers work for 501 Main, we simply cannot afford to keep the entire first floor as retail—there has to be a residential component. But, retail is critical to fostering a great village center so it becomes this careful balance of what ratio is both appropriate and affordable. Every decision needs to tie back to some tangible (i.e. financial) metric that aligns with the goals of the project.
What to take a look at the latest floor plans? Check ‘em out here.
******************
Another problem now in need of a solution at 501 Main is kitchen layout and appliance selection.
I allotted each apartment roughly 10 feet of kitchen space. Apartment 1 (above) is special, and was generously awarded almost 14 feet. But most of the others clock in at 10’.
Keep in mind we’re working with unit sizes between 350-500 SF. Unfortunately, we lack the luxury of offering anything as decadent as a kitchen island. Instead, we need to scale back appliance sizes and drive efficient usage of space.
Each kitchen will include a clothes washer, a heat pump ventless dryer, an electric range, and a refrigerator. EnergyStar, compact appliances and WaterSense fixtures where applicable. Dishwashers were a nice-to-have but, given the space constraints, they were the first piece of fat to get trimmed.
I struggled initially on how to best communicate my ideas for interior layouts to the kitchen supplier and architects. Small apartments are not as common here as in urban areas, and I was concerned that my proposed 10’ kitchen may be interpreted as the equivalent of a dog cage in a crawl space. I know based on my own apartment experiences that small kitchens can be successful (without any resemblance to a dog cage) but I recognize that I’m not in the majority here.
Enter PowerPoint, my old friend. I continue to be amazed with how flexible of a tool it is. I spent five years in consulting using it to prepare client presentations and thought I would put it to rest—or at least on the back burner—as I pivoted into real estate development. I thoroughly missed the mark there.
PowerPoint not only allowed me to shape my investor and lender pitch deck, but also provided me with a way to update the site and floor plans on the fly, create draft roof assemblies, and now communicate ideas for interior elevations (to scale, by the way). Sure, there are more specialized, professional tools that an architect or interior designer will pay for. But, as a small development shop trying to keep costs down, I don’t need all that. I just need a way to effectively share my vision and direction.
If PowerPoint isn’t in your toolbox, you may want to reconsider.
November 25th, 2021
Appraisal is in!
We hit another milestone this week with the post-construction appraisal coming in at $1,075,000. That’s a little over $100,000 more than what we needed to close on the $700,000 construction loan.
For the real estate investors out there, that puts us at a 7 cap for the project. And for those not as in the weeds of real estate finance, here’s a primer on cap rates and why they’re important in real estate.
Almost 16 weeks of waiting. 16 freakin’ weeks! For four months, I sat in the dark on whether the capital structure I meticulously devised would hold. The capital structure hinges on the completed value of the project, an amount that’s determined by the appraiser. Up until this point, the pro forma is really just a collection of (educated) assumptions—the first validation (of many) doesn’t occur until the appraiser submits their opinion of value.
If the appraisal had come in lower than anticipated, that would’ve been a major blow for the project. Two things would have then had to happen:
I would need to reconsider whether the project is actually feasible. If an appraiser is valuing the building lower than you are, that’s a good sign that you’ve overlooked something critical. That said, I did catch an appraiser low ball a refinance on another project last year by 20% and had to write up my own report to convince him why he was undervaluing the project. Against all odds, it actually worked. But that’s definitely the exception.
If I still thought the project was sound after revisiting the numbers, I’d then need to go back to investors and raise more money. The bank will only lend up to 75% of the appraised value so the added gap between debt funding and project costs would need to be filled by more equity. This would dilute ownership shares and lower the returns for investors. Not a great way to start off a project.
Those 16 weeks created an excruciating period of limbo. Not only because of the reasons above. This period also overlapped with the stage in the development process where the architects and engineers should have started drafting the construction set. That is, the final plans we’ll submit for permitting and construction.
This stage is where the majority of the $50,000 in architecture and engineering (A&E) costs are incurred. So you kind of slow roll the A&E while you wait to get confirmation on the appraisal because it would only add to the pain if you shell out tens of thousands of dollars for plans only to find out the project isn’t financeable. Ideally, the appraisal would have only taken a few weeks so that this overlap could all be avoided but, alas, that’s just not the world we live in now.
Regardless, that’s all moot now.
Pause for a big sigh of relief…
And now the final push begins to submit our permit application in January.
******************
State tax credits are all the rage for small development projects. Have a funding gap? Looking for ways to make your project feasible financially? Go get some state tax credits. Granted, it’s a competitive process but free money is never easy. The thing is—actually using the credits once you’ve won them is a bit more complicated than it might seem on the surface.
I shared previously that 501 Main was awarded $86,000 in state tax credits (the project even got a mention in the regional paper). The program is designed to support the revitalization of historic buildings in designated downtowns and village centers throughout Vermont.
I’ll share a bit of my ongoing experience the last few weeks figuring out how to actually use these tax credits. Because it’s not like the state just hands you a check and says bon chance.
Note: my experience is limited to Vermont’s Downtown & Village Center Tax Credit program. Every program will have different stipulations on how the credits can be used and/or sold.
Ok. So first of all, they’re state tax credits. Meaning they provide a dollar-for-dollar reduction in state tax liability. This is great if you’re a business (or person) that pays $86,000 in state taxes each year. Unfortunately, I’m nowhere close to having that problem.
Furthermore, the credits are issued only after construction is complete. We have commitment on the award now, but need to prove the work is complete before actually receiving them.
Unused credits can carry forward for nine years but that still doesn’t solve the immediate funding problem. That $86,000 is a key part of the project’s capital stack and that funding is needed during construction. We need to find some way to turn the credits into liquid capital.
Luckily, our state tax credits can be sold to any business that has the appetite to use them. Typically, that’s a bank or insurance company.
The solution to the liquidity issue is actually two-part:
Find an institution to sell to and get them to provide a commitment letter to purchase once construction is complete and the tax credits are issued
Find a lender to provide a bridge loan secured by the above institution’s commitment letter. This will provide the liquidity to use the tax credit award during construction
Believe it or not, this isn’t some backdoor hustle I just came up with. It’s actually standard practice, especially for smaller developers that rely on the credits for construction expenses.
In theory, you would try to bundle the tax credit purchase and bridge loan with the construction financing so that a single bank is handling the whole burrito. I was late to the fiesta, though, and found out only after we had secured a commitment on the construction loan that the lender had zero interest in getting involved with tax credits.
As it turns out, there aren’t many institutions that are interested in purchasing and lending on such a small tax credit. It’s almost too much of a pain for them to make it worth their while. So I’ve spent the last few weeks reaching out to and speaking with 10+ institutions and, of those, I landed one lead on a tangible solution.
But one is all you really need to make it work.
Fortunately, I found a bank that will both purchase and provide a bridge loan. The downside is that they’ll only pay $.90 on the dollar while also tacking on a 5% interest rate to the bridge loan. Meaning we’ll only actually be able to capture around $73,500 of the actual $86,000 award.
That’s $12,500 lost right off the bat. I won’t pretend to understand the state’s economic rationale for structuring the award as a tax credit but I will say that it is inefficient. Why not make the award a grant? The state could continue to issue the awards following project completion to avoid fraud while still necessitating a bridge loan. But at least the recipient could avoid paying 10% to an institution that acts like they’re doing us a favor by taking the credit off our hands.
Don’t get me wrong. It’s a great program as-is. It’s impossible to complain about free money. And plenty of impactful projects would go unfunded if the program didn’t exist, including 501 Main.
But if the goal is truly downtown revitalization and the state is issuing $5M of these awards per year, then ~$500,000 of that is going straight to the bottom line of large institutions. Or, the equivalent of six 501 Main projects that could have been funded if the program were structured more efficiently and didn’t require skimming 10% off the top.
November 11th, 2021
WE DID IT.
After three meetings, six weeks, and a healthy amount of hair pulled, we received site plan approval from Fairlee’s Development Review Board (DRB) for 501 Main (see post from October 30th for details on the previous hearing). Conditional, of course, on a few items:
Read the full conditional approval letter from the DRB.
Getting here wasn’t all roses and smiles though.
Daniel Herriges at Strong Towns recently wrote a fantastic 5-part series called Where Did All the Small Developers Go? One of the reasons Herriges cites for this disappearance is regulatory barriers and red tape in the zoning process.
I experienced a bit of solace reading through this series, which happened to be released mid-zoning process for 501 Main. Not only was there an element of commiseration with other small-scale developers in similar predicaments, but Herriges’ recounting the success stories of towns overcoming these obstacles provided a much needed light-at-the-end-of-the-tunnel.
The process of getting this conditional approval from the DRB was more arduous than I expected. And, frankly, more so than I believe was warranted—especially given that this project is directly in line with the approved town plan, has the support of the Selectboard, and would be one of the first major developments in the Village Center in decades.
I fully appreciate the need for due diligence that ensures the right kind of development is being pushed forward. That’s a fundamental responsibility of the DRB. The friction here was not necessarily due to the rules themselves being restrictive, but because the subjective interpretation and application of those rules was.
I will absolutely acknowledge the fact that sitting on the DRB is a thankless job (any public servant position in these small towns is for that matter). These men and women are all volunteers that choose to spend numerous unpaid hours of their week making critical decisions that shape the future of the town. And I applaud them for taking on that role.
That said, in reflecting on the process, I saw three red flags that concern me:
Restrictive interpretation of bylaws. The bylaws—whether intentional or not—lack specificity in some instances. For example, a setback is defined as the “distance between a structure and a lot line” in the Fairlee bylaws. It is unclear whether the measurement starts from the base of the structure or the termination of the drip edge. We had proposed an 18” drip edge to enable integration of solar panels into the parapet design but were informed by the DRB that the drip edge could not extend beyond what exists today due to its extension into the setback area. Because that would increase the degree of non-conformity, it was implied that this was out of the question. The DRB could have chosen to interpret the setback definition so as to exclude a reasonable drip edge. Instead, we were forced to reduce the depth of our drip edge, rethink our parapet design, and consequently remove the rooftop solar component.
Inconsistent application of bylaws. Trash receptacles should be screened from the view of abutting properties and public roads. That’s a fair ask. In our site plan, we positioned the refuse area in a way that was tucked in a corner behind the adjacent commercial building and a stand of hemlock trees. This would have sufficiently screened it from the road and neighbors. However, the DRB chose to require a three-sided stockade fence be constructed around the perimeter of the trash area. That’s added cost for no tangible benefit as the area is already naturally screened. More alarming, though, is that the 7-11 next door has two 6 cu. ft. dumpsters directly outside the station in plain view of the road and town. And a small commercial development that was approved last year has done the same thing—no screening yet in plain sight from the road. Why the inconsistency?
Absence of collaboration. Perhaps the most shocking part of the process was the first five minutes of this week’s DRB hearing dedicated to the chair of the board admonishing me for soliciting inappropriate zoning guidance from him outside of a formal hearing setting. This struck me as particularly strange and insular. If I receive feedback from the board on part of my application via email, I’m naturally going to follow up with clarifying questions. My main goal is to stay aligned with the board and to make sure we are unified in our pursuit of a great development—especially when the town’s zoning code lends itself to ambiguity and interpretation. Perhaps naively, I had hoped this would have been a collaborative process.
There’s an adage called Hanlon’s razor that goes: “Never attribute to malice that which is adequately explained by ignorance.” (Shoutout to Tim Ferriss for the reference).
I don’t believe my project was singled out due to spite or that I was targeted in any way. I think the issue is more philosophical as to what it really means to be a member of a Development Review Board. Is the goal to resist change because the status quo is comforting or to promote smart growth that aligns with the town vision and provides real value to the community at large? Two different mindsets, two different outcomes.
And that’s just it—after this whole charade, I’m just not convinced everyone on the board truly understands the vision that has been developed both by the town and for the town. That’s a real problem. For, if true, then future projects brought forward by other small-scale developers will be met with the same resistance that I faced.
Every small development matters in towns such as Fairlee. And any artificial obstacles inserted within the process only go to further jeopardize the chances of bringing new projects to light—incremental projects that would, collectively over time, have the power to transform our town.
Perhaps it’s time for a bit of change.
------------------------------------
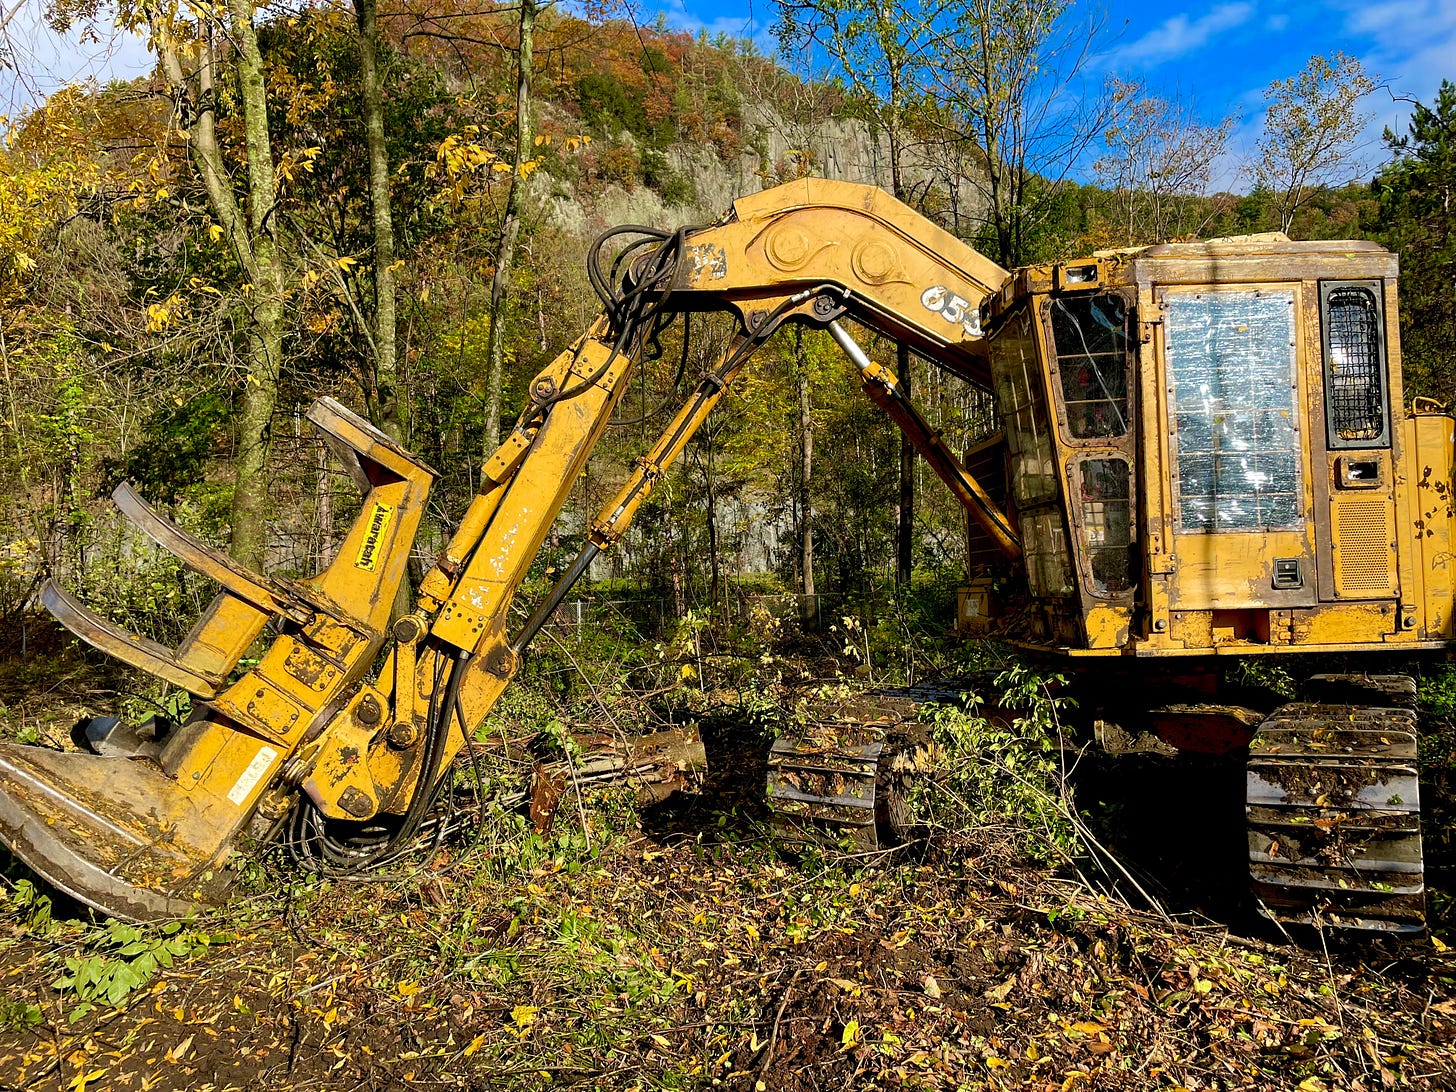
Tree fellin’ came to a close this weekend at 501 Main. After hitting pause for a few weeks, the loggers were able to finish up clearing the two acres behind the property (see my post from October 24th for more context).
I happened to stop by as they were doing the final push, jumped at the opportunity to take the drone out, and then quickly managed to crash it into the one of the few trees that we decided to leave standing. Just trying to get that perfect shot that I’m obviously undeserving of.
Thankfully, DJI makes a resilient product that doesn’t balk at falling 15’ out of the air as well as propellors that easily snap on and off. Four new propellors to the tune of $25 and I’m back in business.
Here’s an Instagram video of one of the last big trees coming down. Timber!
And here are some before and after photos of what the property looks like. It’s like watching one of those skin care infomercials except without all the Photoshop.
The green overlay above represents the boundary lines of 501 Main. Parking will be tucked behind the gas station (site plan here for reference).
One of the next steps will be to remove all the smaller brush and tree stumps that were left in the wake of the loggers. And then to do some site grading. All sorts of strange craters, contours, and debris built up back there over the decades that need to be cleaned up and leveled out before any further work can be done.
October 30th, 2021
The long awaited public hearing with the Development Review Board (DRB) for 501 Main finally happened this week. And it was a bit of a mixed bag.
For context, here is the site plan we submitted for review.
After an hour of discussion, the board ultimately chose to recess the hearing for two weeks. They felt there was enough information missing from my initial submission critical to their decision-making process to warrant postponing it.
Here are the five items that need to be addressed:
#2, #3, and the first half of #1 are understandable. Those probably should have been included on the initial pass. But also—these plans were submitted and presumably reviewed weeks ago. It had been communicated to me that there would be back-and-forth between the board and I should there be additional information needed in the time leading up to the hearing. These could have been easily addressed in advance.
The second half of #1 is interesting. The architects had the idea to extend the parapet out 18 inches over the exterior walls in an effort to accommodate rooftop solar. Essentially, the panels would have sat on a widened ledge around the perimeter of the roof.
In the hearing, however, a nuance to the setback requirement was introduced (a setback is the required minimum distance between the building and the property boundary. Which, in the Village Center, is 15’). Long story short, our proposed 18-inch drip edge (the distance between the exterior wall and the edge of the overhang) is factored into the setback calculation. And, because the building already violates the setback requirements (because the structure was built before the modern zoning bylaws were passed), we have to do everything within our power to prevent an increase of non-conformity. In other words, our parapet has to be redesigned to mirror the overhang that exists today, which is 12 inches.
#4 is actually quite amusing. Halfway through the hearing, one of the board members paused and said: “Given the size of your project, you’ll need to install five EV charging stations.” My jaw dropped. I’m all for promoting green methods of transportation. But a) EV charging infrastructure can be extremely expensive (we have pricing for a project we’re working on across the street), b) we’re already on a tight budget, and c) there are no EV charging requirements referenced anywhere in the zoning bylaws.
After some objection and clarification, the board landed on a request to investigate making the project “EV-ready,” which is a bit nebulous. Are we talking about level 1, 2, or 3 charging stations? Does the trenching need to occur now or later? What about running the cable to the new parking lot pedestal? How many stations are we preparing for? “EV-ready” can be interpreted any number of ways, all with varying degrees of cost implications.
And, lastly, #5—everyone’s favorite topic: parking minimums. I’ll take the reduction from 21 to 16 spaces any day. But where will all of the residents’ extended families park when they come to visit for Thanksgiving? Better start carpooling, folks.
Luckily, however, the DRB’s requests didn’t raise any major alarm bells. There wasn’t any pushback on the requested building height or squaring off of the structure—the two most pressing topics for us.
But perhaps a bit discouraging is that we now need to wait another two weeks for (hopefully) final approval. Which means two more weeks delay on pushing forward with construction documents. I had the requested information ready for submission a few days after the hearing so why not just issue a conditional approval that the zoning administrator could then sign off on later that week?
Regardless, this is exactly the kind of red tape that can preclude successful small-scale real estate development and make it more expensive for end users. Every little delay and additional request adds up—structural engineers charge $150/hr, architects are $100/hr. And we haven’t even gotten to state permitting yet.
Anyone that says yea, but that’s just the cost of doing business might be missing the point. Sure, that’s true. But, then again, any costs that developers incur are ultimately passed off to residents as higher rents. If we want more (unsubsidized) affordable housing, we need to be rethinking all the hoops and hurdles we’re putting our smaller developers through. Full circle back to the Strong Towns article referenced above.
-------------------
Since Day 1, one of the main goals of 501 Main has been to develop a high performance building.
For the most part, this meant focusing on the building envelop—insulation, air sealing, and windows. And after our shed roof concept was shot down during zoning review (see update from October 1st), we took the opportunity to integrate solar panels into a new roof line design.
However, based on the direction the DRB hearing took this past week regarding the drip edge requirements (see above), we’ve had to remove the panels entirely from the design. The reduction in allowable drip line depth just doesn’t provide enough space to accommodate solar arrays. And, furthermore, the area within the parapet perimeter will need to house mechanical equipment and isn’t large enough to install solar panels as well.
The trend to add rooftop solar to homes and new construction projects is continuing to grow, seemingly driven in part by social and community pressures. It’s just seen as the right thing to do—playing your part to protect the environment; reducing dependence on the evil utility companies that are spraying greenhouse gases into our precious atmosphere.
Being a Vermonter, I suppose I just took that as gospel without actually understanding where our utilities actually source their power. And that adding rooftop solar to 501 Main would be a beacon of inspiration for others in town to do the same.
So no longer having the option to produce solar on site got me wondering. Here we are expending this extra effort and money designing the whole building to be all electric. What are the environmental ramifications if we’re just going to tie back to the grid?
Well, turns out—not much. Vermont recently achieved 66% of its electricity production through renewable energy.
Furthermore, the utility that covers our region—fittingly named Green Mountain Power—actually operates using 100% carbon-free sources. Granted, they purchase RECs to offset some of their carbon consumption (I won’t get into RECs and how they work but here’s a good primer if you’re interested). That said, take a look at their energy production pre-REC purchases:
That’s pretty damn good—5.1% wood, 2.5% market purchases (mainly natural gas), 0.6% methane, and 0.3% oil and natural gas. The remaining 90+% is carbon-free without RECs.
Where I’m going with all this is that the grid is already fairly green. Yet we continue to encourage the installation of scattered site solar when we can much more efficiently hook up to the grid. The utility companies can achieve economies of scale well beyond the individual and their cost per kW developed is orders of magnitude less.
Sure, you’ll always have some niche counter arguments related to reliability and dependency. But—at least to me—the benefits of connecting to the grid vastly outweigh those tradeoffs. (Quick caveat that each utility and state will be different so this is very much dependent on your location).
In fact, I actually see this discovery as a bit of a silver lining. In forcing our hand to redesign the drip edge, we’ve been able to reduce a bit of complexity on an already complex project without sacrificing anything from an environmental standpoint. Perhaps I should be thanking the DRB for leading me down this road.
October 24th, 2021
This past week, my neighbors and I hired a logging crew to clear the two acres of wooded area behind 501 Main.
Although our motives are different, we realized that we were all looking to log at the same time. For 501 Main, I need to make way for the 21 required parking spaces mandated by town zoning bylaws for my project. Whereas my neighbors are exploring long-term development options on their side. It was an easy decision to combine efforts and share costs.
As of writing this, the loggers are about halfway through the project. But, it didn’t take long to recognize how tight of an operation they run.
They’ve got four guys working four pieces of heavy machinery, all operating at an efficiency that would send any Six Sigma Blackbelt directly to nirvana.
Briefly, their process goes something like this.
The monstrosity above cruises around, bear hugging trees and chopping them clean at the base. It then lowers them safely to the ground. A second “runner” (below) collects and transports the felled trees from where they were first cut over to the crane and chipper.
The crane then picks up the trees and directs them into the chipper. The wood chips are expelled out into a big box truck to then be transported off site.
But the best part? Next to the crane, there’s a 4-foot-wide saw blade that cuts the big boys in half before being sent into the wood chipper.
Seems like the kind of place Tony Soprano would’ve had a field day at. Although I, too, had a bit of a field day—ogling all the equipment that, as a kid, used to just be the stuff of Tonka Trucks and dreams.
Here are some pictures taken halfway through the process. We had gone through in advance and marked several trees to save. More to come next week.
October 14th, 2021
In my last update, I talked about my preliminary review with the town’s Development Review Board (DRB). It was an informal conversation to present and discuss the project’s proposed roof line given the town has fairly restrictive bylaws pertaining to new construction. That meeting went well and I got the DRB’s non-binding blessing on our design.
And so, with that little boost in confidence, we pivoted to preparing the formal site plan application. This includes a cover letter, site plan, elevations, and any supporting documentation.
For some background, the DRB (like any municipal planning board) has the authority to approve or deny requests for new development based on the town’s zoning codes. Everything from number of parking spaces and amount of outdoor common area, to setbacks and building height is regulated. In effect, the DRB is the gatekeeper to getting a project entitled and shovel-ready. Without their approval, you’re just a sitting duck with a loss-producing asset.
This week, we submitted our formal site plan application with a check for $115. Feel free to take a look:
Site plan (same as above)
With everything submitted, we got our warned hearing for October 26th!
For the most part, we were able to meet the requirements outlined in the zoning bylaws: we’re maintaining the original building footprint (no setback issues); and we’re able to meet the update parking requirements that were increased several weeks ago (yes, increased! 🤦). Our 450 square foot studios must now have two parking spots apiece.
But, no matter how we cut it, we have difficulty staying within the maximum building height of 35’. Which, honestly, seems somewhat arbitrary given the several other buildings within the village center that exceed 35’ (including the building right next door to 501 Main).
So, after being warned that we must stay within 35’ to satisfy the zoning gods, we are going ahead and asking for a 2’ allowance on top of that. If you’re thinking, well, why don’t you just cut the building down 2’ and skip the whole variance runaround?, then I’d encourage you to take a look at the cover letter I shared with the DRB for an explanation. Long story short, it comes down to simple economics—reducing the building by 2’ kicks off a spider web of downstream construction impacts that ultimately kill the financials of the project.
My hope is that, by laying out the above explanation, the board will come to understand the rationale for how we arrived at our request for a 37’ building height. It is not out of architectural showmanship or desire to be the tallest building on the block. Rather, it is the result of solving for function alongside the fundamental desire to develop the best possible product within the financial constraints that we are bound to.
I’ll part with the following. Knowing 501 Main’s location, it is almost certain that the building will become a focal point at the northern end of town, capturing attention and (hopefully) retail traffic along US-5. I’d encourage the board to keep this in mind as they conduct their site plan review. 501 Main will be a big part of the northern Village Center for decades to come and we, collectively, have one shot at getting it right.
Here’s to getting it right 🍻.
October 1st, 2021
On Tuesday, I presented a preliminary sketch plan to Fairlee’s Development Review Board (DRB) for 501 Main.
For some background, we’re currently at an important juncture having invested $10,000 so far in preliminary architectural and engineering drawings. Up until now, there’s been a fair amount of design iteration and changes in construction methods. This is natural at the beginning stages of development.
But, now, we need move into the last phase of design where we create the final construction documents and engineering plans. It’s also the phase where serious capital to pay for those plans needs to be allocated—$50,000 to be exact. And, to put it mildly, you want to be pretty damn sure that the building you’re designing is actually going to get built after investing $60,000 in plans.
We already have the equity and debt commitments, so the remaining piece of the puzzle was to bring our initial plans to the town DRB and get their perspective on the project’s alignment with zoning.
I won’t get into the technicalities of Fairlee’s zoning bylaws but I will say that we were anticipating some difficulties in getting our roof line—a shed roof—approved by the DRB. Well, more of an impossibility than difficulty. As it turns out, shed roofs are not permitted in the Village Center and we were informed that we’d have less of a chance at obtaining a variance than petitioning the town to change the bylaws.
Yes, petitioning a bylaw change was actually suggested to me. And yes, I futility (and perhaps naively) attempted it.
So, on the back of that failure, we pivoted. A few weeks before the hearing, the architects redesigned the roof line to incorporate a parapet and a flat roof. And, while this style is more traditional and widely accepted as a village center roof line, we still had our doubts at getting this past the DRB.
For whatever reason, the bylaw section pertaining to roof lines is extremely vague (in the meeting, even some folks on the DRB were unsure how to interpret it). But that’s a topic for another day.
The meeting actually proved to be a success. I came armed with a few examples of similar roof styles in the area done extremely tastefully that set a good precedent for my project. My goal was to share my plans and hope to convince the DRB on the merits of allowing such a development on Main Street.
And the best part? In a surprising and heartwarming moment, several members of the community stood up and spoke in support of the project. I guess I’ve become so jaded hearing developers’ stories in other cities and towns that, frankly, I expected the opposite. I know a few of you read this, so THANK YOU.
In the end, I walked away with the DRB’s (non-binding) blessing. I’ll still need to do a formal review once construction documents and engineering plans are finalized. But at least we can now move forward with the confidence that we have the town’s support before dropping the next $50,000.
-----
Then, on Thursday, we got to play in the dirt.
Because the scope of 501 Main includes building two stories on top of the existing foundation, we need to check that it is actually safe to build on. Or, if it we find it isn’t, we’ll have to come up with a plan to make it safe by adding reinforcement.
The first step in verifying this is by 1) testing soil bearing capacities and 2) checking for foundation footings. Both of which require digging some pretty deep holes.
#1 involved digging a 12-foot pit (bottom right image above) behind the building to check soil bearing capacity. This was to make sure the soil that the building is sitting on is strong enough (i.e. has sufficient bearing capacity) to withstand the additional building weight without sinking or compressing over time.
The geotechnical engineer* then took various soil samples at different depths to check for compaction (the more compacted, the better the bearing capacity) and composition (the rockier the sand, the better the bearing capacity).
*As a side note, there are more engineers than you might think involved in 501 Main. Despite the project’s relatively small size, we have FIVE separate engineers engaged at the moment: geotechnical, structural, mechanical, fire suppression, and septic. And each one charges for providing their design and/or stamp of approval.
For #2, we had to excavate down along the foundation walls to check for concrete footings (see below right image for what a footing looks like). Footings are what help distribute the weight of the building across the soil below to minimize settling or sinking of the foundation.
September 15th, 2021
A few weeks ago, I wrote about building trust and working with smaller portfolio lenders. This has been particularly relevant for me given that I am trying to finance my first construction project.
Well, we hit another milestone last week on the debt financing front. After a lengthy qualification process across several lenders, we received a conditional loan commitment for both construction and permanent financing.
This may seem like a run-of-the-mill task checked off the list but it’s not every day you get an institution to buy into your vision for $700k. I’m feeling particularly grateful to have found a lender that shares a similar desire for community development. Not to mention excitement that we’ve moved one more rung up the ladder towards actually breaking ground.
Of course, this is all pending an appraisal. And we’ll need a $950k valuation (post-completion) to make it work. So 12 more weeks of holding my breath.
Yes, you read that right. TWELVE freakin’ weeks for an appraisal right now.
But—at the very least—I was able to squeeze a small sigh of relief in with this minor win.


